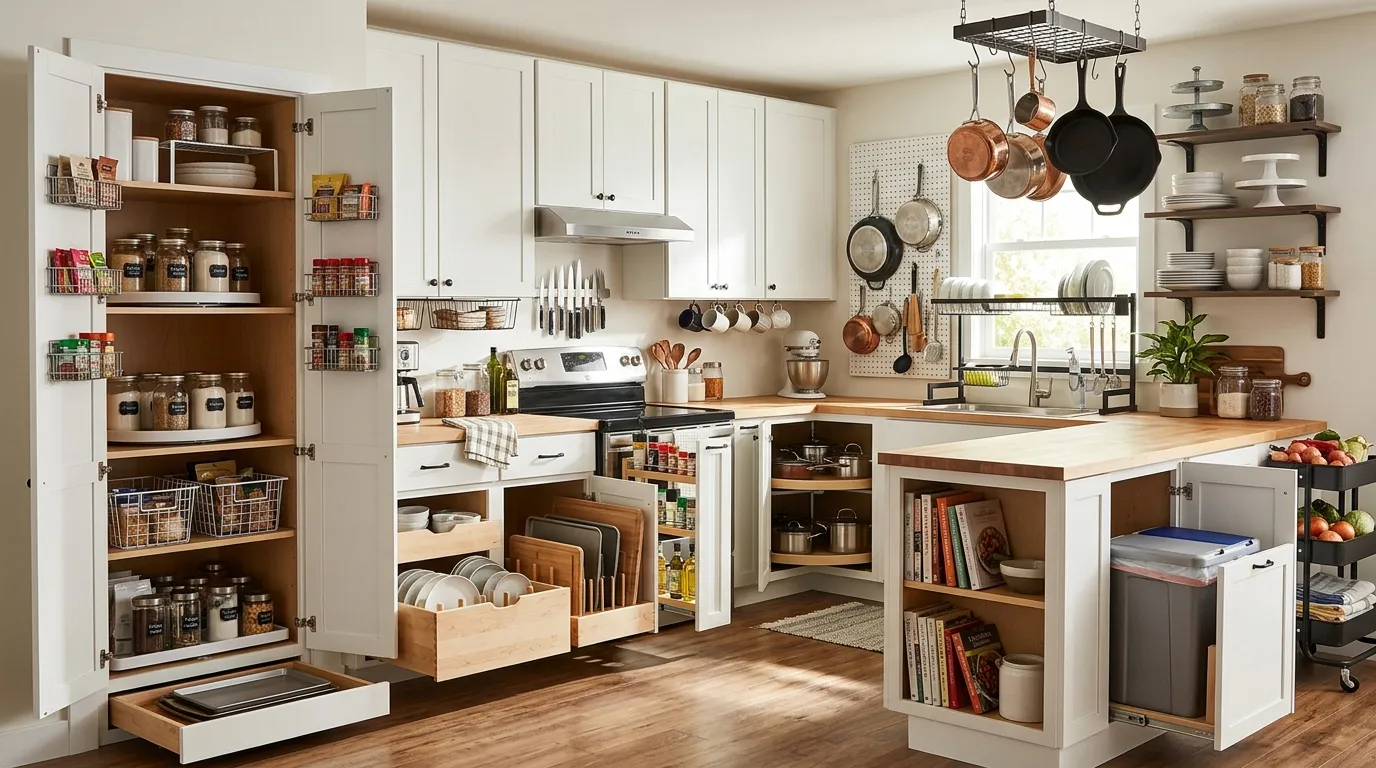
Kitchen Storage Ideas: 30 Clever Ways to Maximize Every Inch of Space
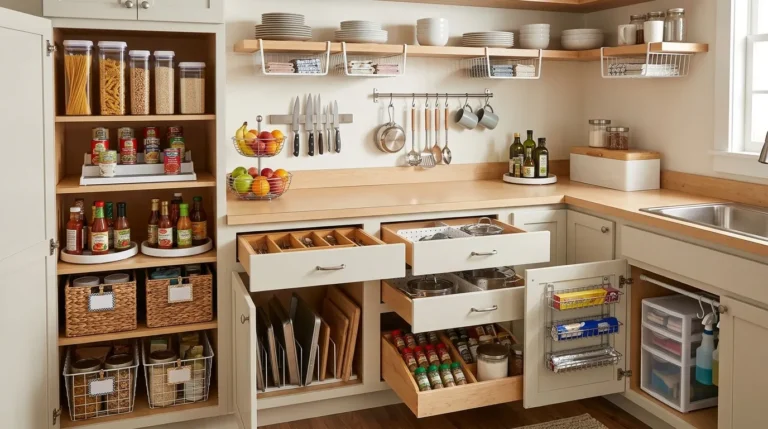
The good news is that the right Kitchen Storage Ideas can help you make the most of every inch without needing a bigger kitchen or an expensive renovation.
Whether you live in a small apartment, rent your home or simply want a more organized cooking space, these 30 practical ideas will help you find room where you least expect it. From vertical wall shelves and magnetic spice storage to clever cabinet organizers and rolling carts, there are options for different budgets, layouts and skill levels.
Vertical Wall Shelves
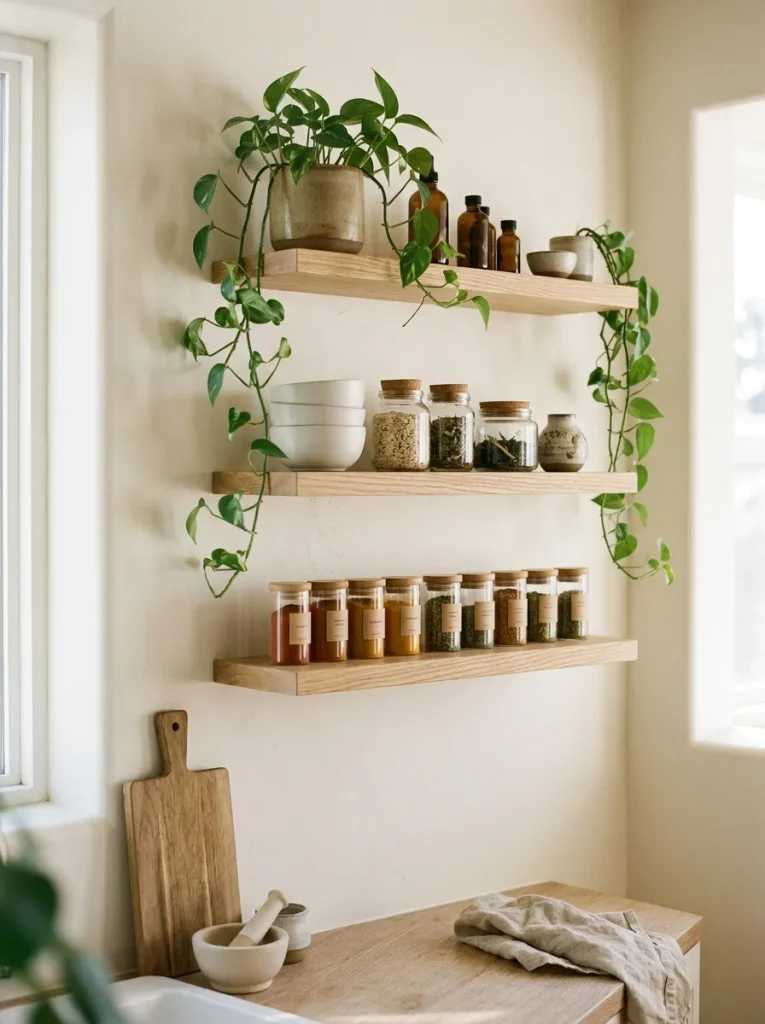
A cluttered countertop can make even a functional kitchen feel frustrating, but empty wall space offers a simple solution. Vertical shelves give everyday essentials a dedicated home without taking up valuable cabinet or counter space.
Install two or three shelves above your countertop, near the cooking area or beside the refrigerator. Use the lower shelf for frequently used spices and cooking oils, then reserve the upper shelves for mugs, small bowls or decorative storage jars. Keep heavier items on securely mounted shelves and avoid placing them directly above areas where falling objects could cause injuries.
Magnetic Spice Storage
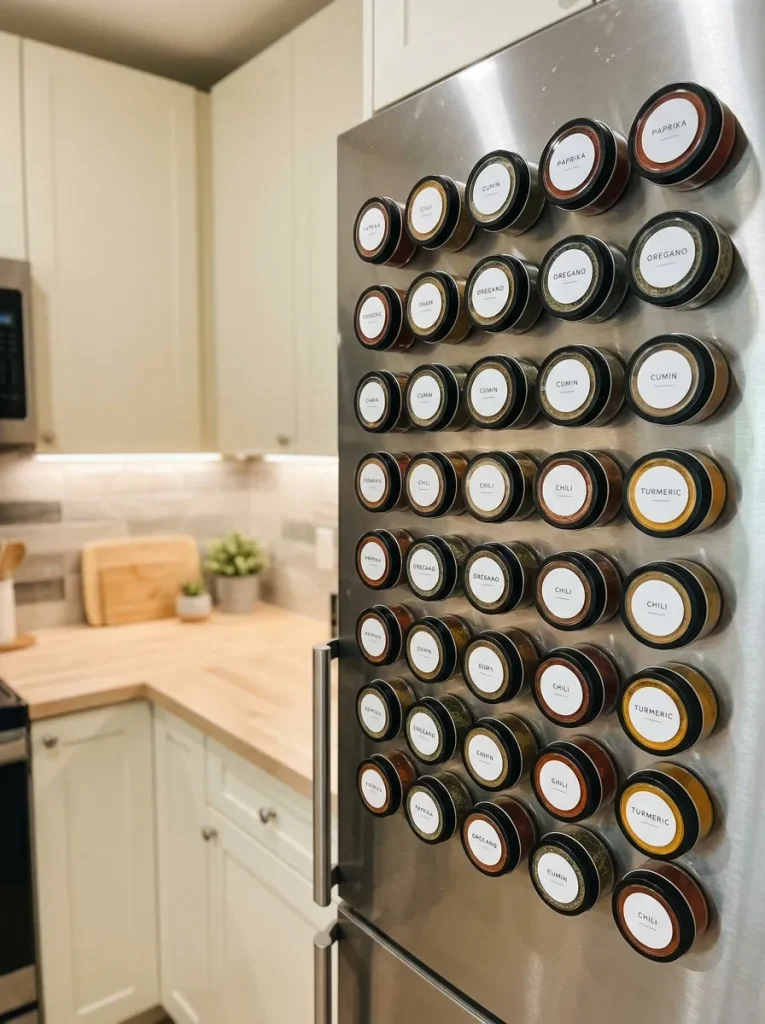
- Choose magnetic containers: Select spice tins or jars with secure magnetic bases that hold firmly against a suitable metal surface.
- Label every container: Write the spice name clearly on the front or lid so you can identify ingredients quickly.
- Arrange by frequency: Keep everyday seasonings near your cooking area and less frequently used spices toward the edges.
- Check container capacity: Choose sizes that suit your cooking habits without making the arrangement bulky.
- Protect spices from heat: Avoid storing them directly beside ovens or stovetops, where heat can reduce their quality.
Magnetic spice storage frees up cabinet space while keeping seasonings visible and accessible. A refrigerator side panel or magnetic board can work well, provided the surface supports the containers securely. For a polished look, use matching jars and consistent labels. Always check that lids close tightly to protect spices from moisture.
Under-Sink Pull-Out Bins

Quick Tip:
Measure the cabinet’s width, depth and height before buying pull out bins. Leave room for plumbing pipes and the garbage disposal, if present. Choose water resistant organizers and keep cleaning products in secure, clearly labeled containers.
That awkward cabinet beneath the sink can become one of the most useful storage areas in your kitchen. Pull-out bins bring supplies forward instead of forcing you to reach behind crowded bottles. I’ve found that grouping similar products together also makes it easier to notice what needs replacing. Keep frequently used dishwashing supplies in the most accessible bin, and check occasionally for leaks or moisture that could damage stored items.
Read More: 29 Radiant Kitchen Lighting Ideas to Create a Warm Glow
Drawer Dividers

BEFORE
Kitchen drawers often become messy when utensils, measuring spoons and cooking gadgets share one open compartment. Finding a simple item can turn into a frustrating search.
AFTER
Adjustable drawer dividers create separate spaces for each category. Every utensil has a designated place, making the drawer easier to navigate and maintain.
Start by emptying the drawer and grouping similar items together. Measure the interior before purchasing adjustable organizers, especially if the drawer has unusual dimensions. Keep frequently used utensils near the front and reserve deeper sections for larger tools. Avoid overcrowding each compartment, as dividers work best when items remain easy to remove and return.
Cabinet Door Organizers

- Measure the door: Check its width, height and clearance before selecting an organizer.
- Choose the right rack: Use shallow baskets for packets and small containers that fit securely.
- Group similar items: Keep baking supplies together and reserve another rack for everyday cooking essentials.
- Check shelf clearance: Make sure stored items will not collide with interior shelves when the door closes.
- Secure the organizer: Follow the manufacturer’s installation instructions and weight limits.
Cabinet doors provide useful storage space that often goes unnoticed. A well fitted rack can free up room on interior shelves while keeping smaller items visible. In rental kitchens, removable organizers may be helpful if the door design supports them. Avoid storing heavy glass bottles in lightweight racks and keep the door balanced so its hinges are not strained.
Stackable Storage Containers

| Storage Choice | Best Use |
|---|---|
| Option A: Original packaging | Unopened products and items used occasionally |
| Option B: Stackable containers | Frequently used dry ingredients and opened packages |
| Space efficiency | Original packaging varies in shape; uniform containers create consistent rows |
| Visibility | Bags may hide contents; clear containers make ingredients easier to identify |
| Maintenance | Loose packages can spill; sealed containers help contain messes |
Stackable containers make pantry shelves easier to organize because they use vertical space without leaving awkward gaps. Choose sizes based on the quantities you regularly buy, rather than purchasing a large matching set immediately. Label containers with ingredient names and expiration details when useful. Always transfer dry goods into clean, completely dry containers and follow appropriate food storage guidance.
Hanging Mug Hooks
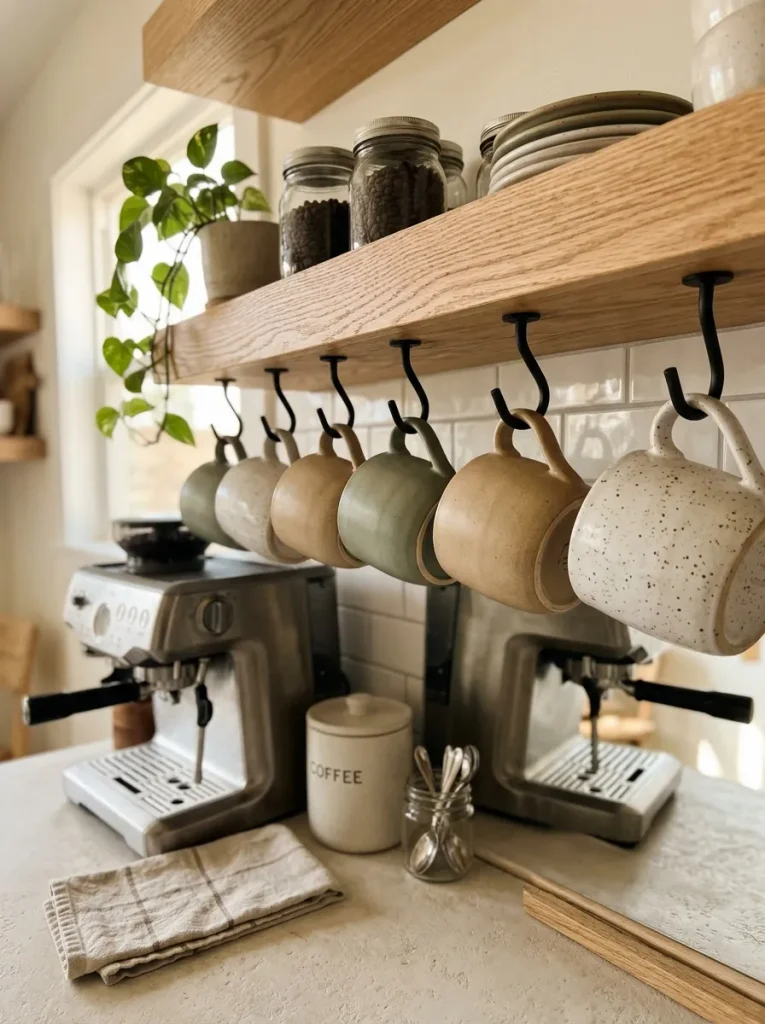
DO
- Install sturdy hooks beneath a securely mounted shelf.
- Leave enough space between mugs so handles do not overlap.
- Hang lightweight mugs that fit comfortably on each hook.
- Keep the arrangement near your coffee or tea station.
DON’T
- Overload a shelf that is not designed to support the extra weight.
- Place mugs where they could hit a person’s head.
- Hang chipped mugs that may break during handling.
- Position hooks where swinging mugs could knock into appliances.
Hanging mugs frees up cabinet shelves for plates, bowls, and food containers. It also creates a convenient coffee station without requiring additional furniture. Choose hooks that match your shelf thickness and mug handles, and test the arrangement before hanging your entire collection. If counter space is limited, a small wall mounted rail can provide a similar benefit.
Rolling Kitchen Cart
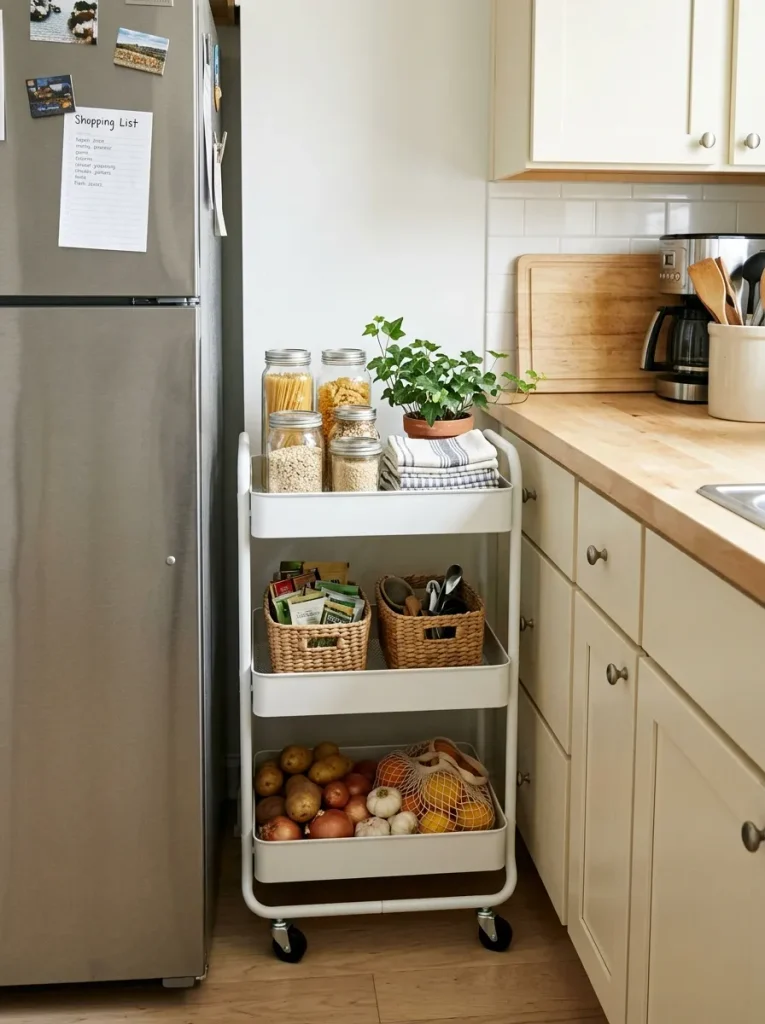
Cost: Moderate, depending on size and materials.
Time: Around 15 to 45 minutes for a ready to assemble cart.
Skill Level: Beginner.
Best For: Renters, small apartments and kitchens with unused narrow gaps.
A rolling cart adds flexible storage without requiring permanent installation. Use its upper tier for frequently needed cooking supplies, the middle tier for pantry staples and the bottom tier for heavier items such as potatoes or bottled drinks. Measure the intended parking space and check the cart’s loaded weight capacity before buying. Locking wheels help keep it steady during food preparation.
Over-the-Sink Shelf

An unused area around the sink can provide extra room for daily essentials. A properly fitted over-the-sink shelf keeps soap, sponges and small accessories organized while leaving more counter space available for washing and food preparation.
Measure the sink and faucet carefully before selecting a shelf. Choose water-resistant materials and make sure the design allows the faucet to operate freely. Keep the shelf clear of items that could fall into the sink, and avoid placing electrical appliances near splashing water. A simple, open design is usually easier to clean than one with many narrow compartments.
Tiered Cabinet Risers

- Select a suitable riser: Measure cabinet width, depth and available height before buying.
- Place large dishes below: Keep heavier plates on the lower level for stability.
- Use the upper tier: Store lightweight bowls, saucers or small cups where they remain easy to reach.
- Leave room to move: Avoid packing dishes so tightly that removing one disturbs the others.
- Keep stacks stable: Choose a sturdy riser with a level base and appropriate weight capacity.
Tiered risers help make better use of the vertical space between cabinet shelves. Instead of stacking every plate in one tall pile, you can separate dishes into smaller groups that are easier to reach. They are particularly useful for cabinets with generous height but limited shelf area. For safety, place the riser on a stable surface and avoid overloading its upper tier.
Pegboard Wall Storage
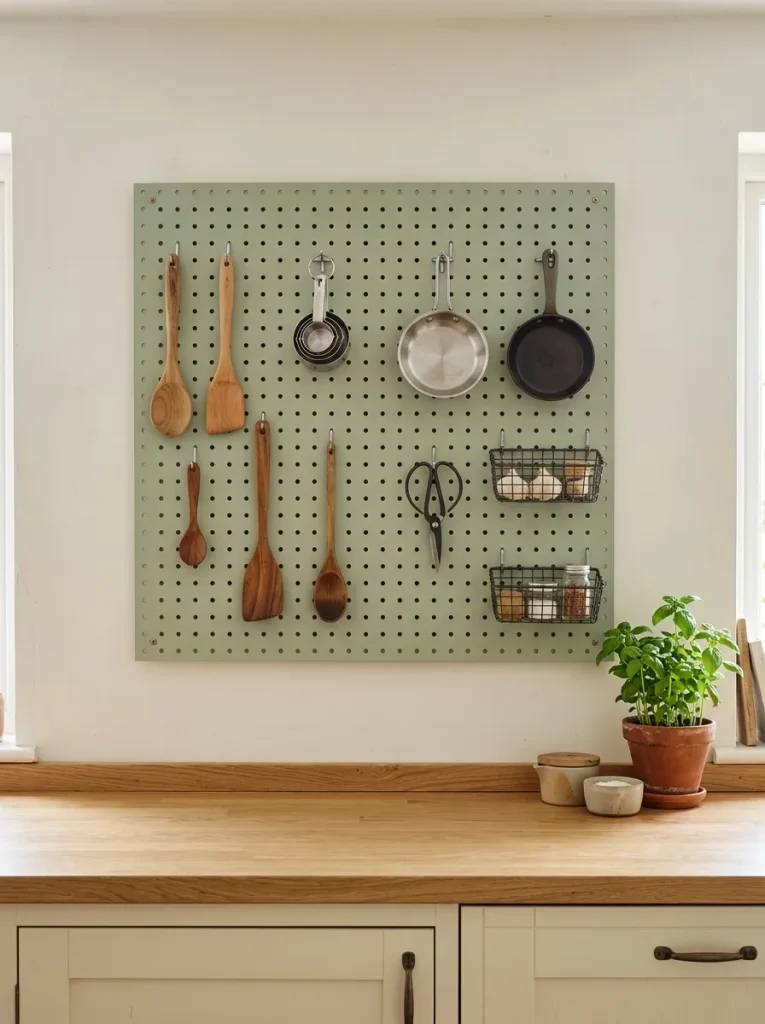
Quick Tip:
Map out where your largest tools will hang before installing the pegboard. Choose hooks and baskets designed for its specific hole pattern, and secure the board to suitable wall supports.
Pegboards turn a blank wall into adaptable storage for frequently used cooking tools. You can rearrange hooks as your needs change, keeping spatulas, measuring cups and lightweight accessories within reach. For a neat appearance, group similar tools together and leave small gaps between them. Check the board’s mounting system and weight limits before hanging heavy pans or sharp equipment.
Pull-Out Pantry Shelves
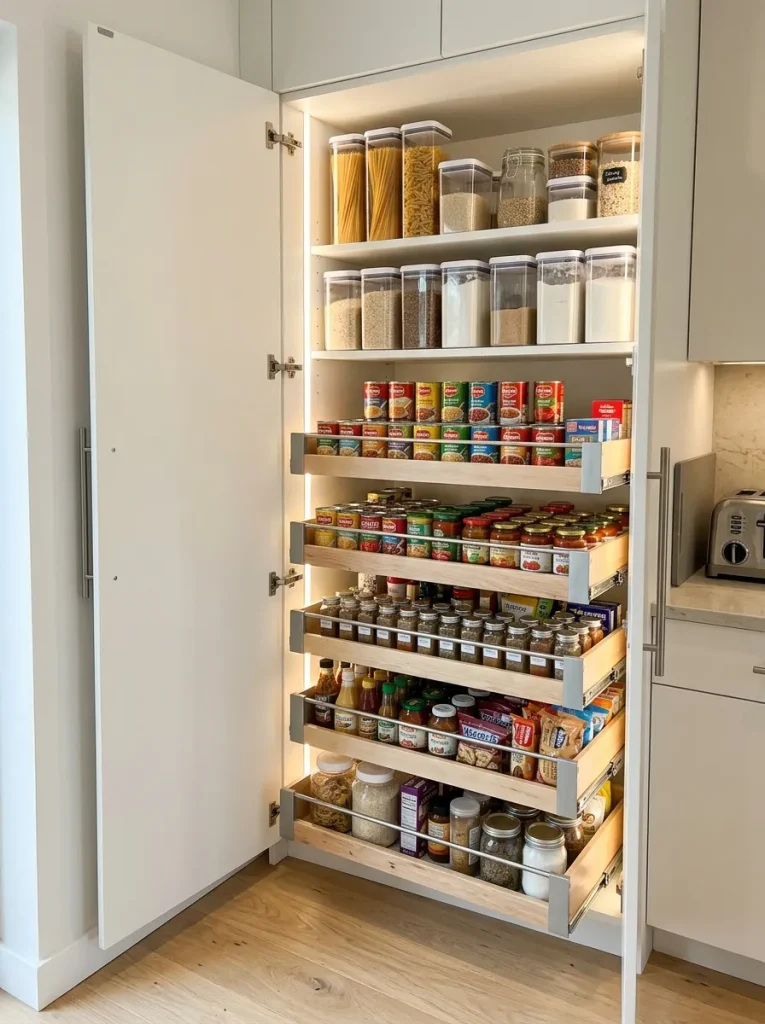
BEFORE
Deep pantry cabinets often hide smaller packages behind larger containers. Items get forgotten, duplicate purchases accumulate and reaching the back becomes inconvenient.
AFTER
Pull-out shelves bring stored products forward, making contents easier to see and reach. Each shelf can hold a different food category for simpler organization.
Measure the cabinet carefully, including its opening width and any hinges or plumbing that might interfere. Choose a slide system rated for the expected load, especially if storing canned goods or jars. Keep heavier products on lower shelves and reserve upper levels for lighter items. If installation requires cabinet modifications, check whether the existing structure can support the hardware securely.
Under-Shelf Baskets

- Measure the thickness and depth of the existing shelf.
- Choose an under-shelf basket with a secure, compatible mounting design.
- Store lightweight items such as napkins, wraps or tea towels.
- Leave enough clearance for objects stored on the shelf above.
- Check the basket regularly for loose fittings or excess weight.
Under-shelf baskets create an additional storage level without requiring another cabinet shelf. They work particularly well in cupboards with unused vertical clearance. Before buying one, confirm that its frame will fit the shelf and allow the cabinet door to close. Keep heavier objects elsewhere, as many hanging baskets are designed for lightweight household items rather than dense kitchen supplies.
Magnetic Knife Strip

| Storage Method | Advantages | Considerations |
|---|---|---|
| Option A: Knife drawer | Keeps blades concealed | Requires a suitable knife insert |
| Option B: Magnetic strip | Makes selected knives visible and accessible | Requires secure mounting and careful handling |
| Cleaning | Drawer inserts need regular cleaning | Strip and wall need wiping |
| Space use | Occupies drawer space | Uses a section of wall |
| Safety | Blades are protected when stored correctly | Knives must be mounted securely and kept out of children’s reach |
A magnetic knife strip can free up drawer space while keeping suitable knives accessible to the person preparing meals. Install it according to the manufacturer’s instructions on a wall surface that can support the mounting hardware. Position the strip away from children’s reach and busy walkways. Always handle blades carefully, and make sure each knife is firmly secured before releasing it.
Corner Cabinet Lazy Susan

DO
- Measure the cabinet’s usable width and height.
- Select a rotating organizer suited to the cabinet’s shape.
- Group sauces, spices, and small jars by category.
- Place heavier containers toward the center for stability.
DON’T
- Force an organizer into a cabinet with insufficient clearance.
- Store containers so close together that they tip while rotating.
- Exceed the organizer’s recommended weight limit.
- Ignore hinges or pipes that may obstruct movement.
Corner cabinets can be difficult to use because items at the back are easy to overlook. A rotating tray brings those products forward with a simple turn. Choose a model that fits the cabinet and allows its door to close completely. Wipe spills promptly and avoid filling the tray beyond its capacity, especially with tall glass bottles.
Slim Gap Storage Rack

Cost: Low to moderate.
Time: Around 15 to 30 minutes for assembly.
Skill Level: Beginner.
Best For: Narrow gaps beside refrigerators, cabinets, or appliances.
A slim rack can turn a neglected gap into useful storage for products you reach for regularly. Measure the full space, including the clearance needed to pull the rack out, before choosing a model. Check that nearby appliances have adequate ventilation and that the rack does not block access to outlets or controls. Store stable, lightweight products on upper shelves and heavier items lower down.
Hanging Fruit Baskets

Fruit bowls can occupy a surprising amount of valuable counter space. Hanging baskets move suitable produce into vertical storage, leaving the worktop clearer for chopping, mixing and meal preparation.
Choose a sturdy ceiling hook, wall rail or freestanding hanging system designed for the combined weight of the baskets and fruit. Keep produce that needs airflow in open baskets and avoid mixing fruits that require different storage conditions. Bananas, for example, may be better stored separately from delicate produce. Place the baskets where they will not interfere with cooking or everyday movement.
Vertical Baking Sheet Rack

- Measure the cabinet: Confirm the rack’s height, depth and width before purchase.
- Sort the trays: Group baking sheets, cutting boards and cooling racks by size.
- Choose sturdy dividers: Use a rack that supports the items without allowing them to slide.
- Keep access simple: Place frequently used baking sheets in the easiest slots to reach.
Vertical dividers prevent baking sheets from forming a heavy, awkward pile. Instead of lifting several trays to reach the bottom one, you can remove the item you need individually. This setup works well in a lower cabinet or a wide drawer. Keep sharp edged trays stable and avoid overfilling the rack, which can make removal difficult.
Drawer Peg System
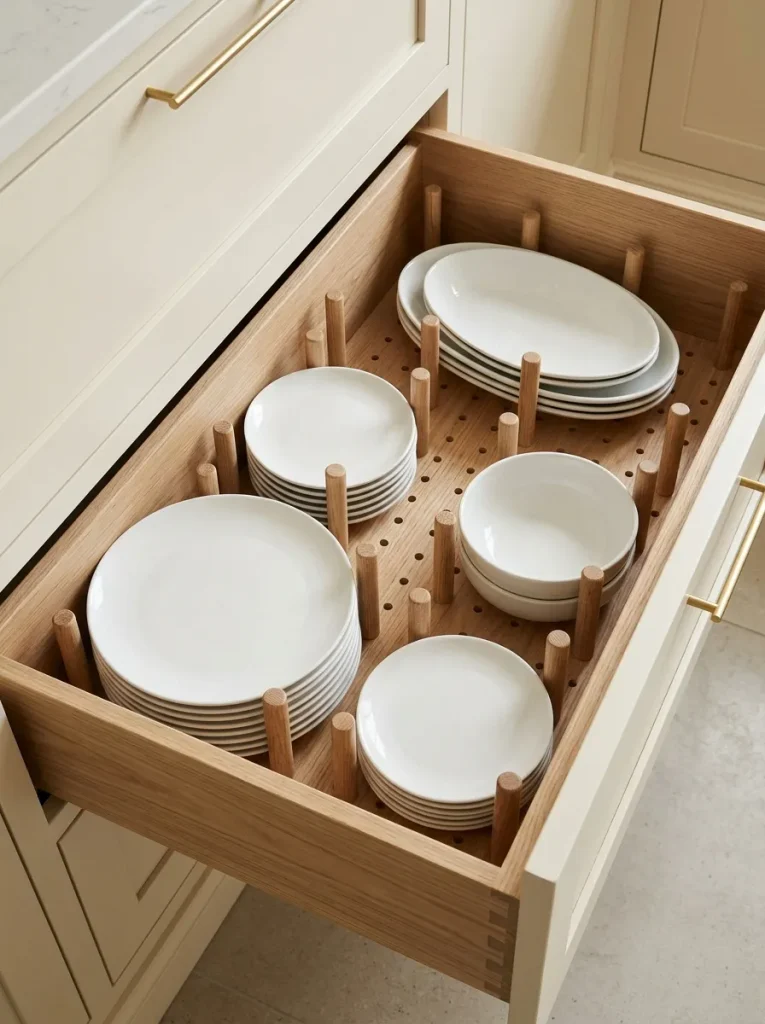
Quick Tip:
Arrange the pegs around your largest plates first, then position smaller dishes within the remaining space. Test the drawer by opening and closing it gently before loading all your dishes.
A peg system lets you customize a drawer for plates, bowls, and serving pieces without building fixed compartments. The adjustable pegs help prevent dishes from sliding when the drawer moves. Choose a system compatible with your drawer dimensions and the weight of your dishes. Leave enough room to lift each item out comfortably and inspect the pegs periodically to ensure they remain secure.
Wall-Mounted Pot Rail

BEFORE
Large pots and pans often crowd kitchen cabinets, forcing you to move several pieces just to reach the one underneath.
AFTER
A properly installed pot rail keeps selected cookware visible and easy to access. Lower cabinets become available for lids, food containers or appliances.
Choose a wall that can safely support the combined weight of the rail and cookware. Follow the mounting instructions and use hardware appropriate for the wall material. Hang pans with secure handles, space them to prevent collisions and keep them away from busy walkways. If the wall cannot support the load, a sturdy freestanding rack may be a safer alternative.
Refrigerator Side Shelves

- Check the refrigerator design: Confirm whether the side panel can safely support an attached organizer.
- Measure the available area: Account for the door swing, ventilation requirements, and nearby cabinets.
- Choose lightweight supplies: Store tea packets, napkins and small containers rather than heavy glass bottles.
- Secure the unit: Follow the product’s mounting instructions and stated weight limits.
- Keep everything accessible: Arrange frequently used items at a comfortable height.
The side of a refrigerator can offer storage that would otherwise go unused. A suitable shelf or organizer can keep small essentials off the counter and close to where they are needed. Not every refrigerator is designed to support attached racks, so check the manufacturer’s guidance before installation. Keep heat sensitive foods away from warm appliance surfaces and avoid blocking ventilation.
Nested Mixing Bowls
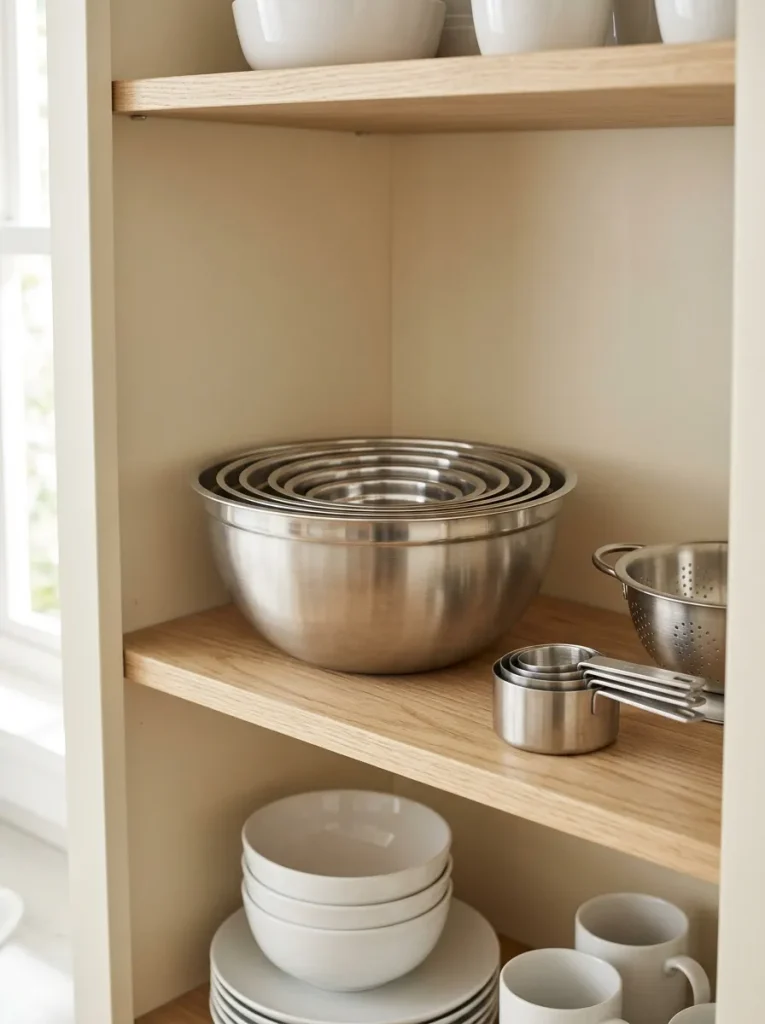
Cost: Low if using existing bowls.
Time: About 5 to 10 minutes.
Skill Level: Beginner.
Best For: Cabinets crowded with mixing bowls, colanders and prep dishes.
Nested bowls save room by allowing smaller pieces to fit inside larger ones instead of occupying separate shelf areas. Start by arranging bowls from largest to smallest, checking that their shapes fit comfortably together. Keep lids and accessories in a separate small bin if they do not nest neatly. Dry stainless steel and other metal items before stacking them to prevent trapped moisture.
Hanging Under-Cabinet Rack
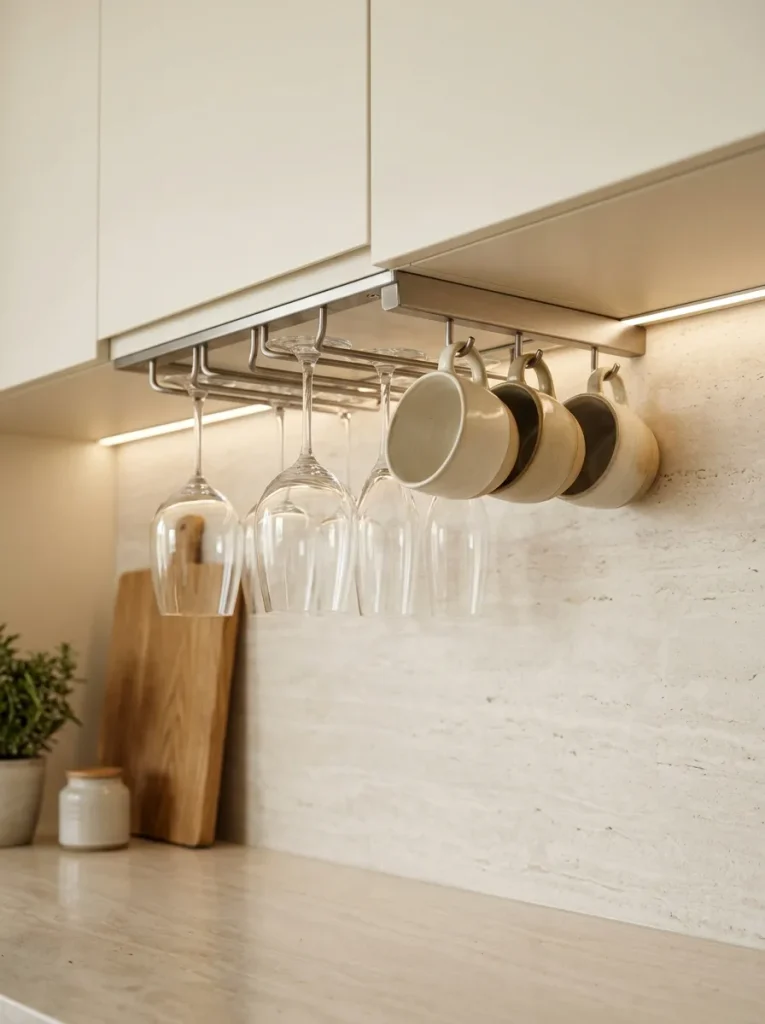
DO
- Measure the cabinet underside and available clearance.
- Choose a rack compatible with the cabinet’s construction.
- Store only items supported by the rack’s weight rating.
- Position hanging objects away from heads and active cooking zones.
DON’T
- Drill into the cabinet without checking its structure.
- Overload the rack with heavy glassware.
- Allow cups or glasses to touch one another constantly.
- Block cabinet doors or nearby appliance access.
Under-cabinet racks use space that often remains empty while keeping selected items within easy reach. Depending on the design, they can hold stemware, cups or lightweight accessories. Confirm that the cabinet can support the mounting system and that the rack does not interfere with opening doors. For fragile glassware, choose a stable rack with suitable spacing and secure supports.
Labeled Pantry Baskets

Quick Tip:
Assign each basket a clear category before filling it. Use labels that are easy to read, and place everyday items at eye level so family members can return products to the correct spot.
Pantry baskets help contain small packages that tend to slide behind larger products. They are especially useful for snack packets, baking supplies, seasoning sachets, and individually wrapped foods. Select basket sizes that fit your shelf depth and allow you to pull each one forward. Avoid packing them too tightly and check expiration dates regularly so older products do not remain forgotten at the back.
Foldable Kitchen Step Stool Storage
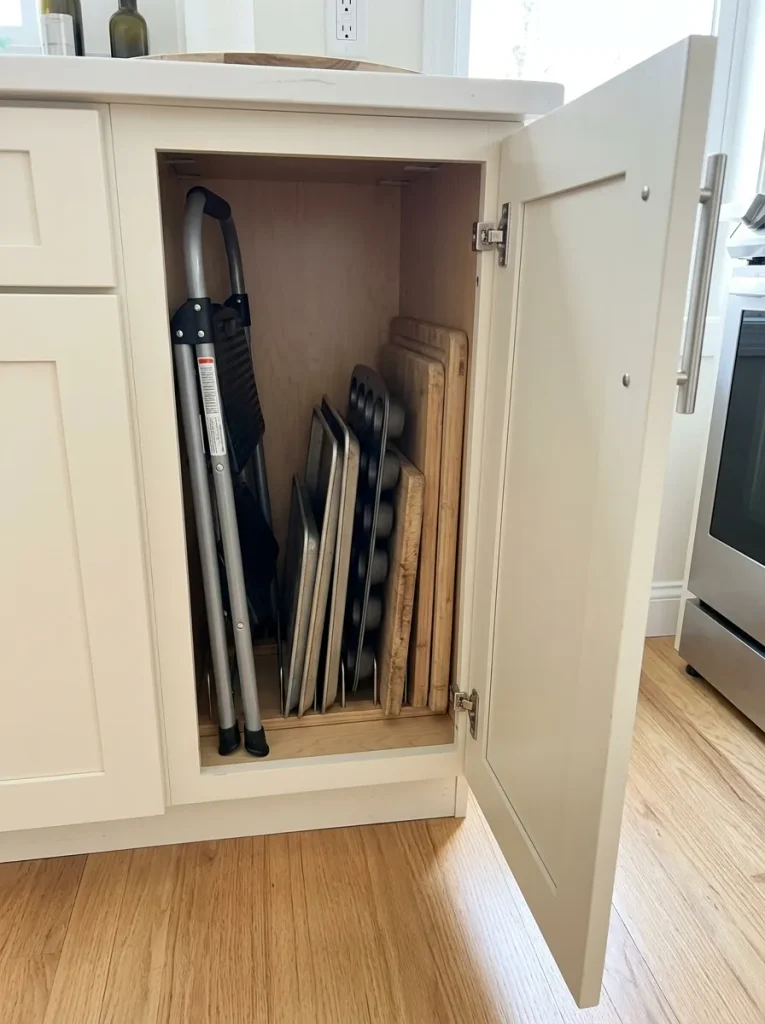
A foldable step stool can be useful in kitchens with high cabinets, but it should not become another bulky item in the way. Choose a model that folds flat and fits securely into a narrow cabinet, pantry gap or designated utility corner.
Check the stool’s weight rating, locking mechanism, and stability before use. Store it away from damp areas and ensure it cannot fall out when the cabinet opens. Never use an unstable chair or improvised stack as a substitute for a proper step stool and keep children from climbing on stored equipment.
Sink Caddy Organizer
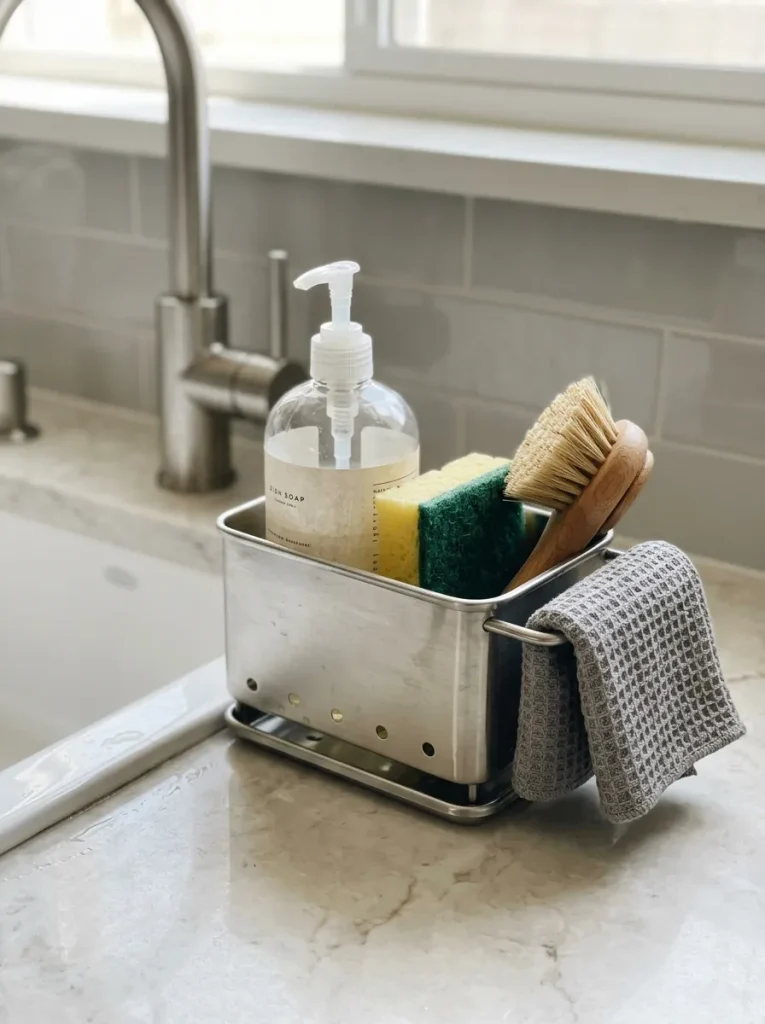
Cost: Low to moderate.
Time: Around 5 minutes to set up.
Skill Level: Beginner.
Best For: Small sinks and crowded dishwashing areas.
A sink caddy keeps frequently used cleaning tools together instead of spreading them across the counter. Choose a model with drainage openings, removable compartments, and a stable base or suitable mounting system. Empty standing water regularly and clean the caddy to prevent buildup. Keep detergent bottles upright and avoid positioning the organizer where it interferes with the faucet or food preparation.
Plate Rack Display

| Storage Approach | Advantages | Considerations |
|---|---|---|
| Option A: Stacked plates | Uses enclosed cabinet space | Lower plates can be harder to reach |
| Option B: Vertical plate rack | Keeps selected plates separated and visible | Needs secure support and suitable depth |
| Visual effect | Concealed and simple | Creates an open display |
| Cleaning | Plates stay protected behind doors | Exposed dishes collect dust more readily |
| Best location | Inside a cabinet | On a stable shelf or wall-mounted rack |
A plate rack can free up shelf space while making frequently used dishes easier to reach. Choose a design that fits your plate sizes and supports them securely. If you display dishes in an open area, wash them before use if dust accumulates. For wall mounted racks, use appropriate fixings and avoid placing heavy ceramics where they could fall onto a work surface.
Compact Appliance Garage

DO
- Measure appliances and their cords before choosing a storage compartment.
- Group small appliances that serve similar purposes.
- Keep the interior easy to access and clean.
- Follow appliance instructions for cooling and ventilation.
DON’T
- Operate heat-producing appliances inside a closed compartment.
- Trap warm appliances in an enclosed space immediately after use.
- Overload outlets or hide damaged electrical cords.
- Block ventilation openings or access to power switches.
An appliance garage can reduce countertop clutter by giving frequently used equipment a dedicated home. A cabinet with a lift-up door or a designated counter nook may work well, depending on your kitchen layout. Keep the space practical rather than overcrowded, and always use appliances according to their safety instructions. Toasters and other heat-producing equipment need adequate clearance and must not be operated inside an unsuitable enclosed cabinet.
Fold-Down Wall Table
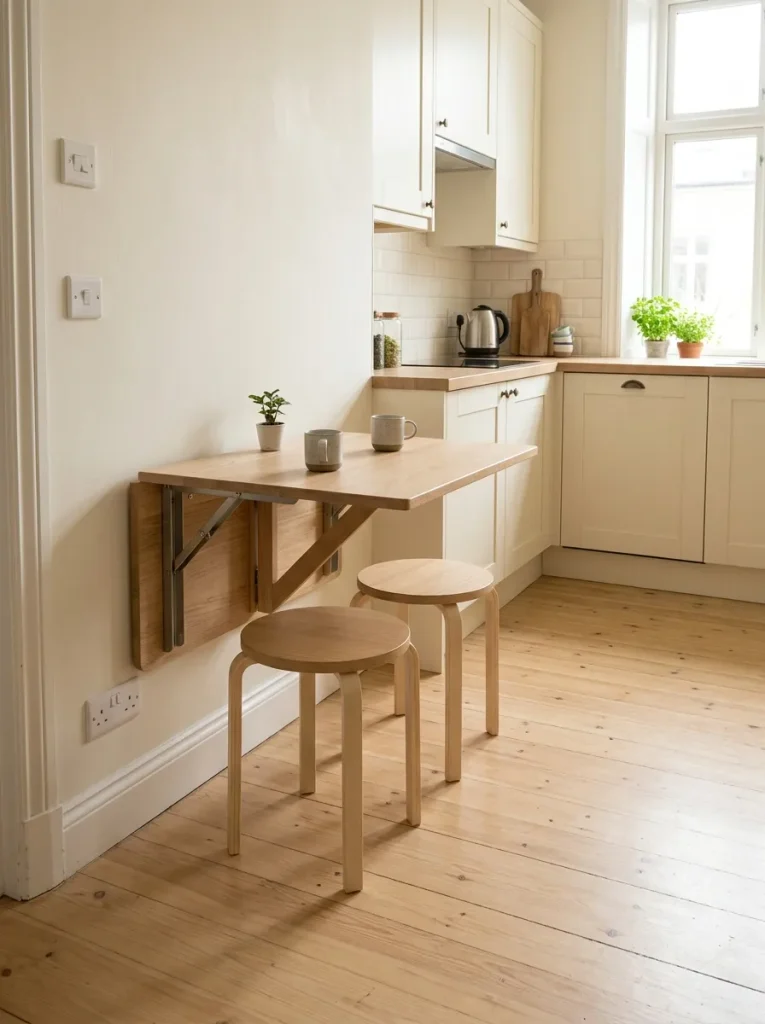
Cost: Moderate, depending on the mounting system and table size.
Time: Around one to three hours for installation, depending on the design.
Skill Level: Intermediate for secure wall mounting.
Best For: Tiny kitchens that need occasional extra work or dining space.
A fold-down table can provide a temporary surface for meal preparation, a quick breakfast, or extra workspace when needed. Fold it away when finished to reclaim floor space. Choose a model suited to the intended load and wall structure and follow the installation instructions carefully. Keep the open table clear of walkways and confirm that its support brackets lock securely before placing anything on it.
Clear Countertop Zones

Quick Tip:
Choose three simple zones: food preparation, cooking and drinks or breakfast. Keep only the tools used daily on the counter, and store occasional appliances and spare supplies in cabinets.
A clear countertop often makes a kitchen feel larger without requiring any new storage products. Give each activity a designated area, then move everything that does not belong there to a suitable drawer, cabinet, or pantry basket. Leave enough open space for chopping and serving. The goal is not to remove every useful object, but to make the items you need easy to reach.
CONCLUSION
A cramped kitchen doesn’t have to stay cluttered. With thoughtful storage choices, you can make better use of your cabinets, drawers, walls and countertops without committing to a costly renovation.
These Kitchen Storage Ideas offer practical ways to organize everyday essentials, create more workspace, and make cooking feel easier. Start with one small change, such as adding drawer dividers, installing a magnetic spice rack or organizing the space beneath your sink. Build on your progress as you discover what works best for your home.
Save this article on Pinterest for inspiration, try your favorite ideas, and share it with someone who could use a little extra kitchen space. A more organized kitchen starts with one simple step.

One Comment