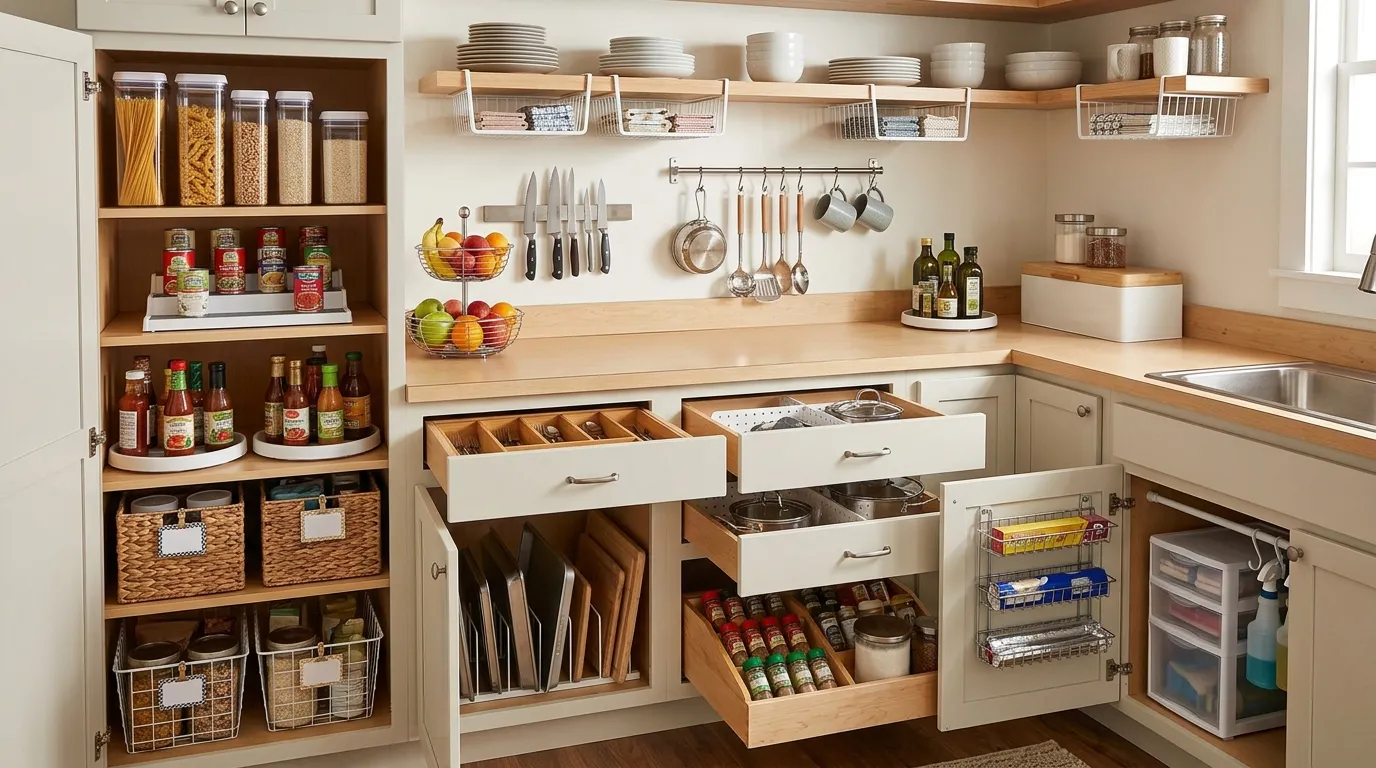
Kitchen Organization Ideas: 27 Hacks for Total Order
A cluttered kitchen can make even the simplest daily tasks feel overwhelming. The good news? A few smart changes can make your space feel cleaner, calmer and easier to use.
These Kitchen Organization Ideas will help you make the most of your cabinets, drawers, pantry shelves, and countertops without spending a fortune. Whether you have a small apartment kitchen or a spacious family kitchen, you can find practical ways to reduce clutter and create a place for everything.
From clear pantry containers and clever drawer dividers to hidden storage solutions and simple countertop arrangements, these ideas combine everyday functionality with Pinterest worthy style. You don’t need to buy expensive organizers or renovate your entire kitchen to get started. Often, the biggest improvements come from using the space you already have more wisely.
I’ve noticed that organizing one small area at a time makes the process feel much more manageable. Start with the drawer or cabinet that frustrates you most, then build on your progress. With these 27 practical hacks, you’ll have plenty of inspiration to create a kitchen that works better for your everyday routine.
Clear Countertop Zones
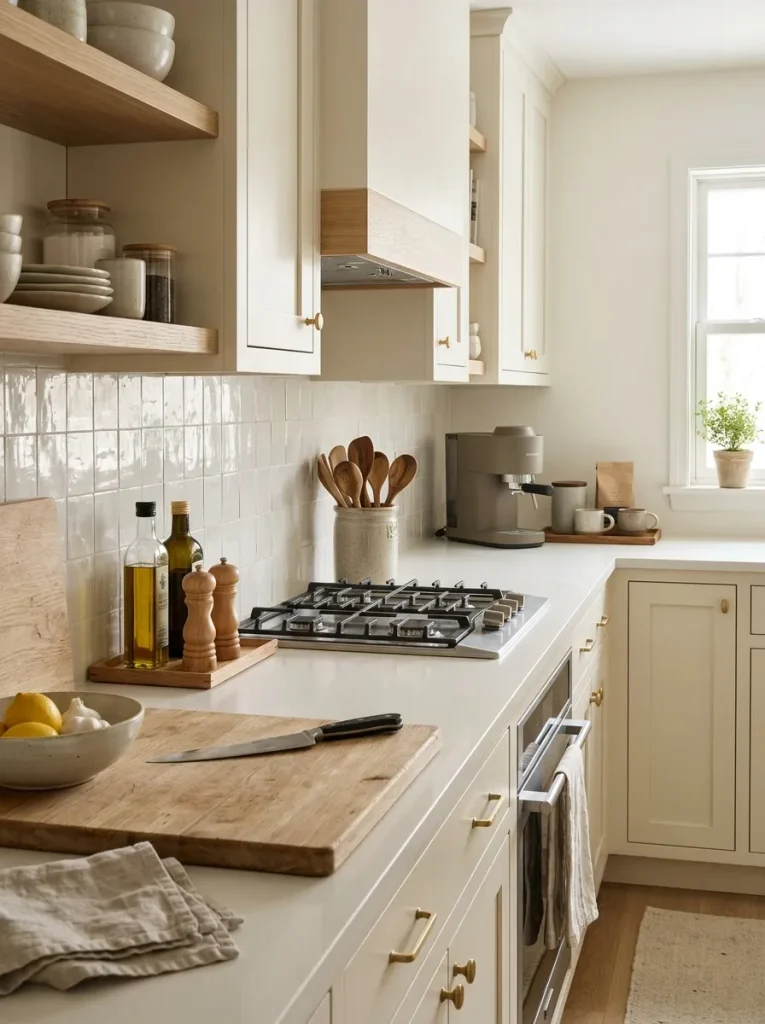
A clutter-free countertop can make your entire kitchen feel larger, brighter, and easier to use. Start by dividing the available surface into small zones based on your daily routines. Keep cooking oils and frequently used spices near the stove, place coffee essentials together, and reserve a clear area for chopping vegetables or preparing meals.
The secret is to give every item a specific purpose and location. Remove decorative pieces that collect dust or occupy valuable workspace. In my experience, keeping only daily essentials on the counter makes cleaning quicker and helps prevent clutter from returning. Even a small kitchen can feel more spacious with this simple change.
Vertical Cabinet Storage

- Add shelf risers: Create a second level for mugs, bowls or small plates without stacking everything too high.
- Install vertical dividers: Store baking sheets, cutting boards and trays upright for easier access.
- Group similar dishes: Keep everyday plates together and reserve higher shelves for occasional serving pieces.
- Use cabinet door space: Add suitable organizers for lightweight lids or small kitchen accessories.
- Measure before buying: Check shelf height and cabinet depth to avoid purchasing organizers that do not fit.
Vertical storage makes better use of cabinet space that often goes unnoticed. Instead of piling everything into one stack, create separate levels and upright sections that let you see each item. Keep heavier dishes on lower shelves and frequently used pieces within easy reach. This setup reduces searching, prevents unstable stacks and makes putting dishes away much simpler.
Drawer Dividers

Quick Tip:
Empty one drawer completely before adding dividers. Measure its interior width, depth, and height, then choose adjustable bamboo or plastic organizers that fit securely. Leave enough room for the drawer to open and close smoothly without utensils getting trapped.
A well-organized drawer saves time during meal preparation because every tool has a predictable home. Separate everyday cutlery from measuring spoons, peelers and specialty gadgets rather than mixing everything together. If you have limited space, prioritize the utensils you use most often and store occasional tools elsewhere. Review the drawer every few weeks to remove duplicates and keep the arrangement practical.
Read More: Kitchen Storage Ideas: 30 Clever Ways to Maximize Every Inch of Space
Clear Container Pantry
BEFORE
Open food packets are scattered across the shelves, making ingredients difficult to find. Half empty bags get pushed behind larger containers and duplicate purchases take up valuable space.
AFTER
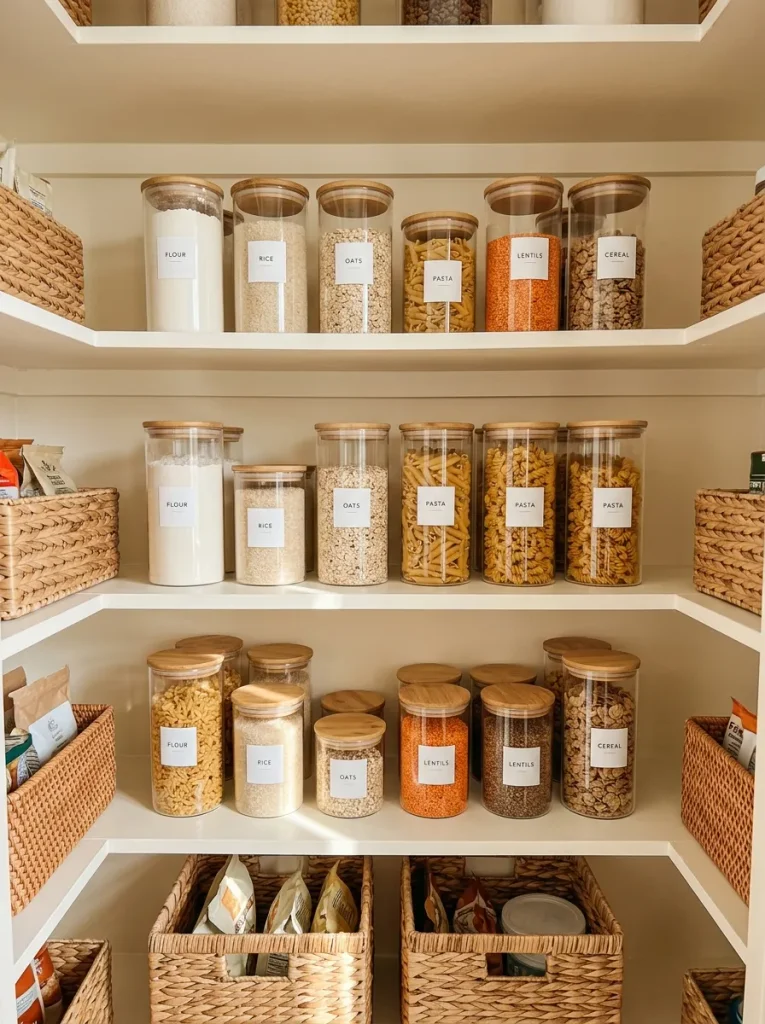
Clear containers display every ingredient at a glance. Matching lids and simple labels create a tidy appearance while making it easier to check quantities before shopping.
Transferring dry goods into suitable airtight containers can help protect them from moisture and common pantry pests when the containers are clean, dry and properly sealed. Choose containers that fit your shelves and are easy to refill. Keep original product information, including cooking instructions and expiration details, accessible when needed. Avoid decanting everything at once if you prefer to start with a small, manageable pantry section.
Under Sink Bins

- Empty the cabinet: Remove old supplies and wipe the interior clean.
- Check the plumbing: Measure around pipes, disposal units and other obstacles before buying organizers.
- Group cleaning products: Separate dishwashing supplies, spare sponges and other household cleaners.
- Add pull-out bins: Choose washable containers with handles for easier access.
- Keep leaks visible: Leave plumbing connections accessible and avoid covering signs of moisture.
The area beneath the sink can become one of the messiest kitchen spaces because pipes interrupt the available storage. Small bins make use of the remaining gaps without forcing products into awkward piles. Store chemicals in their original, labeled containers, keep them away from food, and follow their safety instructions. If children or pets live in your home, use appropriate safety latches and keep hazardous products securely out of reach.
Adjustable Shelf Risers

| Storage Method | Better Approach |
|---|---|
| Stacked bowls | Use a riser to separate smaller bowls from larger ones. |
| Crowded mugs | Create a second level for frequently used cups. |
| Hidden jars | Place short containers beneath the raised shelf. |
| Tall cookware | Keep oversized items on an unobstructed shelf. |
Shelf risers are useful for cabinets with generous vertical clearance but limited horizontal space. They create additional levels without requiring permanent installation, making them suitable for renters and beginners. Measure the cabinet carefully and check the riser’s weight capacity before loading it. Keep heavy dishes stable and avoid placing fragile items near the cabinet edge where they could fall during everyday use.
Labeled Spice Drawer

DO
- Arrange spices alphabetically or group them by cooking style.
- Position labels so you can read them without lifting every jar.
- Keep frequently used seasonings near your main cooking area.
- Check freshness and replace spices that have lost their aroma.
DON’T
- Store spices beside a hot stove where heat can affect quality.
- Mix different seasonings in the same unlabeled container.
- Buy matching jars before measuring the drawer.
- Keep old spices simply because their containers look attractive.
An organized spice drawer makes cooking easier because you can locate seasonings quickly while preparing a meal. Use airtight containers and keep them in a cool, dry place away from direct sunlight and steam. If drawer space is limited, a narrow shelf or dedicated cabinet organizer can offer similar benefits without taking up valuable cooking space.
Pull Out Pantry Baskets

Cost: Moderate, depending on the sliding hardware and basket material.
Time: Approximately one to three hours for measuring and installation.
Skill Level: Beginner to intermediate, depending on the mounting system.
Best For: Deep pantry shelves and lower cabinets where items tend to disappear at the back.
Pull-out baskets bring hidden pantry items forward instead of forcing you to reach around everything in front. Group similar products together and position heavier cans in sturdy lower baskets. Before installing a sliding system, check the available width, depth and clearance around cabinet doors. For rented homes, freestanding pull out organizers can provide similar convenience without permanent modifications.
Wall Mounted Utensil Rail

When drawer space is limited, the empty wall above a countertop can become useful storage. Install a sturdy rail in a convenient location and hang only the utensils you regularly use. Keep it away from direct heat, cooking splashes, and areas where hanging tools could interfere with food preparation.
Choose hooks that match the rail and distribute the weight evenly. Before drilling, check for hidden electrical wiring and plumbing, especially near sinks and cooking areas. Renters can consider suitable removable systems when the wall surface and product specifications allow. The result is a practical display that keeps everyday tools visible without filling the counter.
Refrigerator Storage Bins

- Create food categories: Separate ready to eat snacks, dairy products and packaged ingredients.
- Choose clear bins: Transparent containers make it easier to identify food without pulling everything out.
- Use removable handles: Select bins that can be lifted out for cleaning.
- Check shelf dimensions: Leave space for airflow and ensure drawers and doors close properly.
- Follow safe storage practices: Keep raw meat in leakproof containers on the lowest suitable shelf, away from ready to eat foods.
Refrigerator bins help prevent small packages from spreading across every shelf. They also make it easier to notice food that needs to be used soon, reducing forgotten leftovers and unnecessary waste. Avoid overcrowding the refrigerator, since cold air needs to circulate. Store foods according to recommended temperature and food safety guidance rather than relying only on appearance or container labels.
Cabinet Door Organizers

Quick Tip:
Measure the inside of your cabinet door before choosing an organizer. Check the hinge clearance and shelf position so the door can close completely without hitting stored items.
Door-mounted storage uses space that is often overlooked, especially in compact kitchens. It works well for lightweight lids, measuring spoons, wraps, and other small accessories, depending on the organizer’s design. Keep heavy cookware in properly supported cabinets instead of hanging it from a thin door. Choose mounting hardware suited to the cabinet material, and avoid obstructing hinges or shelves.
Dedicated Coffee Station
BEFORE
Coffee filters sit in a crowded drawer, mugs are mixed with everyday dishes and sugar packets get scattered across the counter.
AFTER
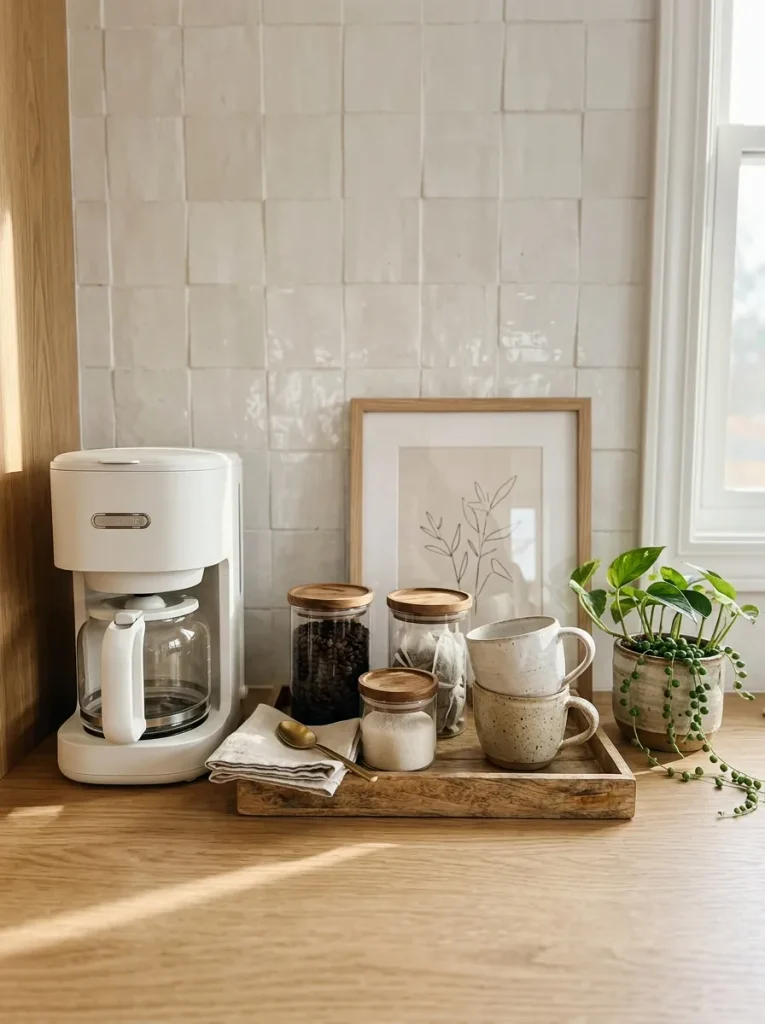
A single tray or small shelf holds coffee essentials together. Mugs stay nearby and frequently used supplies become easy to reach during busy mornings.
A dedicated coffee station can simplify your morning routine without requiring a large kitchen or expensive equipment. Start with a small section of countertop and gather only the items you use regularly. Store backup supplies in a nearby cabinet to prevent the station from becoming crowded. Keep electrical appliances away from water splashes and follow the manufacturer’s cleaning and maintenance instructions.
Vertical Baking Tray Storage

- Remove the trays: Take everything out of the cabinet and check which pieces you actually use.
- Measure the opening: Confirm that your tallest baking sheet fits upright without touching the cabinet top.
- Install dividers: Choose stable racks designed for the cabinet width and tray weight.
- Sort by purpose: Keep baking sheets together and separate cutting boards from hot cookware.
- Test access: Slide each piece out individually to confirm that nothing catches or tips.
Storing trays vertically prevents the familiar problem of lifting an entire stack just to reach one baking sheet. It also makes cabinet interiors easier to maintain because each item has its own slot. If you prefer not to install permanent hardware, use a freestanding divider that sits securely on the shelf. Avoid placing unstable trays where they could slide forward unexpectedly.
Matching Food Storage Containers
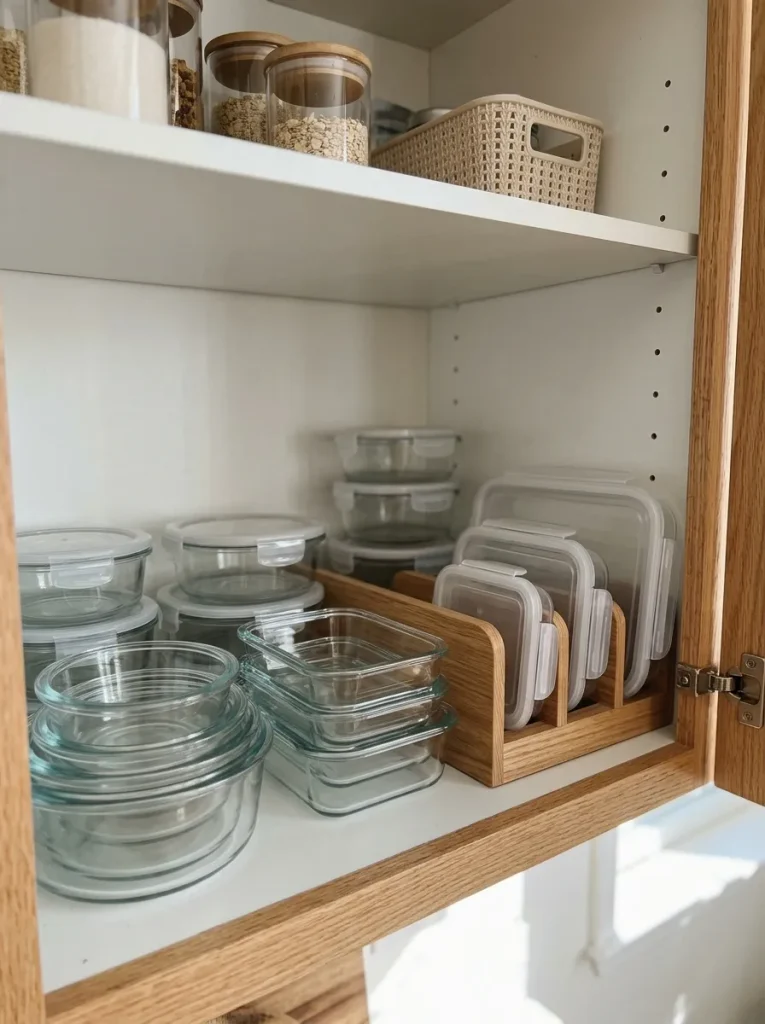
| Storage Habit | Improved System |
|---|---|
| Mismatched containers | Keep a manageable set of compatible sizes. |
| Lids scattered everywhere | Store lids vertically in a dedicated holder. |
| Containers stacked randomly | Nest matching shapes together. |
| Missing lids | Check compatibility before storing each set. |
A consistent container collection saves cabinet space and makes packing lunches or storing leftovers less frustrating. You do not need to replace every container at once. Start by matching the pieces you already own, removing damaged items, and organizing lids by shape or size. When purchasing replacements, prioritize food-safe materials, secure seals and sizes that suit the portions you normally prepare.
Drawer Knife Organizer

DO
- Choose a knife insert designed for your blade lengths and drawer dimensions.
- Keep each knife in its designated slot.
- Dry knives thoroughly before storing them.
- Position the organizer so the drawer opens smoothly.
DON’T
- Toss loose knives into a drawer with other utensils.
- Force oversized blades into short slots.
- Leave sharp edges exposed where fingers may brush against them.
- Store knives within easy reach of young children.
A dedicated knife organizer keeps sharp blades separated and reduces the chance of accidental cuts when searching for cooking tools. Select a stable insert that prevents knives from shifting as the drawer opens and closes. If your drawer is too shallow, consider a secure wall mounted magnetic knife holder installed away from children’s reach and positioned according to the manufacturer’s safety guidance.
Sink Side Caddy

Cost: Low to moderate.
Time: About 10 to 20 minutes.
Skill Level: Beginner.
Best For: Busy sinks where sponges and brushes tend to collect on the countertop.
A sink-side caddy gives wet cleaning tools a designated place instead of leaving them scattered around the faucet. Choose a model with drainage openings and enough room for the supplies you use daily. Empty standing water regularly, rinse the caddy and let sponges and brushes dry between uses. Keep the area around the faucet clear so cleaning the sink remains quick and simple.
Everyday Dish Cabinet
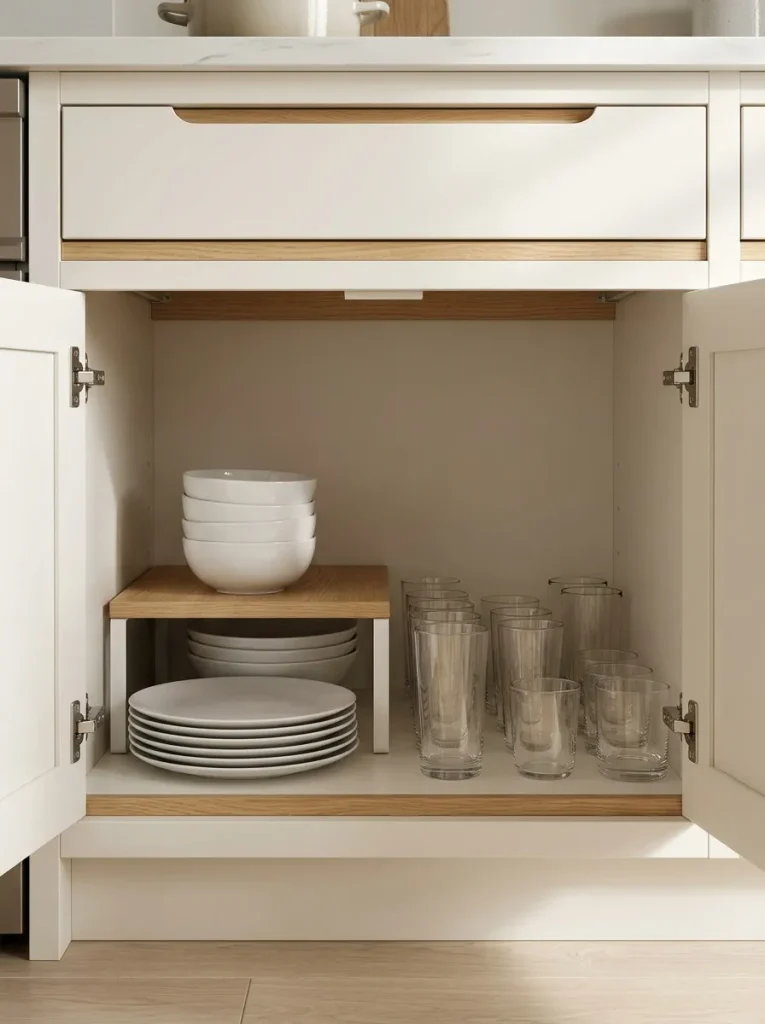
A well-arranged dish cabinet makes daily meals easier because family members can find and return items without searching through multiple shelves. Keep frequently used plates and bowls together at a comfortable height, placing heavier stacks on sturdy lower shelves. Reserve less accessible areas for occasional serving pieces. If children help set the table, give them a reachable section with lightweight, unbreakable dishes.
Baking Supply Station

BEFORE
Baking ingredients are scattered between several cabinets and measuring tools disappear whenever you prepare a recipe.
AFTER
Dry ingredients, measuring equipment, and small baking accessories sit together in a dedicated cabinet or shelf. Preparation becomes quicker because the essentials are gathered in one place.
Group supplies according to how you use them rather than arranging everything by appearance alone. Keep heavy mixing bowls on sturdy shelves and place frequently used measuring tools in a nearby container. Store ingredients in appropriate airtight containers and label them clearly. Check expiration dates before restocking, and keep specialty decorating equipment in a separate bin if you bake only occasionally.
Pantry Door Storage
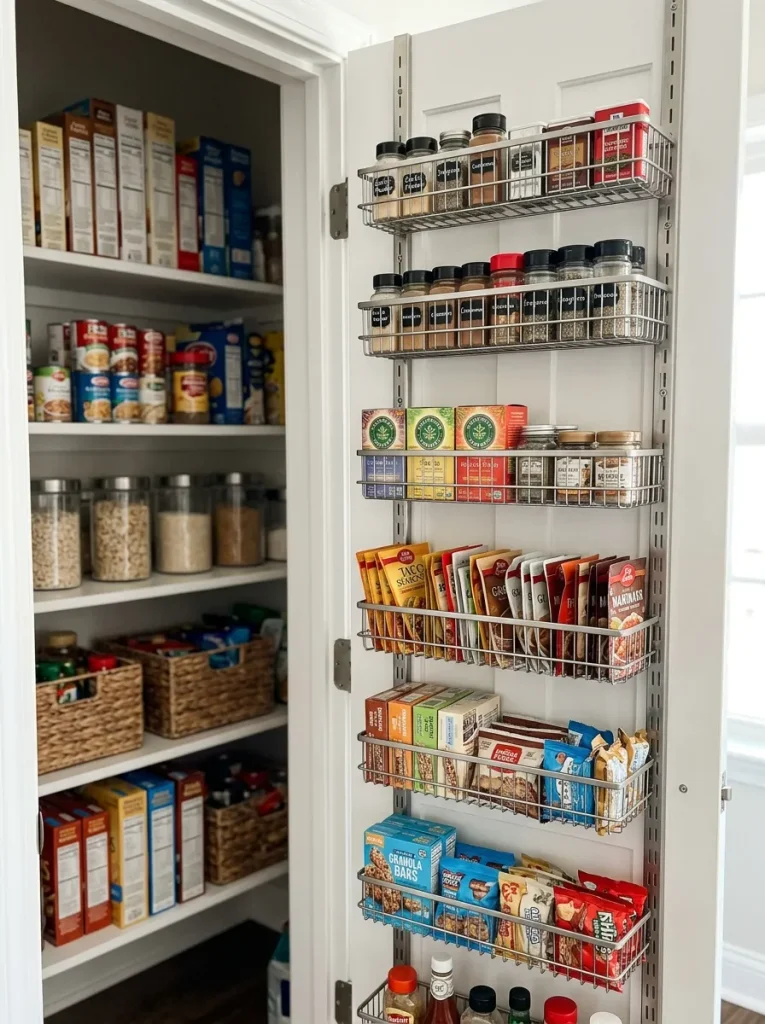
- Measure the door: Check the usable height, width, and depth before buying a rack.
- Group small products: Place packets and lightweight containers in separate baskets.
- Check door clearance: Ensure shelves do not hit pantry contents when the door closes.
- Keep heavy items low: Follow the rack’s load limits and secure the mounting hardware properly.
The back of a pantry door can provide extra room for small items that otherwise crowd the main shelves. Narrow racks are especially helpful in compact kitchens where every inch matters. Keep the arrangement simple, with labels or clear bins that make products easy to identify. Avoid overloading the door and make sure mounted organizers are firmly secured before placing items inside.
Rolling Kitchen Cart

Quick Tip:
Choose a cart that fits through the narrowest kitchen walkway and can be moved without blocking appliance doors. Measure the full footprint, including handles and wheels, before purchasing.
A rolling cart adds flexible storage when your kitchen lacks sufficient cabinets or preparation space. Use its top for frequently needed items and reserve lower shelves for heavier bowls, produce, or pantry supplies. Lock the wheels before using the cart as a work surface. Keep sharp tools and hot cookware secure and avoid loading the cart beyond its stated weight capacity.
Meal Prep Container Zone

| Organization Method | Practical Benefit |
|---|---|
| Mixed container sizes | Group matching sizes together. |
| Loose lids | Use a vertical lid divider. |
| Lunch supplies in several places | Keep containers and bags in one zone. |
| Damaged containers | Remove cracked pieces and unusable lids. |
A dedicated meal prep zone saves time when packing lunches, storing leftovers, or preparing food for the week. Keep containers near the refrigerator or food preparation area if that suits your routine. Choose stackable pieces that fit your usual portions and cabinet dimensions. Wash and dry everything thoroughly before storing, and separate lids from containers only when a dedicated organizer makes them easier to locate.
Under Shelf Mug Hooks

DO
- Check the shelf thickness before buying clip-on or screw-mounted hooks.
- Hang lightweight mugs with enough space between handles.
- Keep the arrangement clear of cabinet doors and nearby shelves.
- Test the hooks with one mug before adding more.
DON’T
- Exceed the hooks’ weight capacity.
- Hang chipped mugs or pieces with weak handles.
- Place mugs where they could swing into one another.
- Force hooks onto shelves that are too thick or unstable.
Under-shelf mug hooks can free up room for bowls, plates and other cabinet essentials. They work best when there is enough clearance beneath the shelf for mugs to hang without touching the items below. Choose a secure mounting style and keep heavier cups on the shelf if the hooks do not provide adequate support. A small, carefully spaced row is usually more useful than filling every available inch.
Labeled Leftover Shelf
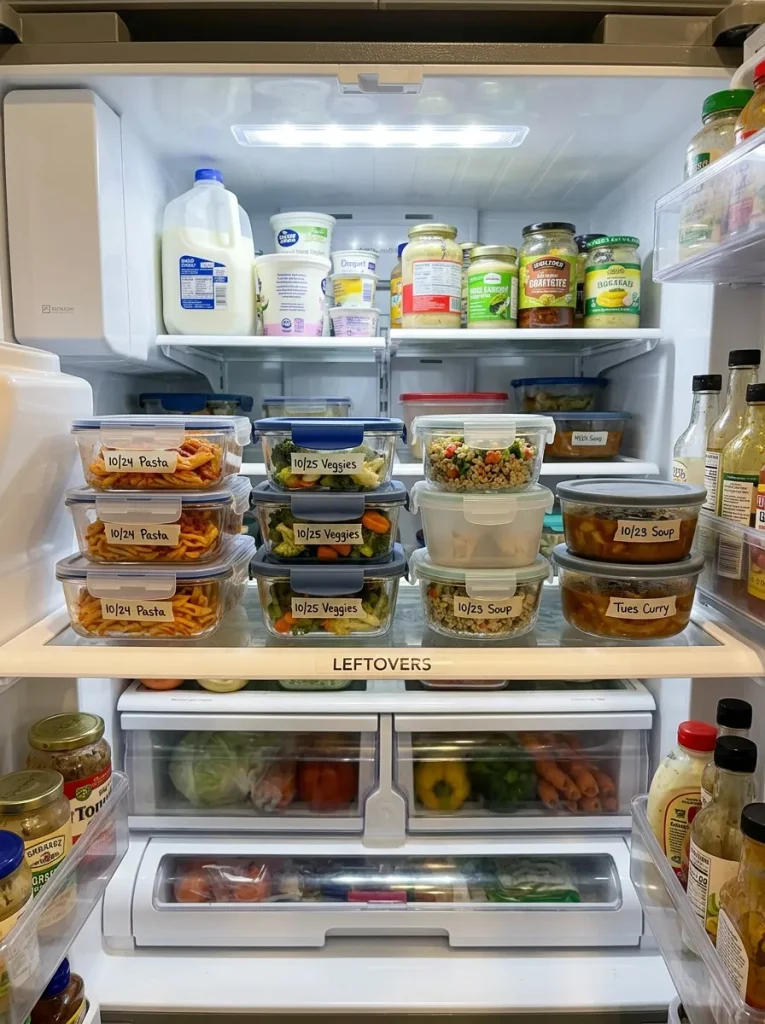
Cost: Low if you already own containers.
Time: Approximately 10 minutes to establish the system.
Skill Level: Beginner.
Best For: Households that regularly store cooked meals, leftovers and prepared ingredients.
A dedicated leftover shelf helps prevent food from being forgotten behind new groceries. Place older food toward the front and label containers with the preparation date so you can track what needs attention. Refrigerate perishable food promptly, use shallow containers when appropriate for quicker cooling, and follow established food safety guidance for storage times. Never rely on appearance or smell alone to determine whether food is safe.
Hanging Fruit Basket

A hanging fruit basket can free up countertop space while keeping suitable produce visible and easy to reach. Choose a location away from cooking heat and ensure the ceiling hook and mounting hardware are designed to support the full load. Avoid placing the basket where people could bump into it while preparing food. Keep fruit that requires refrigeration in the refrigerator rather than leaving everything at room temperature.
Slim Gap Organizer

- Measure the gap: Check the narrowest width, available depth and full height.
- Choose the right tower: Select a slim organizer with stable wheels or suitable mounting hardware.
- Sort the contents: Reserve shelves for lightweight bottles, spices, or small packaged goods.
- Test the movement: Make sure the tower slides out without hitting cabinet handles or appliance doors.
The small gap beside a refrigerator or cabinet can provide useful storage when a full-size shelf will not fit. A slim organizer makes those forgotten inches accessible without adding bulky furniture. Avoid blocking refrigerator ventilation openings or placing heavy glass bottles on unstable shelves. Before purchasing, confirm that the unit can move freely and that the space is suitable for the items you intend to store.
Cabinet Corner Organizer

BEFORE
Items pushed into the back of a corner cabinet become difficult to reach. Smaller bowls disappear behind cookware, and forgotten supplies accumulate in unused spaces.
AFTER
A suitable rotating organizer brings stored items forward. Grouping similar pieces on separate levels improves visibility and reduces the need to remove everything from the cabinet.
Corner organizers are most useful when the cabinet shape, opening and interior dimensions match the product design. Measure carefully, including hinges and plumbing if present, and check the shelf’s weight capacity. Store frequently used items where they are easiest to reach, and avoid overloading rotating shelves. If a turntable does not fit your cabinet, simple bins that can be pulled forward may be a better solution.
Weekly Kitchen Reset Station
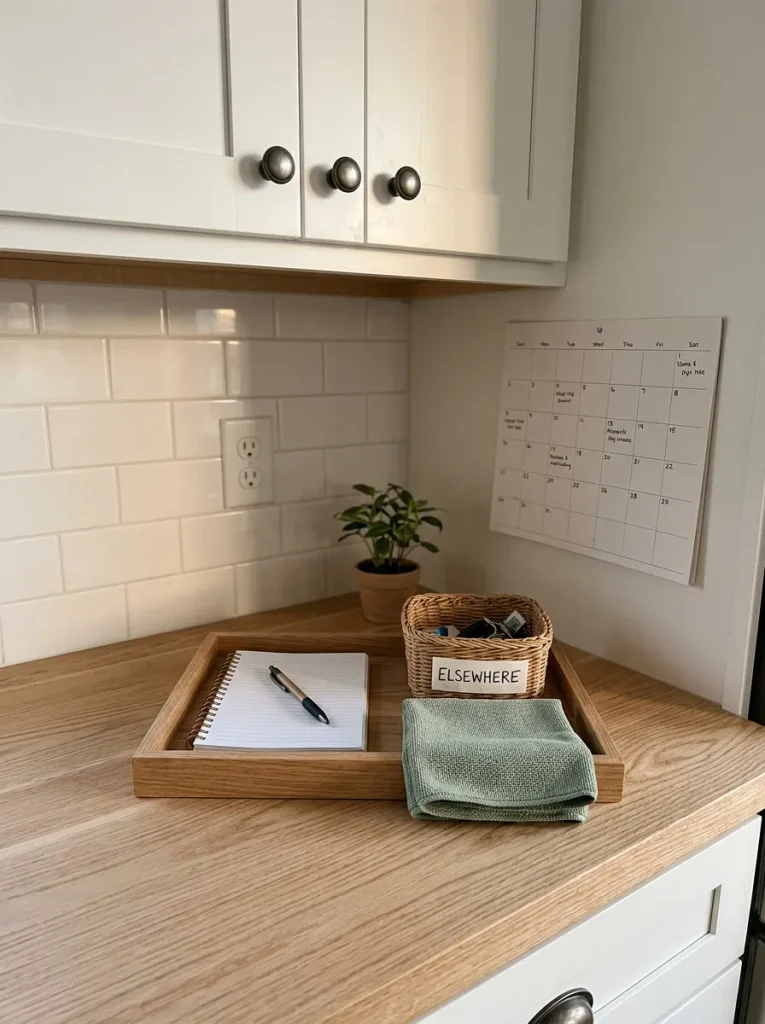
A simple weekly reset helps maintain the organization systems you have already created. Choose a consistent time to clear countertops, return misplaced items, check the refrigerator and review pantry supplies. A small basket can collect objects that belong in other rooms, while a short checklist keeps the task manageable.
Start with ten minutes rather than trying to reorganize the entire kitchen again. Wipe frequently used surfaces, put clean dishes away and identify any storage area that has started collecting clutter. In my experience, short, repeatable routines are easier to maintain than occasional marathon cleaning sessions. The goal is not a perfect kitchen every day, but a functional space that supports your everyday life.
CONCLUSION
An organized kitchen doesn’t require a big budget, expensive storage products or a complete makeover. Small changes, such as adding drawer dividers, grouping pantry essentials and clearing your countertops, can make everyday cooking and cleaning much easier.
These 27 Kitchen Organization Ideas offer plenty of inspiration for creating a tidy, functional space that suits your home and lifestyle. Start with one simple hack, see what works for you and gradually organize the areas that need the most attention.
Save this article on Pinterest so you can revisit your favorite ideas whenever you’re ready for a refresh. Share it with a friend who loves a tidy home and enjoy creating a kitchen that feels more peaceful, practical and welcoming every day!

One Comment