Kitchen Backsplash Ideas: 28 Eye-Catching Looks to Try
Your backsplash is the wall everyone notices first, yet it is the one most people feel nervous choosing. Kitchen backsplash ideas are everywhere, but picking one still feels risky when every scroll shows a new tile, color and pattern. That is exactly why this guide exists.
Inside, you will find 28 looks that cover every budget, from simple paint and peel and stick panels to handmade zellige and full stone slabs. Each idea comes with practical tips, so you know what to buy, what to avoid and how it holds up around a real stove and sink. In my experience, the best wall is never the trendiest one. It is the one that matches how you actually cook and clean. Whether you rent or own, you will leave with ideas you can save, plan, and try.
Classic Subway Tile
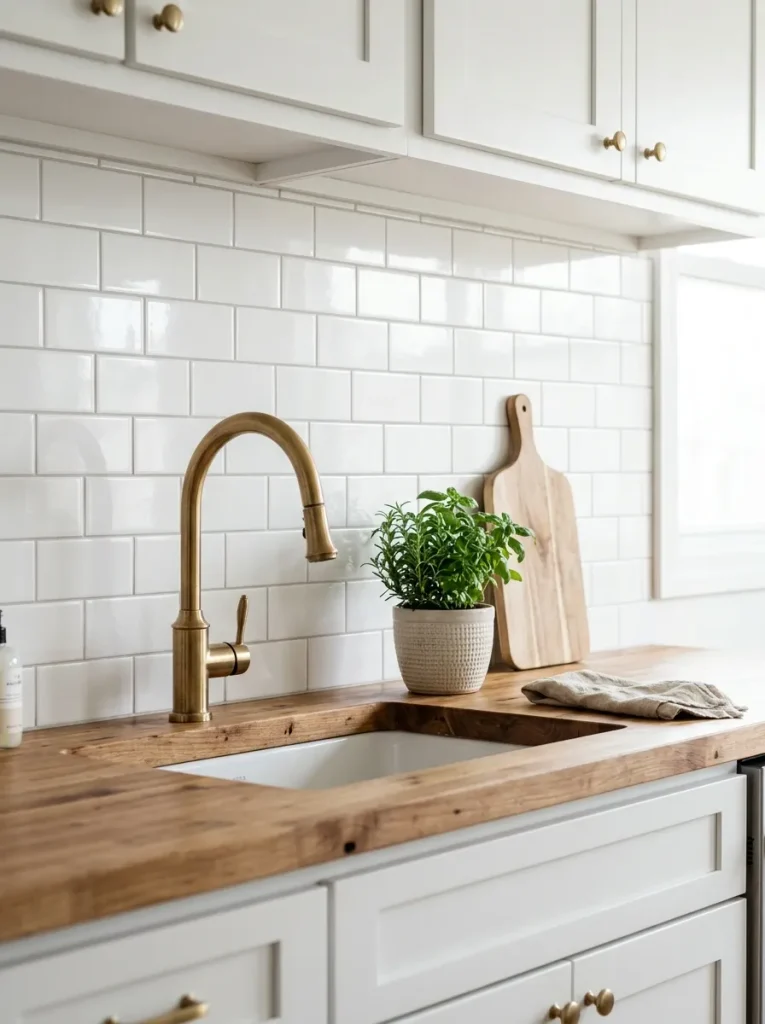
White subway tile has stayed popular for over a century and the reason is simple. It brightens a kitchen, bounces light off the counters and works with almost every cabinet color. Among all kitchen backsplash ideas, it is the safest starting point for first timers on a budget.
In my experience, the grout color matters more than the tile. Light gray grout hides daily splashes, while white grout shows every coffee drip within a week. Lay the tiles in a classic offset brick pattern and keep grout lines thin for a clean, modern finish.
Herringbone Pattern

- Zigzag lines draw the eye upward, so a short wall instantly feels taller. Even plain ceramic tile looks custom in this layout.
- Choose a small rectangle tile, about 2 by 8 inches, for the tightest and most recognizable pattern.
- Start from the center of the wall and work outward, so the pattern stays balanced on both sides.
- Pick a grout color close to the tile shade if you want the pattern to look soft and calm.
- Expect extra cuts at the edges. Buy 15 percent more tile than your measurements call for.
I’ve noticed that herringbone works best behind a range, where the pattern has room to stand out. Keep the cabinets and counters simple so the tile gets all the attention. A matte finish in warm beige or soft sage keeps the look calm instead of busy.
Peel and Stick Panels

Quick Tip:
Clean the wall with a degreaser and let it dry fully before the first sheet goes up. Warm each panel with a hair dryer for ten seconds as you press it down. This helps the adhesive grip tight corners.
Renters love this option, and I can see why. A weekend is enough to cover a standard backsplash, and the panels come off without ruining the paint underneath. Pick a subtle marble or gray tile print, since bold patterns can look flat when viewed up close.
Read More: 25 Kitchen Island Ideas That Upstage Everything Else
Zellige Handmade Tile

Before:
Flat, perfectly even tile can make a kitchen feel like a showroom. The wall looks neat but lifeless and light just sits on the surface without any movement.
After:
Zellige tile has slightly uneven edges and a wavy glaze, so light shifts across it all day. The same wall now has depth, character and a soft glow.
I’ve noticed that zellige looks best in solid colors like deep green, cream, or dusty blue. Expect small size differences between tiles and leave slightly wider grout lines to handle them. Seal the grout once it cures, since porous grout stains fast near the stove. Hire an installer who has set it before.
Penny Round Mosaic

- Buy mosaic sheets, which come pre mounted on mesh, so you can set a full square foot at once.
- Spread thin set mortar with a small notched trowel over a clean, dry wall.
- Press each sheet in place and tap it flat with a rubber float.
- Keep the spacing between sheets consistent so the circles line up across every seam.
- Wait 24 hours, then apply grout and wipe the surface with a damp sponge.
Round tile hides small wall flaws better than large squares do, which is a relief in older homes with wavy walls. Penny rounds look fresh in white and surprisingly bold in black. Choose a soft gray grout, because it keeps the tiny joints from looking dirty over time.
Full Slab Marble

| Point | Single Slab | Small Tile |
|---|---|---|
| Seams | Almost none | Many grout lines |
| Cleaning | Wipe in seconds | Scrub grout now and then |
| Cost | Higher | Lower |
| Look | Clean and bold | Textured and classic |
A single stone slab turns the wall into a focal point with zero grout lines to scrub. Ask the fabricator to match the veining to your counter for a continuous flow. Seal the stone twice a year, since lemon juice and tomato splashes can leave dull marks on marble.
Beadboard Wall Panels

DO
- Choose moisture resistant PVC or primed MDF panels.
- Seal the top edge with a thin trim piece.
- Caulk every seam and corner before painting.
- Paint with a semi gloss finish so spills wipe off easily.
DON’T
- Don’t install plain wood boards directly behind the stove.
- Don’t skip primer or the paint will peel near the sink.
- Don’t leave gaps at the countertop edge where water can seep in.
Beadboard brings quiet cottage charm without a big budget. One weekend turns a flat painted wall into a cozy focal point. Stick to soft whites, sage or pale blue for the cleanest result, and keep panels at least a few inches away from open flames. Wipe it down with a damp cloth.
Hexagon Tile Pattern
Cost: Medium
Time: Two days
Skill Level: Intermediate
Best For: Modern and farmhouse kitchens
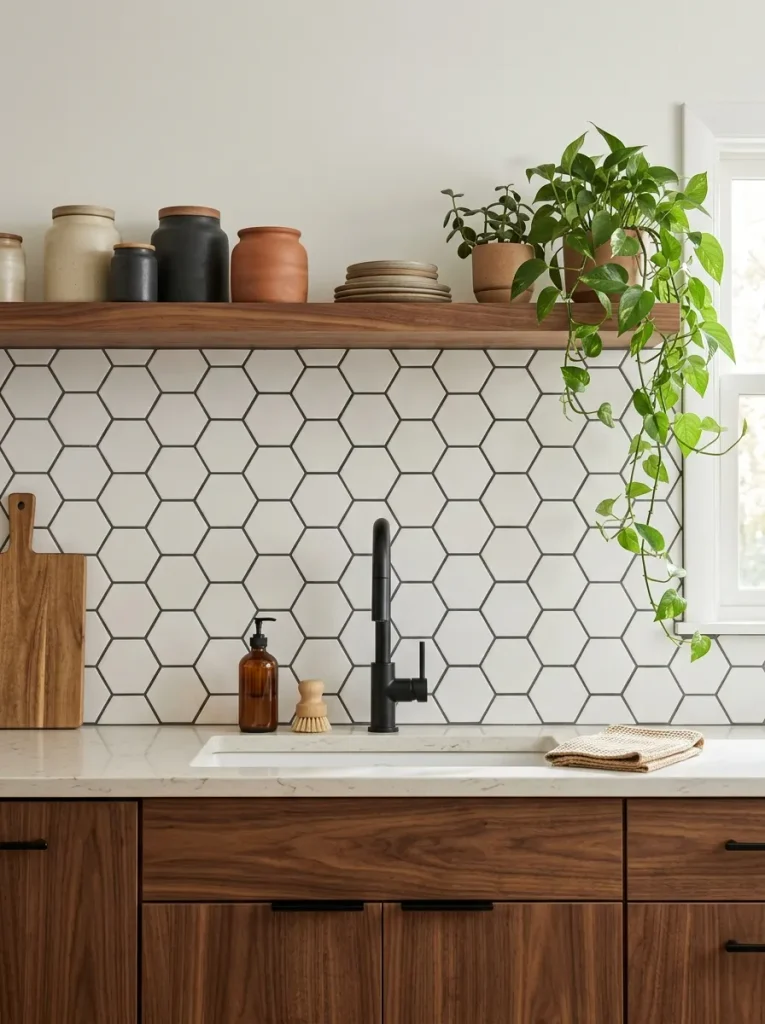
Honeycomb shapes bring movement to a plain wall without adding clutter. Dark grout outlines every hexagon and makes the pattern pop, while light grout keeps it soft. Always dry lay a few sheets on the floor first, so you can check the layout before spreading any adhesive.
Vertical Stacked Tile

Short on wall height? Vertical tile fixes that fast. Stacking rectangles upright pulls the eye toward the ceiling and makes a low kitchen feel taller. It also looks fresh next to the horizontal brick layouts most kitchens already have, so the whole room feels newly designed.
Choose a tile about 3 by 12 inches and keep grout lines narrow, around one sixteenth of an inch, for a crisp line. Use a level on every row, because small tilts show up quickly in vertical layouts. Pale blue, white or soft gray works well in compact kitchens.
Natural Brick Wall

- Real brick brings instant texture and warmth. Thin brick veneer gives the same look without the weight.
- Seal the surface with a matte masonry sealer so grease and splashes wipe off easily.
- Whitewash the brick for a lighter, softer look that suits small kitchens.
- Keep bricks away from direct flames with a glass or metal panel behind the stove.
- Pair it with pale cabinets so the wall feels warm instead of heavy.
Brick works best in kitchens that already lean rustic, industrial or cozy. Natural variation in color means no two walls look the same, which gives every kitchen its own character. Plan on resealing every year or two, because unsealed brick soaks up cooking oil and is hard to clean once stained.
Copper Metal Sheet

Quick Tip:
Order a clear protective coating if you want the copper to keep its bright shine. Without it, the metal slowly darkens into a rich brown patina. Wipe with a soft cloth and mild soap, never steel wool.
Metal sheets go up fast, often in one afternoon, and they cut the need for grout entirely. Dark copper pairs well with deep green, black or cream cabinets. A trick I use is to hold a sample next to your lighting for a day before you commit.
Terracotta Tile Wall

Before:
Cold white walls can leave a kitchen feeling clinical. Nothing in the room ties the wood, plants, and metal together.
After:
Terracotta tile adds a warm, sun baked glow that connects every material. The kitchen now feels lived in and welcoming, even before you cook.
Terracotta tile ranges from soft peach to deep rust, so pick a shade next to your counter in daylight. Sealing is not optional, since raw clay absorbs oil and water. I’ve seen this work well in white kitchens that needed warmth. Apply two coats of sealer before grouting.
Arabesque Shape Tile
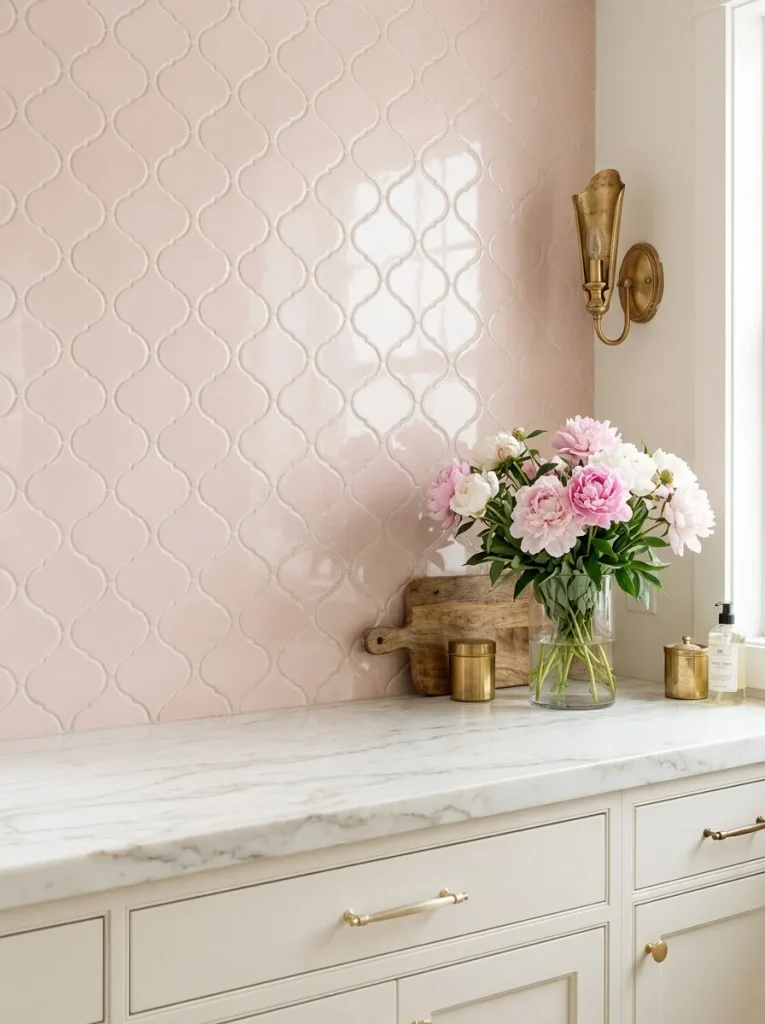
- Measure the wall and order 10 percent extra, since curved edges create more cut waste.
- Mark a center line and dry lay the first rows on the counter to check that the curves line up.
- Set the tile with thin-set mortar, pressing each piece so the points meet evenly.
- Use small spacers at every joint to keep the shapes aligned.
- Grout with a color close to the tile for a soft, flowing look.
Curved tile feels softer than any straight grid, which suits kitchens with lots of hard edges. Choose a muted shade like blush, sage or ivory if you want a calm result. Bright colors look striking, but they work best when everything else in the room stays quiet.
Black Matte Tile

| Point | Black Grout | White Grout |
|---|---|---|
| Look | Soft and tone on tone | Graphic and bold |
| Stains | Hides spills | Shows every drip |
| Style | Moody and modern | Crisp and playful |
Dark tile makes a kitchen feel confident, but it needs a smart plan. Keep the counters light and add warm bulbs under the cabinets so the wall does not swallow the room. In small spaces, that extra lighting matters most. Matte finishes show water spots, so wipe them dry after cooking.
Bold Cement Patterns
DO
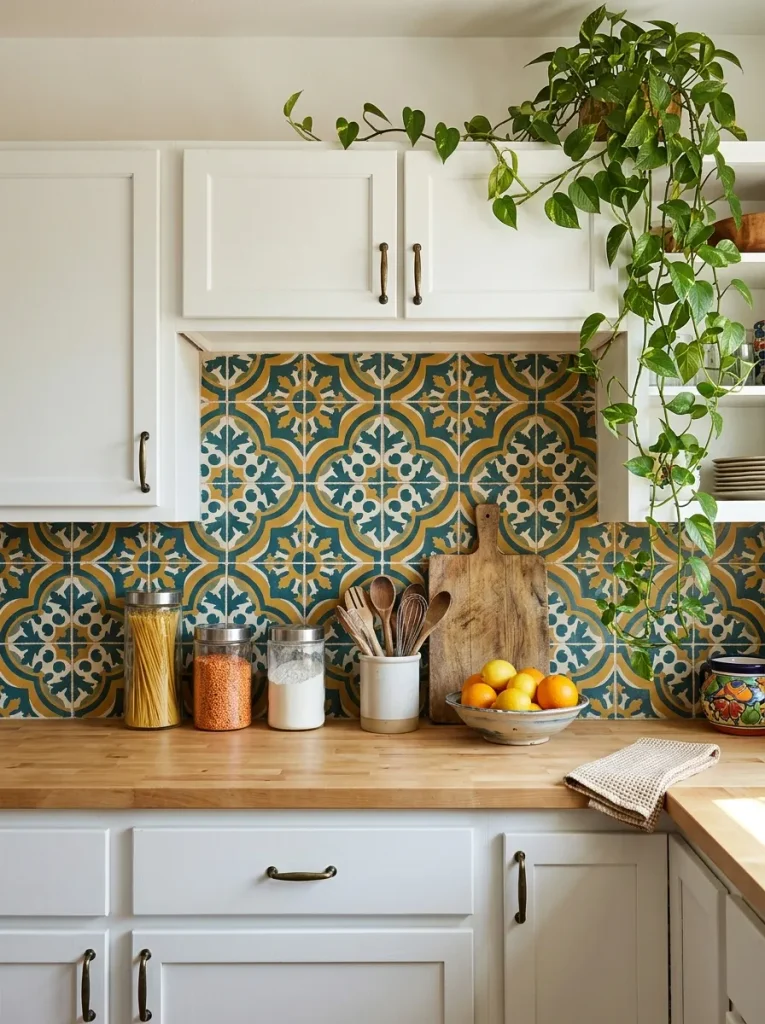
- Limit the bold pattern to one wall or a small panel behind the range.
- Seal the tile before grouting and again every year.
- Keep cabinets and counters in plain, solid colors.
- Pull one color from the tile for towels or bowls.
DON’T
- Don’t mix more than one busy pattern in the same kitchen.
- Don’t use acidic cleaners, since they dull the surface.
- Don’t skip a sample, because colors shift under different lighting.
Pattern tile is for people who love color and want the kitchen to feel lively. A single bold patterned strip behind the stove can carry an entire room. Stay with a limited palette of two or three shades and the design stays fun instead of loud.
Floating Shelf Wall
Cost: Low to medium
Time: One afternoon
Skill Level: Beginner
Best For: Small kitchens that need extra storage
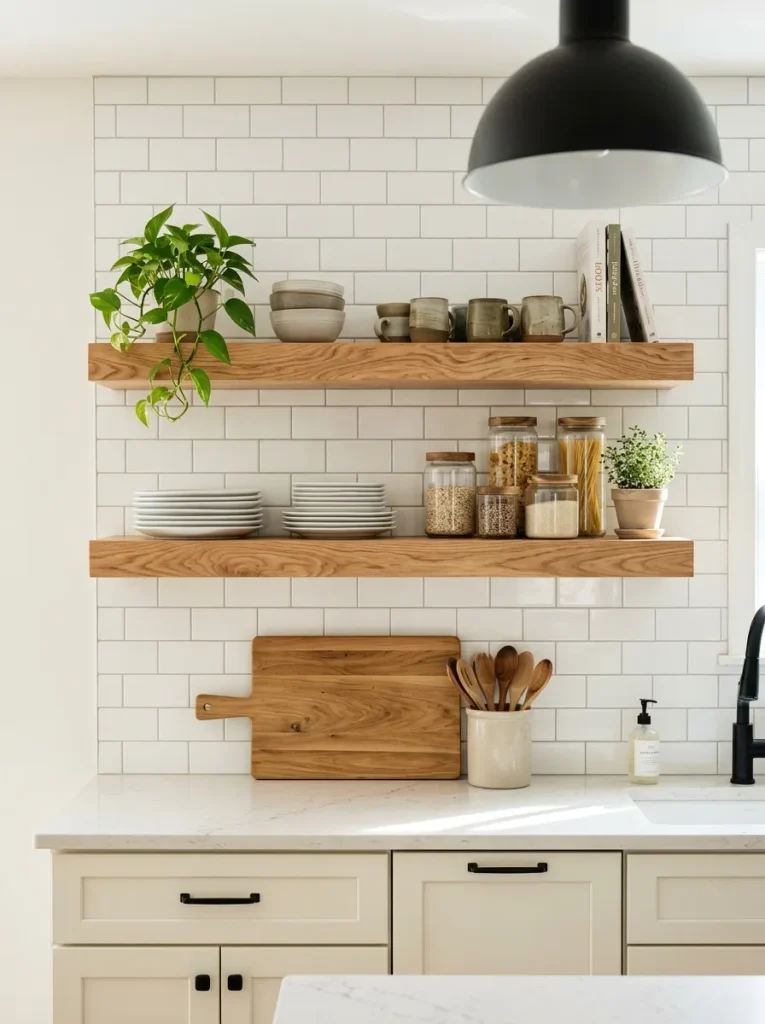
Shelves turn a plain tiled wall into useful storage and display space. Mount them into wall studs, not just drywall, since plates and jars get heavy fast. Keep daily items within easy reach and leave a few empty inches, so the wall still feels open and tidy.
Glass Tile Shimmer
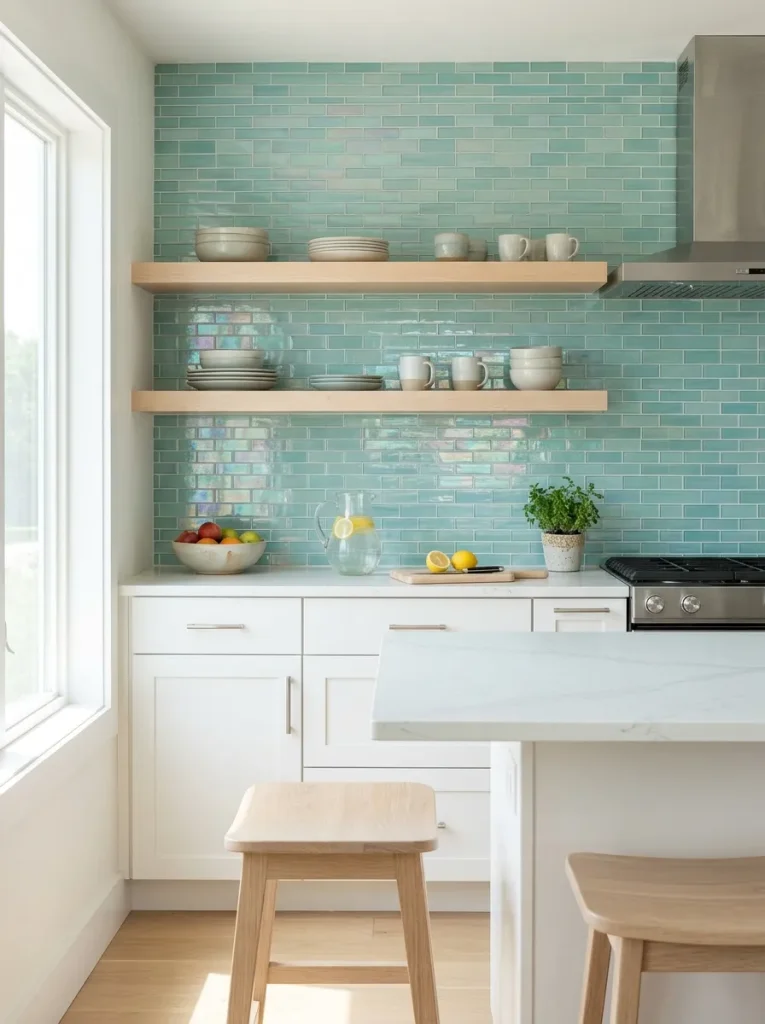
Glass tile catches light the way water does, with a soft shimmer that moves through the day. Even a small window sends soft reflections across the wall, which makes a dim kitchen feel bigger and brighter. It is smooth, nonporous and wipes clean in seconds, so splatter never soaks in.
Choose a white or light gray thin-set mortar, because dark adhesive shows through clear glass and muddies the color. Cut tiles with a wet saw and a glass blade to avoid chips. Small glass tiles hide uneven walls better than large ones, so they suit older homes.
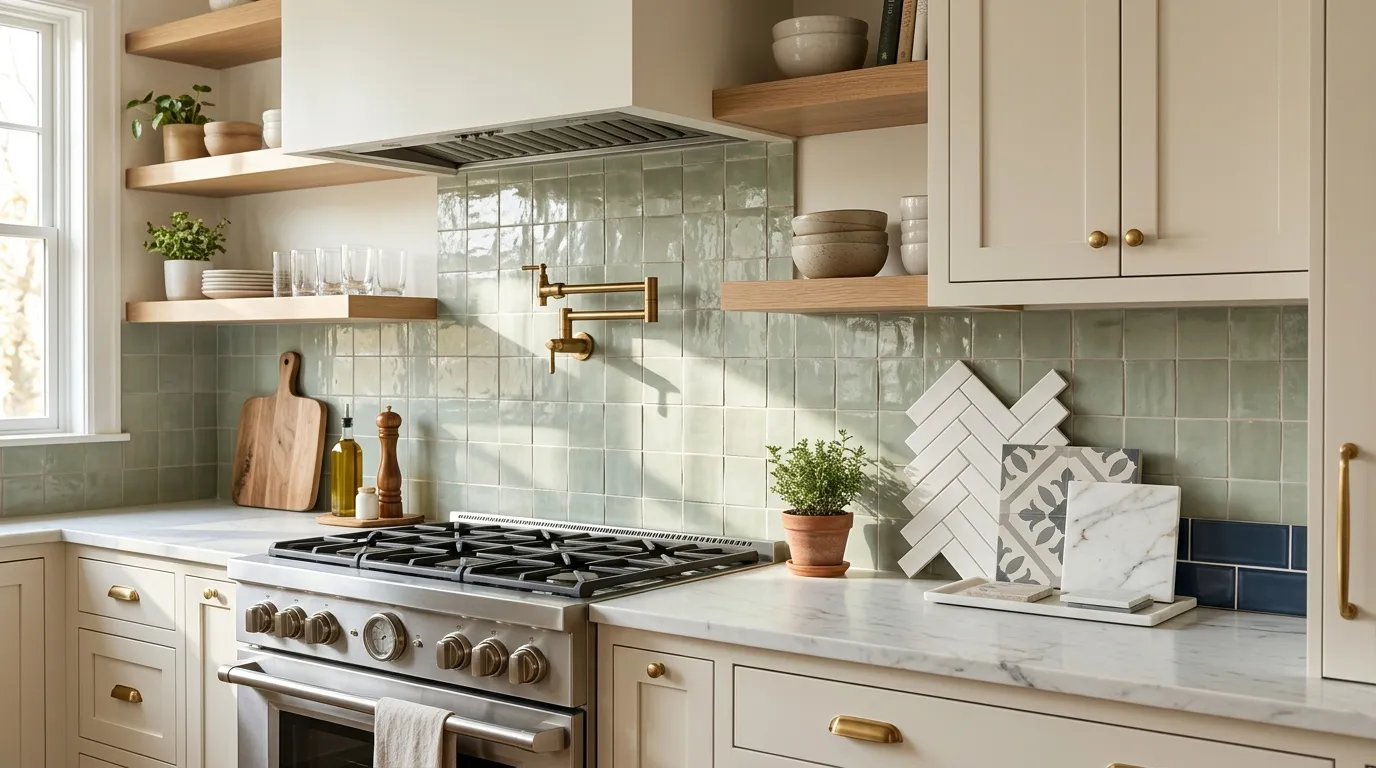
Sage Green Tile
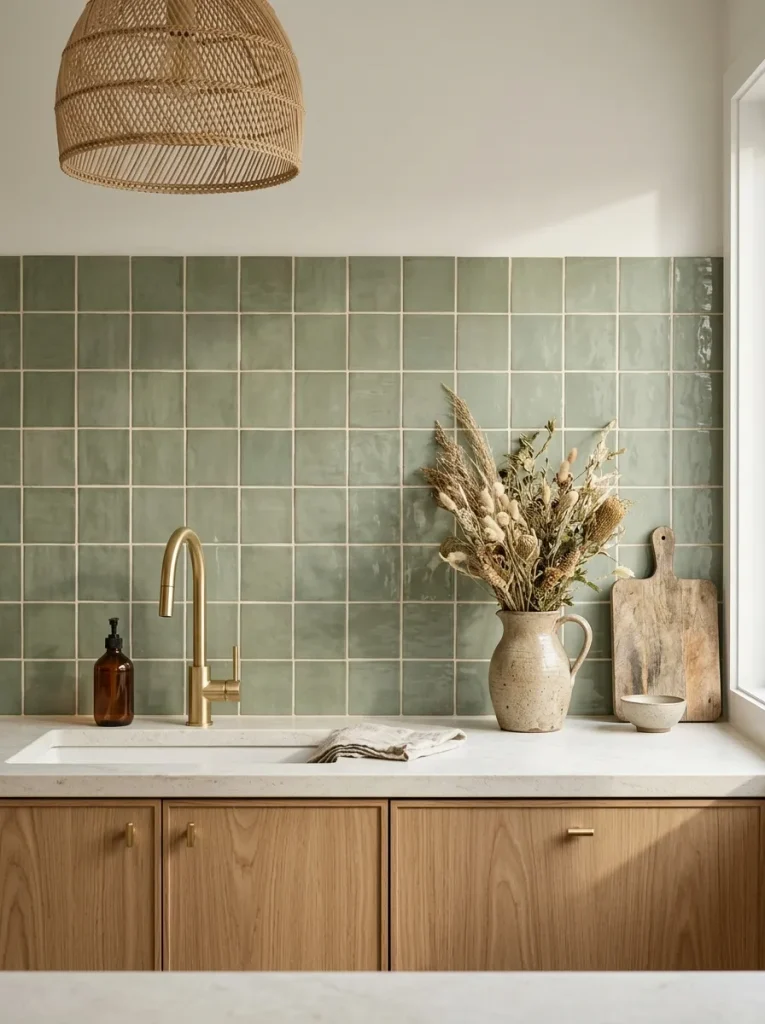
- Pick a muted sage with a gray undertone, since bright greens can feel loud in daylight.
- Pair it with warm wood, cream or white cabinets for a calm, natural palette.
- Match the grout to the tile for a soft look or use cream grout for a gentle outline.
- Add brass or matte black hardware to give the green a crisp finish.
Green taps into the calm of a garden, which is why it keeps rising in popularity. Test a sample tile on your wall for two days and check it in morning and evening light. Sage can look gray at night and fresh green in sunshine. That small test saves expensive regrets.
Fish Scale Tile
Quick Tip:
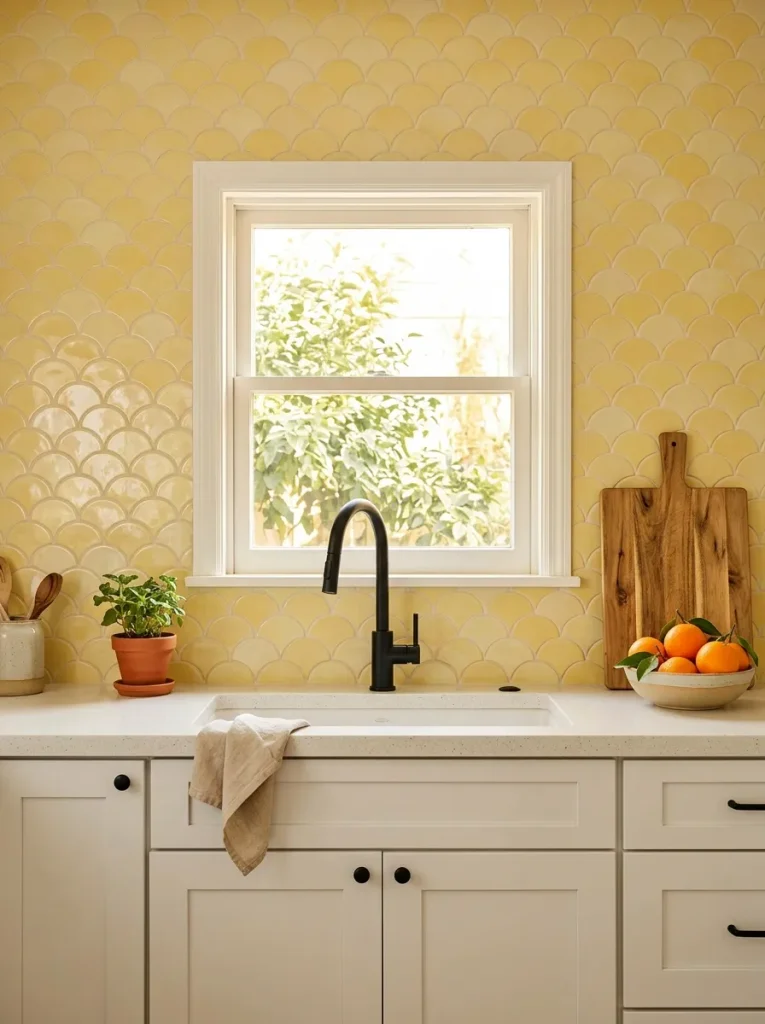
Start laying scales from the bottom row and work upward so each curve overlaps correctly. Snap a chalk line first to keep the rows level. Dry fit a few sheets on a table before you spread any adhesive.
Scalloped shapes feel playful without being childish. A pale yellow or soft white version can brighten a gray kitchen in one afternoon. Keep the rest of the room simple and let the curved edges be the only decorative detail on the wall. Matching grout keeps the scale pattern smooth.
Stainless Steel Panel

Before:
Painted drywall behind a busy stove collects grease splatter and stains fast. Scrubbing it often leaves marks and chips the paint.
After:
A stainless steel panel wipes clean with one pass of a damp cloth. Heat, grease, and water splashes no longer damage the wall.
Restaurant kitchens use steel for a reason, since it is heat safe, easy to sanitize, and hard to damage. A strip behind the range protects the exact spot where splatter happens. Choose a brushed finish, because polished steel shows every fingerprint and water spot. Pair it with warm wood for balance.
Painted Wall Finish

- Clean the wall with a degreaser and let it dry completely.
- Sand lightly and apply a stain blocking primer.
- Tape the counter edge and trim with painter’s tape.
- Roll on two coats of semi gloss or high gloss paint, drying fully between coats.
- Seal with a clear water based polyurethane for extra splash protection.
Paint is the cheapest way to refresh a tired wall and it costs less than one box of tile. It works best away from the stove, where heat and grease are lighter. Navy and charcoal look rich. Pick a scrubbable finish and plan for touch ups every few years.
Pebble Stone Mosaic

| Point | Pebble Mosaic | Flat Tile |
|---|---|---|
| Texture | Rounded and bumpy | Smooth and even |
| Cleaning | Needs a soft brush | Quick wipe |
| Look | Natural and spa like | Clean and classic |
Pebbles bring the feel of a riverbank into the kitchen. Grease can settle between the stones, so keep this wall away from the stove and sink splash zones. Seal the surface well, and use a soft brush with mild soap for cleaning once a month. Best for a prep nook or coffee corner.
Mirrored Surface Wall

DO
- Choose antiqued or smoked mirror tiles, since they hide smudges better than clear glass.
- Place them where light can bounce, such as across from a window.
- Use a mirror safe adhesive that will not eat the reflective backing.
- Wipe with glass cleaner and a microfiber cloth.
DON’T
- Don’t install large mirrors right next to a hot burner.
- Don’t use harsh scrubbing pads that scratch the surface.
- Don’t cover the entire kitchen in mirror.
Mirrored tile doubles the light in dark kitchens and makes narrow rooms feel wider. I’ve noticed that antique finishes feel softer and less flashy than plain mirror. Keep the surface small, such as one strip between the counter and upper cabinets, so the effect stays classy.
Reclaimed Wood Planks

Cost: Medium
Time: One weekend
Skill Level: Intermediate
Best For: Rustic, cabin, and farmhouse kitchens
Wood adds warmth that tile cannot copy. Seal every plank with a water based polyurethane, front and back, to block moisture. Keep it at least a foot from the burners, and finish the bottom edge with a thin trim strip. Reclaimed boards give character, but check them for nails and pests first.
Quartz Slab Splash
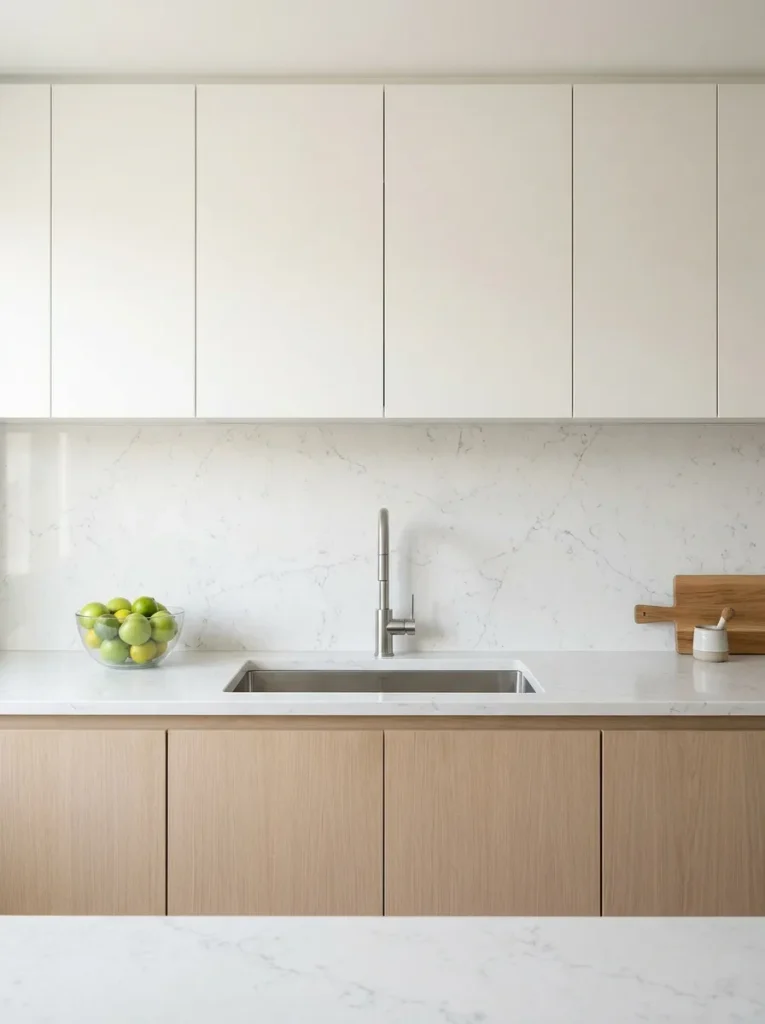
Few things clean up as fast as one continuous surface from counter to wall. Quartz slabs have no grout lines, so there is no joint for crumbs, grease or moisture to settle into. A quick wipe with a damp cloth finishes the job. That makes it popular with busy families.
Ask the fabricator to cut the slab four inches high for a classic look, or full height for a bold statement. Quartz contains resin, so keep trivets under hot pans and follow the maker’s heat guidelines near burners. Choose a slab that matches your counter exactly.
Framed Tile Accent

- Choose a simple white or neutral field tile, then add a strip of contrast color to frame the wall.
- Use a patterned tile inset behind the range, about 30 to 36 inches wide, as a focal point.
- Match the border color to something in the room, such as cabinet paint or hardware.
- Keep the frame width consistent on all sides, which makes the design look planned.
- Plan the layout on paper first to avoid awkward cuts at corners.
A frame tells the eye where to look. In my experience, kitchens with a bold inset look custom, even when the main tile is basic. Set the border first, then fill in the field tile around it, so the lines stay straight and the corners meet cleanly.
Checkerboard Tile Layout
Quick Tip:
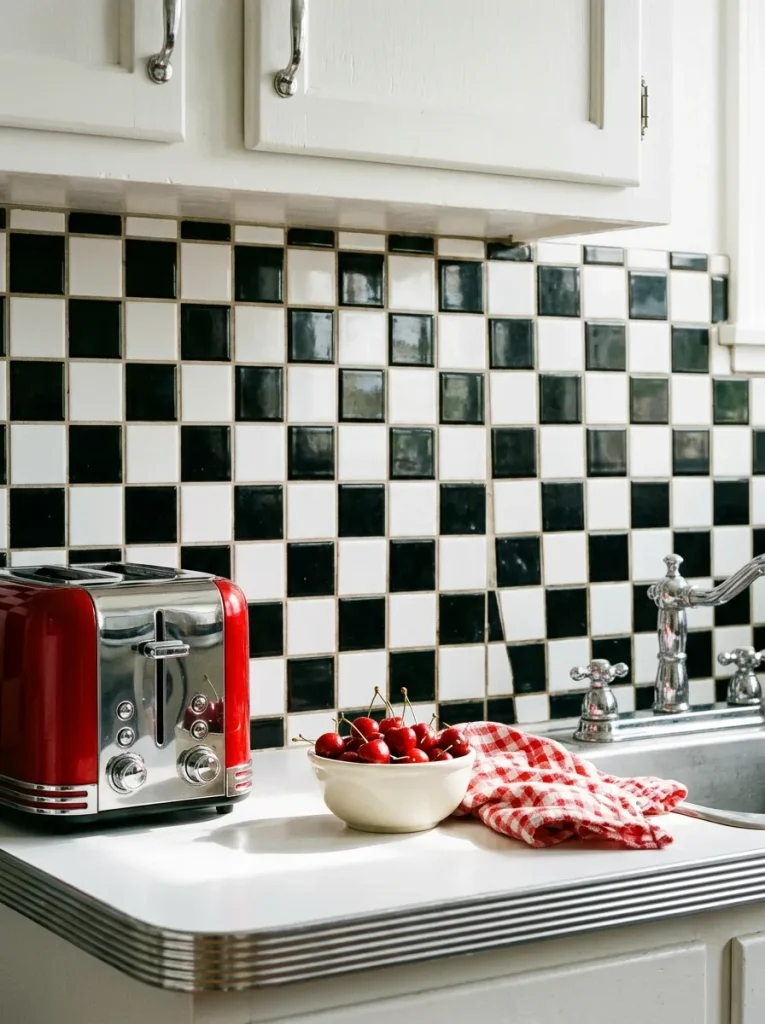
Mark a center line and begin with a full black tile in the middle, so the pattern stays balanced on both sides. Use 4 inch squares for a small wall and larger squares for a long one. Spacers keep the grid perfectly straight.
Checks bring instant retro energy, and they work best when the rest of the kitchen stays calm. Soft cream and sage tones also work if black and white feels too sharp. Keep the pattern limited to one wall, because too much contrast can make a small room feel busy.
Two-Tone Tile Mix

Before:
A single color tile can look flat once the novelty fades. The wall feels safe, but nothing about it feels personal.
After:
Two shades of tile, split with a clean line, give the wall layers and a custom look. The same budget now delivers a designer feel.
Conclusion
A new backsplash does not need a full renovation to change how your kitchen feels. Whether you love soft sage tile, classic subway, or a bold cement pattern, the right wall can make cooking feel brighter and more personal. I’ve seen how small changes like these can shift a room.
Use these kitchen backsplash ideas as a starting point, then pick the look that fits your space. Save this post on Pinterest so it is ready for your next project, try one idea this month, and share it with a friend who needs inspiration. Your dream kitchen starts with one wall.

One Comment