Garden Landscaping Ideas: 27 Lush Looks on a Budget
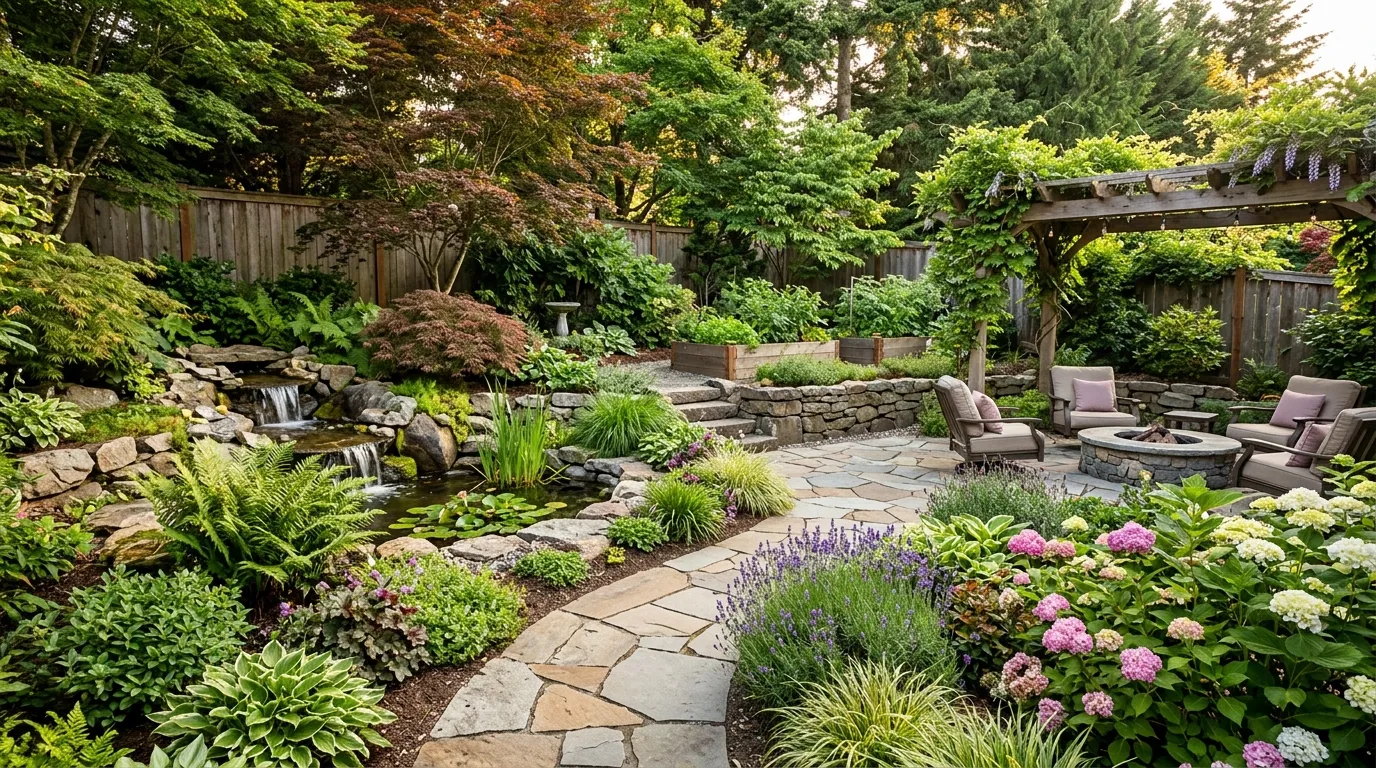
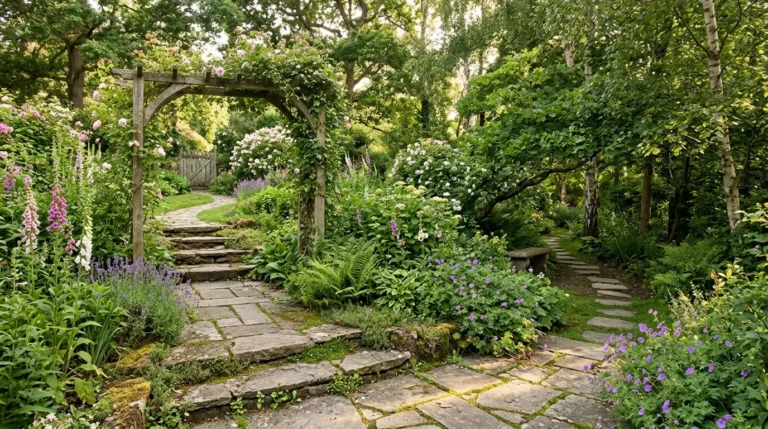
A beautiful garden doesn’t have to come with an expensive price tag. With a few clever choices, even a small or neglected yard can become a lush, welcoming outdoor retreat.
These Garden Landscaping Ideas will help you create a garden that feels polished, colorful and full of life without stretching your budget. From curved flower beds and gravel pathways to recycled planters, cozy seating corners and charming solar lights, you’ll find practical inspiration for outdoor spaces of different sizes and styles.
The secret is knowing where to spend, what to reuse and which plants offer the best value over time. Starting with a few simple improvements can make your garden feel more organized and inviting. Whether you’re a beginner gardener or simply looking for affordable ways to refresh your yard, these ideas will help you build a space you can enjoy throughout the seasons.
Curved Garden Borders

Curved borders can make even a small garden feel more natural and thoughtfully designed. Instead of straight lines that divide the yard into rigid sections, gentle curves guide the eye through different planting areas. You can create these shapes with a garden hose before digging, making it easy to experiment without spending anything.
Choose affordable edging materials such as reclaimed bricks, natural stones or locally available timber. Fill the borders with hardy perennials, flowering ground covers and a few evergreen plants for year round structure. Repeating the same plants along the curves creates a cohesive look without requiring a large collection of expensive flowers.
Layered Flower Beds

- Place tall plants at the back. Use ornamental grasses, sunflowers or affordable flowering shrubs to create height and a natural backdrop.
- Fill the middle layer. Plant medium-height flowers such as coneflowers, salvias or hardy daisies for seasonal color.
- Edge with low growers. Creeping thyme and suitable ground covers soften the front of the bed.
- Repeat plant varieties. Groups of three or five plants often create a more unified appearance than scattered individual flowers.
- Choose plants for your climate. Native and locally adapted varieties often need less water and maintenance once established.
Layering makes a garden look fuller without requiring dozens of different plants. Start with a few healthy specimens, then divide suitable perennials as they grow to fill empty spaces. Before planting, check each variety’s mature height and sunlight requirements so taller plants do not shade out flowers that need full sun.
Gravel Garden Paths
Quick Tip:
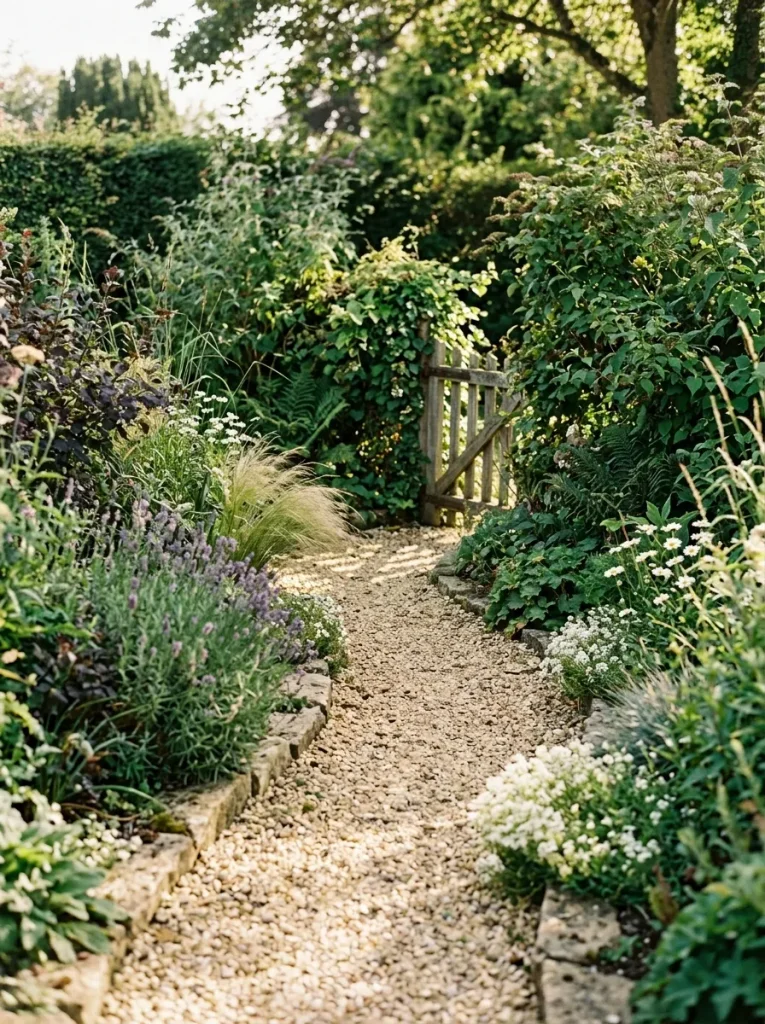
Use a permeable landscape fabric or an appropriate weed control layer beneath your gravel, following the material’s installation instructions. Prepare a firm, well drained base and add sturdy edging to keep stones from spreading into nearby beds. Choose gravel that feels comfortable underfoot and suits your local rainfall conditions.
A gravel path offers an affordable alternative to extensive paving while giving the garden a clear layout. Even a simple walkway connecting the back door to a seating area can make the whole yard feel more organized. I’ve noticed that repeating the same gravel color in several areas helps tie separate planting beds together. Keep the path wide enough for comfortable walking, and avoid placing loose gravel on steep slopes where rain could wash it away.
Read More: Small Garden Ideas: 26 Magical Ways to Maximize Space
Recycled Brick Edging

BEFORE
Flower beds blend into the lawn, making the garden look unfinished. Grass spreads into planting areas, and mowing around irregular edges becomes frustrating.
AFTER
Reclaimed bricks create a clear boundary between the lawn and flower beds. The garden looks tidier, and maintaining the edges becomes easier.
Recycled bricks are an excellent choice for inexpensive garden landscaping because they can often be sourced from leftover building materials or local salvage yards. Arrange them in a straight line or gentle curve, depending on your garden layout. Set the bricks on a firm, level base and check that they remain stable after heavy rain. Avoid using bricks that crumble easily or contain unknown coatings.
Vertical Plant Displays
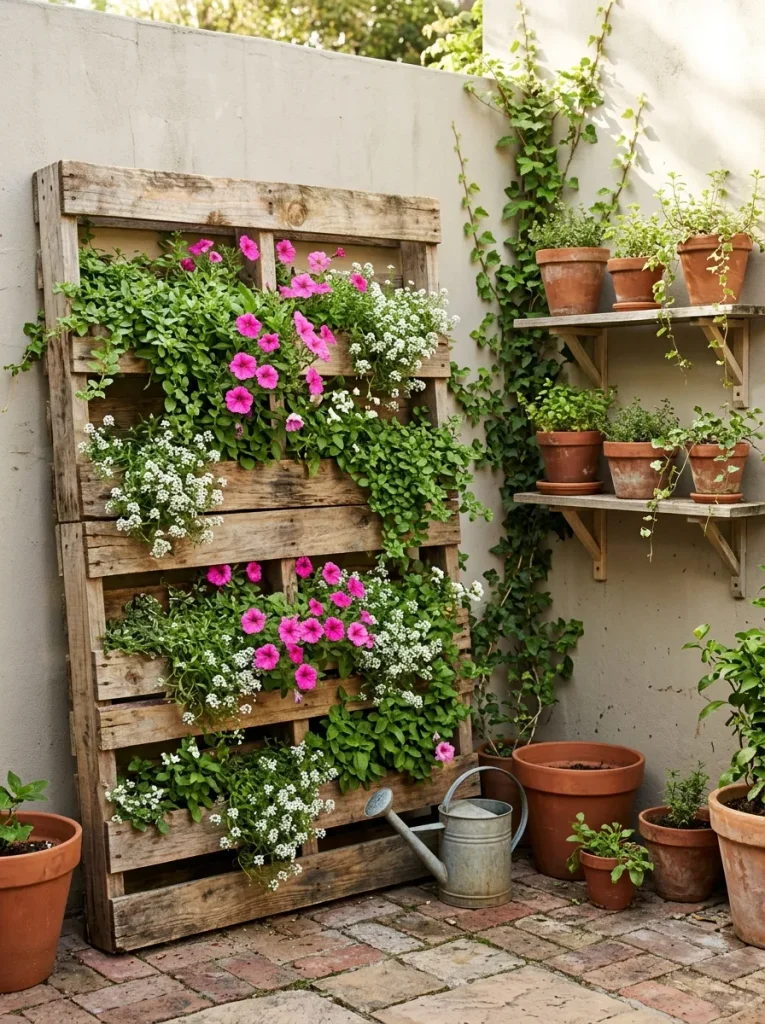
- Choose a sturdy structure. Repurpose a sound wooden ladder, pallet or wall mounted shelving unit designed for outdoor use.
- Select lightweight containers. Use affordable pots with drainage holes to prevent water from collecting around plant roots.
- Arrange plants by sunlight needs. Place sun-loving flowers in brighter positions and shade-tolerant foliage where direct sunlight is limited.
- Secure everything safely. Anchor tall displays properly and check that walls, shelves, and supports can handle the weight of wet soil.
Vertical planting makes use of overlooked walls and corners, especially in small gardens where ground space is limited. Herbs, trailing flowers and compact foliage plants can create a lush effect without requiring a large planting area. Choose materials that can withstand outdoor weather, and remember that elevated containers often dry out faster than garden beds. Regular watering and occasional feeding will help keep the display healthy.
Mulched Planting Beds

| Feature | Bare Soil | Mulched Beds |
|---|---|---|
| Weed control | More weeds may emerge | Helps suppress many weeds |
| Moisture | Soil dries more quickly | Helps retain soil moisture |
| Appearance | Can look unfinished | Creates a neat, consistent finish |
| Maintenance | Frequent weeding may be needed | Usually requires periodic replenishment |
Mulch is one of the simplest ways to make a garden look more established without buying additional plants. Organic options such as shredded bark, dry leaves and suitable wood chips can improve the soil as they decompose. Spread mulch evenly, usually about 2 to 3 inches deep, while keeping it away from plant stems and tree trunks. Choose a material suited to your plants and local climate.
Native Plant Gardens
DO
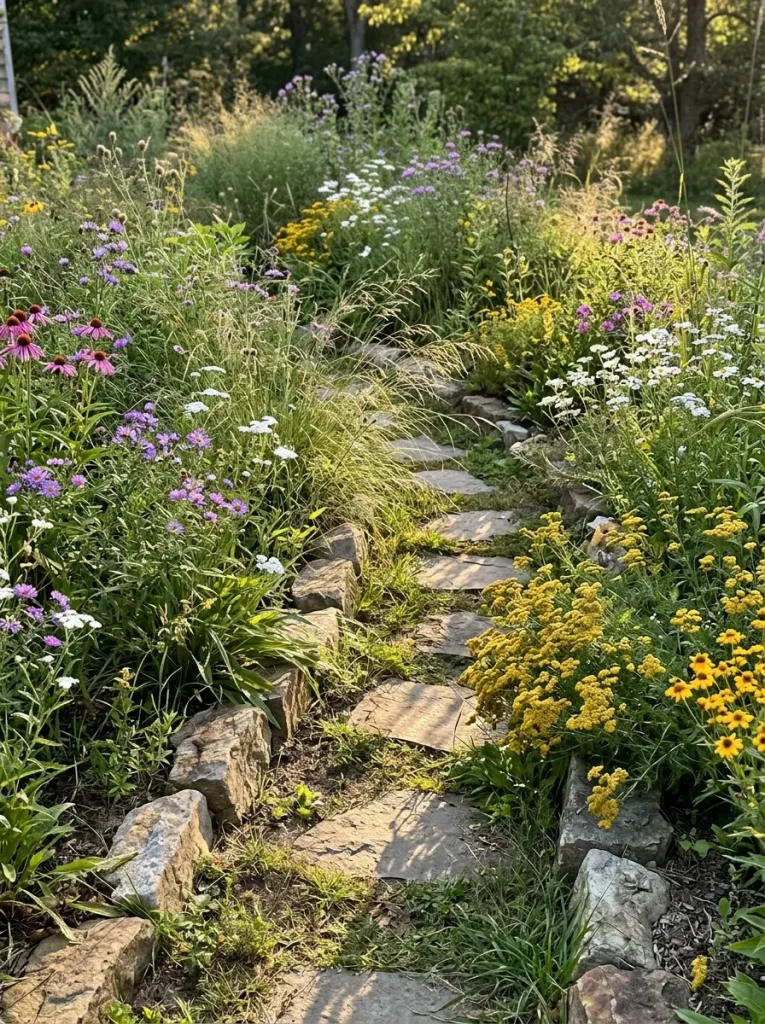
- Research native plants suited to your region and soil conditions.
- Group plants with similar water and sunlight requirements.
- Include flowering varieties that support local pollinators.
- Leave enough room for mature plants to spread naturally.
DON’T
- Buy plants simply because they look attractive in a nursery.
- Mix drought-tolerant plants with varieties that require constantly wet soil.
- Assume every native plant thrives in every part of your yard.
- Introduce invasive species that can spread into surrounding areas.
Native planting can reduce the need for frequent watering and replacement plants when you choose species adapted to your local conditions. Visit a reputable local nursery to find suitable options, then combine different flower shapes, foliage colors and heights for a natural layered effect. In my experience, grouping a few dependable varieties often creates a more cohesive garden than purchasing many unrelated plants.
Repurposed Container Gardens
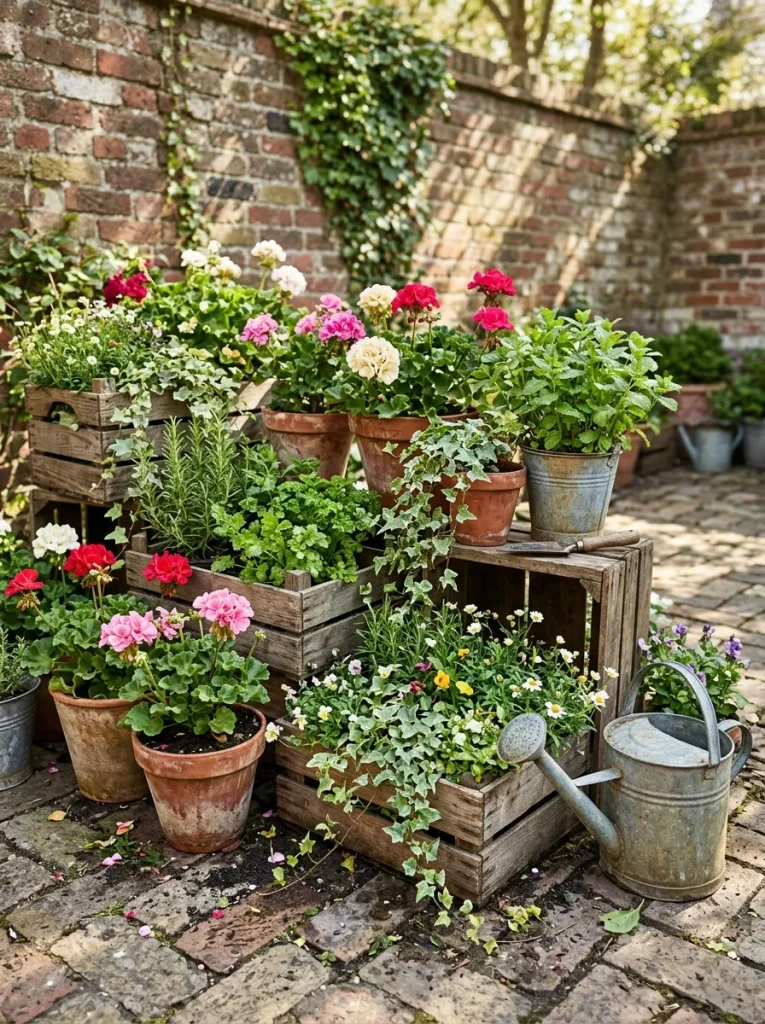
Cost: Low to moderate, depending on the containers you already own.
Time: One afternoon for arranging and planting.
Skill Level: Beginner friendly.
Best For: Patios, balconies, rental homes and small yards.
Result: Flexible planting displays that can be rearranged whenever your garden needs a fresh look.
Container gardening lets you add greenery without digging new beds or changing the existing landscape. Old pots, suitable wooden crates and sturdy metal containers can all work when they provide adequate drainage and enough room for roots. Check that repurposed materials are safe for growing plants, especially edible herbs and vegetables. Combine containers of different heights, but repeat a few colors or materials to keep the arrangement visually connected.
Simple Raised Garden Beds
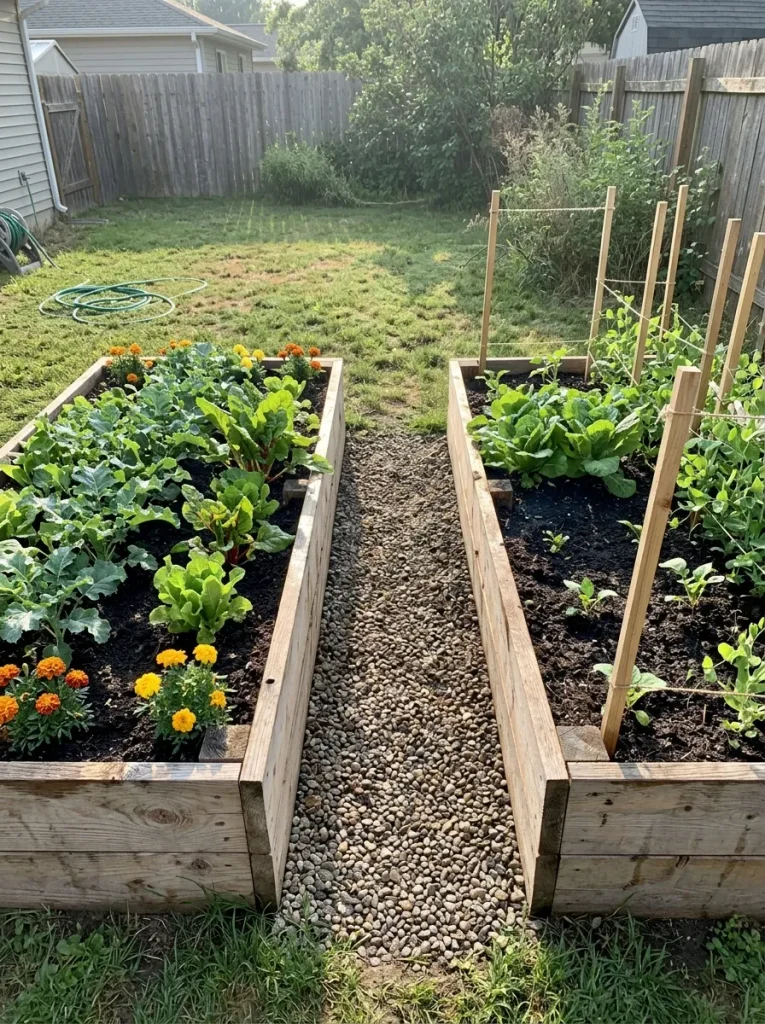
A raised bed can turn an awkward patch of ground into an organized, productive planting area. Use untreated, rot-resistant timber or another suitable material and choose a size that allows you to reach the center comfortably from the sides. Fill the bed with a soil blend appropriate for the plants you intend to grow. Position it where sunlight and water access suit your chosen crops.
Keep the design simple to control costs. A single well built raised bed can provide enough space for herbs, compact vegetables or colorful annual flowers without taking over the entire yard. If your budget is especially tight, start with one small bed and expand only when you know how much growing space you actually need.
Solar Garden Lighting

- Place solar path lights along walkways and entrance areas.
- Use a few accent lights to highlight a tree, textured wall or attractive planter.
- Choose warm-white lighting for a softer, more natural evening atmosphere.
- Position solar panels where they receive sufficient direct sunlight.
- Keep lights spaced consistently instead of filling every corner with fixtures.
Solar lighting adds evening charm without requiring new underground wiring or a large electricity supply. Start with the areas where illumination improves safety, such as steps and uneven paths, then add accent lights if your budget allows. Check battery quality, weather resistance, and charging requirements before buying. In shaded gardens, place solar panels in brighter spots or consider low-voltage lighting where appropriate.
Climbing Flower Arches

Quick Tip:
Choose a sturdy arch or trellis suited to the mature weight of your climbing plants. Secure it firmly in the ground before training stems along the supports. Select climbers suited to your climate, sunlight and available space and check whether they need regular pruning to remain manageable.
An arch creates a focal point that makes a garden feel more intentional, even when the rest of the yard is simple. Affordable metal supports, reclaimed timber or basic garden trellises can all provide structure for climbing roses, clematis, or suitable flowering vines. Train young stems gently and tie them with soft garden ties. Over time, the greenery adds height, shade and seasonal color without requiring extensive landscaping.
Small Water Features

BEFORE
A small garden corner contains empty ground, a few scattered pots and little visual interest. The space feels disconnected from the surrounding planting beds.
AFTER
A compact water bowl or small recirculating fountain becomes a focal point. Pebbles, moisture tolerant plants and nearby seating help the corner feel more complete.
You do not need a large pond to introduce the calming presence of water. A sturdy basin with a suitable small pump can create gentle movement, while a simple birdbath offers an even more affordable alternative. Keep the water feature stable, clean it regularly and prevent standing water from becoming a mosquito breeding site. If you use electricity outdoors, choose equipment rated for outdoor use and follow the manufacturer’s safety instructions.
DIY Garden Seating
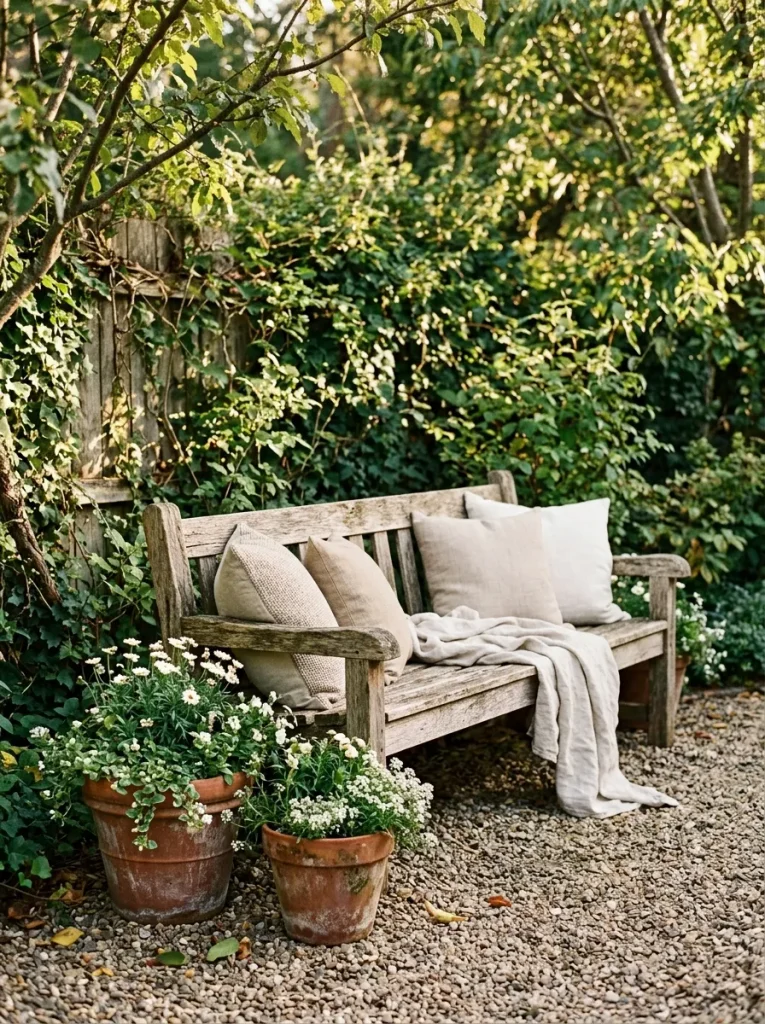
- Choose a practical location. Find a level spot with comfortable access and enough room to walk around the seating.
- Reuse sturdy materials. Restore a sound outdoor bench or repurpose suitable timber into a simple seat.
- Add inexpensive comfort. Use weather resistant cushions and washable covers in neutral or garden inspired colors.
- Soften the surroundings. Position a few planters beside the seat and add a small path leading toward it.
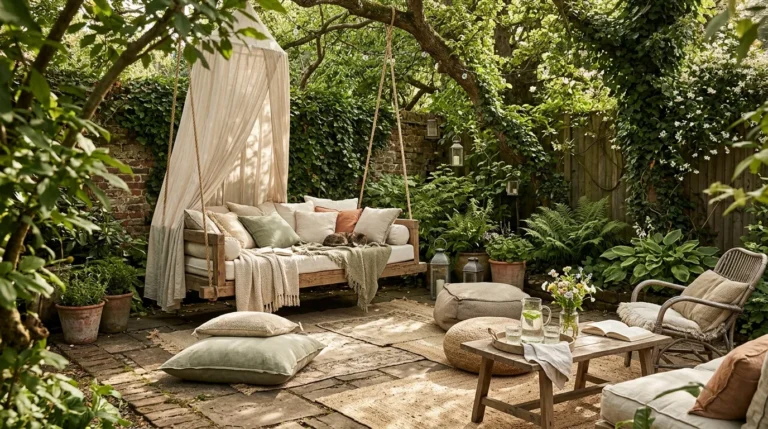
A seating area gives the garden a purpose beyond looking attractive. Even a modest bench can create a place for morning coffee, reading or enjoying the plants after a long day. Keep the furniture proportional to the available space and choose weather-resistant materials. If you are using reclaimed wood, inspect it for rot, splinters and unsafe coatings before making it part of your outdoor seating.
Mixed Evergreen Borders

| Design Element | Random Planting | Mixed Evergreen Border |
|---|---|---|
| Winter appearance | Some areas may look bare | Green structure remains visible |
| Plant selection | Often includes unrelated varieties | Uses complementary shapes and textures |
| Maintenance | Needs vary across many species | Can be simpler with compatible plants |
| Visual effect | May feel scattered | Creates a consistent foundation |
Evergreen borders provide structure during seasons when flowers fade or deciduous plants lose their leaves. Choose shrubs that suit your climate and mature space requirements, then mix upright, rounded and spreading forms for contrast. You can fill small gaps with affordable seasonal flowers or suitable ground covers. Avoid planting shrubs too close together, since overcrowding can restrict airflow and create unnecessary pruning work later.
Reclaimed Stone Features

DO
- Reuse clean, suitable stones from your property or a reputable salvage source.
- Group rocks in varied sizes for a natural arrangement.
- Set stones securely on a stable base.
- Combine stone features with plants that complement the surrounding landscape.
DON’T
- Stack heavy stones where they could topple onto a path.
- Block drainage routes with decorative rock arrangements.
- Use loose stones on steep slopes without proper stabilization.
- Collect stones from protected natural areas where removal is prohibited.
Reclaimed stone adds texture and a sense of permanence without the cost of elaborate hardscaping. Use smaller pieces to define flower beds and larger stones as accents near shrubs or ground covers. Before building a retaining structure, assess the slope and drainage needs because decorative edging is not a substitute for an engineered retaining wall. A few thoughtfully placed stones usually look more natural than a crowded collection.
Fragrant Herb Borders

Cost: Low to moderate, especially when starting with seeds or small plants.
Time: One afternoon to prepare and plant a short border.
Skill Level: Beginner friendly.
Best For: Sunny paths, kitchen gardens and small outdoor spaces.
Result: A fragrant, useful planting border with attractive foliage and herbs for cooking.
Herbs can combine practical value with the visual appeal of a landscaped garden. Rosemary, thyme, sage and lavender may work well together where the climate and drainage suit them, but check the needs of each species before planting. Most Mediterranean herbs prefer well-drained soil and plenty of sunlight. Keep them accessible for harvesting and avoid placing moisture loving plants beside herbs that prefer drier conditions.
Budget-Friendly Lawn Alternatives
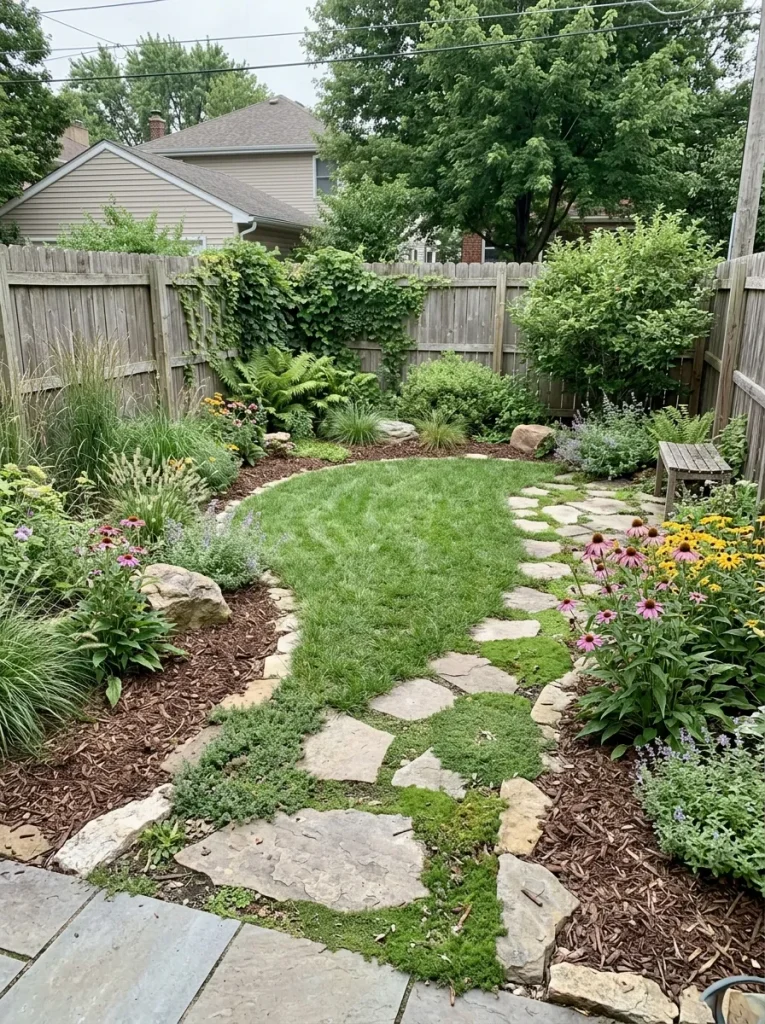
Replacing part of a thirsty or difficult-to-maintain lawn can reduce mowing and help you use garden space more efficiently.
- Ground covers: Choose suitable low-growing plants for areas with compatible light and moisture conditions.
- Mulched beds: Cover unused planting areas with organic mulch to help suppress weeds.
- Stepping stones: Create clear walking routes without paving the entire yard.
- Native planting: Use locally adapted species in areas where lawn struggles to grow.
- Small lawn sections: Keep grass where children, pets, or outdoor activities genuinely need it.
You do not have to remove every blade of grass to create a more interesting garden. Start with one difficult corner or narrow strip and replace it with a suitable alternative. Check whether the chosen ground cover can tolerate foot traffic, local temperatures, and your soil conditions. A combination of lawn, planting beds and pathways often gives you the best balance of appearance, maintenance and usability.
Colorful Recycled Planters

BEFORE
Mismatched containers sit scattered around the patio and faded pots make the planting display feel disorganized.
AFTER
A coordinated color palette brings the containers together. Fresh paint, varied heights, and healthy plants create a more deliberate display without replacing every pot.
Refreshing old planters is an inexpensive way to introduce color without changing the garden’s permanent features. Clean each container thoroughly and use paint appropriate for its material and outdoor exposure. Keep drainage holes clear, and avoid coatings inside containers used for edible plants unless they are specifically suitable for that purpose. Repeat two or three colors throughout the display for a balanced finish.
Cottage-Style Flower Patches

- Choose a small palette. Select three or four flower colors that complement each other.
- Mix flower heights. Place taller varieties behind medium flowers and lower-growing plants near the edges.
- Repeat favorite varieties. Plant several small groups rather than scattering single flowers throughout the bed.
- Include foliage plants. Green leaves provide visual continuity when flowers are not blooming.
- Plan for your climate. Select varieties suited to your growing season and available sunlight.
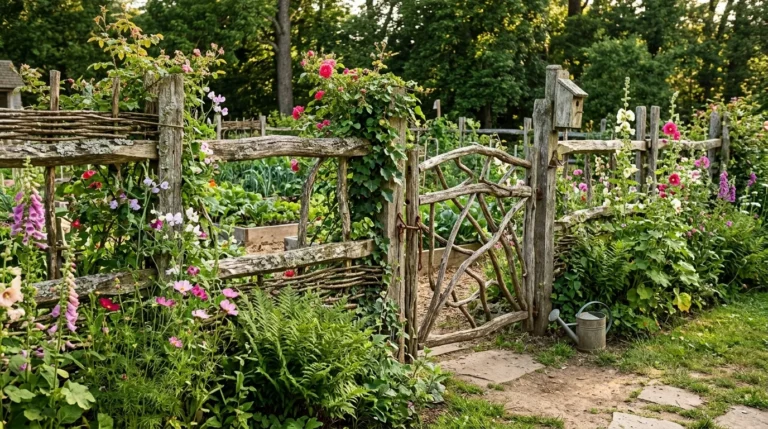
Cottage-style planting feels abundant because it combines different heights, textures, and flowering times. You can create this look gradually by starting seeds, dividing suitable perennials, or exchanging plants with other gardeners. Leave enough room for mature growth and provide support for varieties that tend to flop. A slightly informal arrangement works well, but a clear edge and repeated plant groupings keep it from looking neglected.
Defined Mulch Walkways

| Feature | Unfinished Path | Defined Mulch Walkway |
|---|---|---|
| Walking surface | Soil may become muddy | Wood chips provide a softer surface |
| Bed separation | Edges can become unclear | Timber or stone edging defines the route |
| Weed management | Weeds may spread freely | Preparation and mulch help suppress weeds |
| Upkeep | Surface may erode | Periodic topping up is usually needed |
A wood-chip walkway is often less expensive than paving and can suit informal gardens, vegetable plots, and shaded areas. Remove existing weeds, prepare the ground and install sturdy edging before spreading an appropriate layer of chips. Keep the path clear of deep puddles and avoid using slippery materials on steep slopes. Organic path surfaces decompose over time, so plan to replenish them as needed.
Compact Rock Gardens
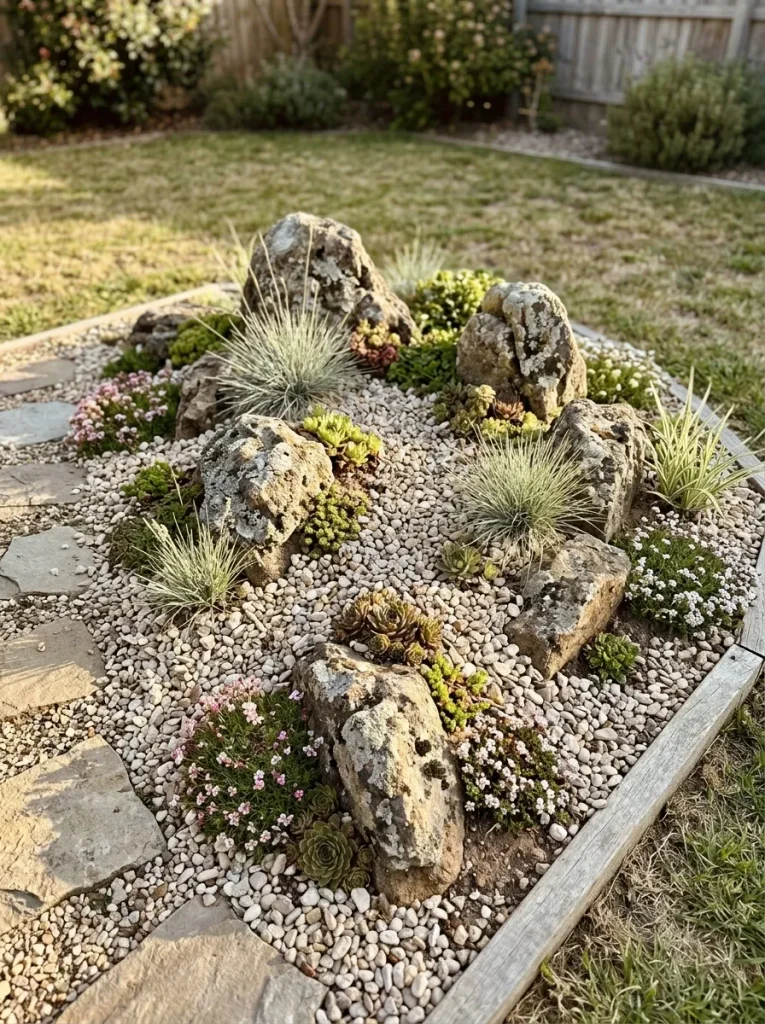
Quick Tip:
Choose plants according to your local rainfall, sunlight and winter temperatures. Many rock garden plants need excellent drainage, so avoid placing moisture sensitive varieties in heavy, waterlogged soil. Arrange the larger stones first, partially burying them for stability, then add smaller stones and plants around their natural contours.
Rock gardens can make awkward sunny corners or sloping areas more visually interesting. You do not need rare alpine plants or expensive imported stones to create one. Use locally available rocks and a small collection of plants that suit your conditions. Leave enough open space around each plant to show off the stone textures and check drainage carefully before adding varieties that are sensitive to excess moisture.
Privacy Planting Screens

DO
- Assess the height and width needed to screen the specific view.
- Choose plants suited to your climate and available sunlight.
- Use a sturdy trellis or suitable fencing to support climbers.
- Allow enough spacing for shrubs to reach their mature size.
DON’T
- Plant large trees too close to buildings, pipes or boundaries.
- Expect newly planted shrubs to provide instant privacy.
- Block drainage or access routes with a dense screen.
- Choose invasive climbers that can damage structures or spread beyond the garden.
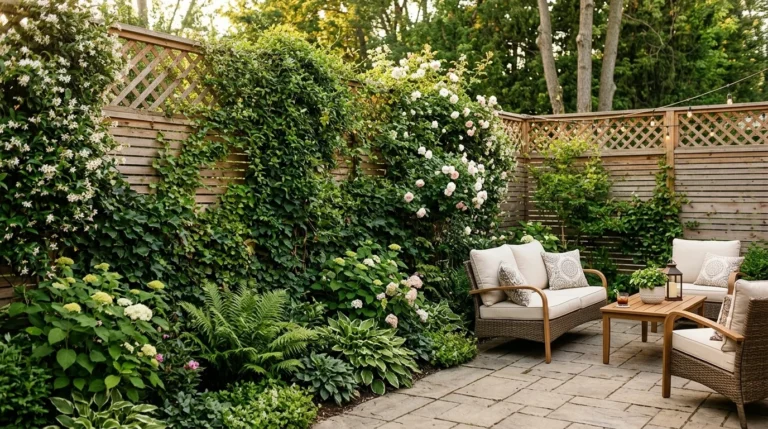
Privacy planting can make an outdoor space feel more secluded without the expense of a tall new fence. A combination of trellises, climbing plants and appropriately sized shrubs often works well. For faster coverage, choose suitable plants with a naturally dense growth habit, but check their mature dimensions before buying. Keep in mind that living screens need watering, pruning, and time to fill out.
Decorative Stepping Stones

BEFORE
Visitors walk directly across the lawn, creating worn patches where the grass struggles to recover. The route between garden areas is unclear.
AFTER
Stepping stones create a defined route between the entrance, seating area and planting beds. The lawn remains more protected and the garden gains an attractive visual feature.
Stepping stones can be an economical alternative to a fully paved path, particularly when you use suitable reclaimed slabs or locally available materials. Lay them on a firm base and space them according to a comfortable walking stride. Make sure each stone sits level and does not wobble underfoot. Leave enough room around the stones for mowing or trimming, and choose a surface that remains safe when wet.
Rainwater-Friendly Landscaping

Cost: Low to moderate, depending on drainage changes and water collection equipment.
Time: A few hours for a simple rain barrel installation, with longer work for reshaping beds.
Skill Level: Beginner-friendly for basic collection systems; professional advice may be needed for drainage modifications.
Best For: Gardens where managing rainfall and reducing potable water use are priorities.
Result: Better use of rainwater and a landscape designed to handle local rainfall more thoughtfully.
Water-conscious landscaping starts with observing where rain flows and where the soil stays wet. A properly installed rain barrel can collect roof runoff for later use, while suitable permeable surfaces help water soak into the ground. Keep collection containers covered with secure screens and follow local rules for rainwater harvesting. Never redirect runoff toward your house or a neighboring property without understanding the drainage implications.
Layered Garden Lighting
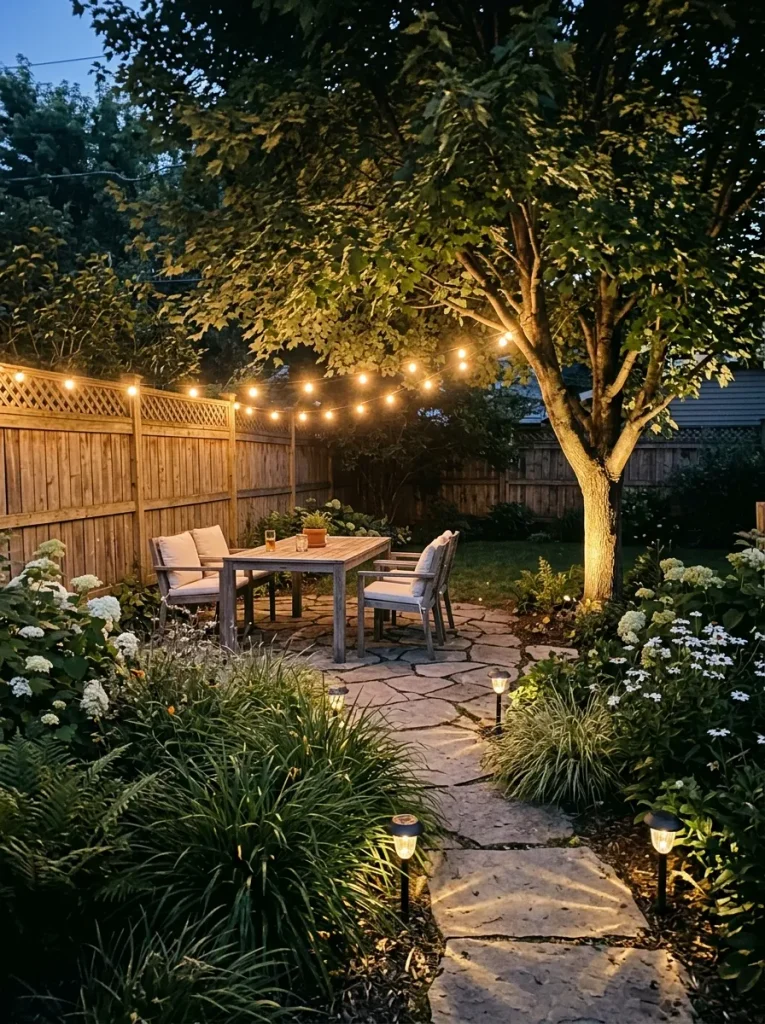
- Path lighting: Mark walkways and steps with evenly spaced fixtures.
- Accent lighting: Highlight a distinctive tree, textured wall or attractive planting group.
- Seating lights: Use suitable outdoor string lights to create a gentle glow above a patio.
- Energy-conscious choices: Select solar or efficient outdoor-rated LED fixtures where practical.
- Simple controls: Use timers or manufacturer-approved controls to avoid leaving lights on unnecessarily.
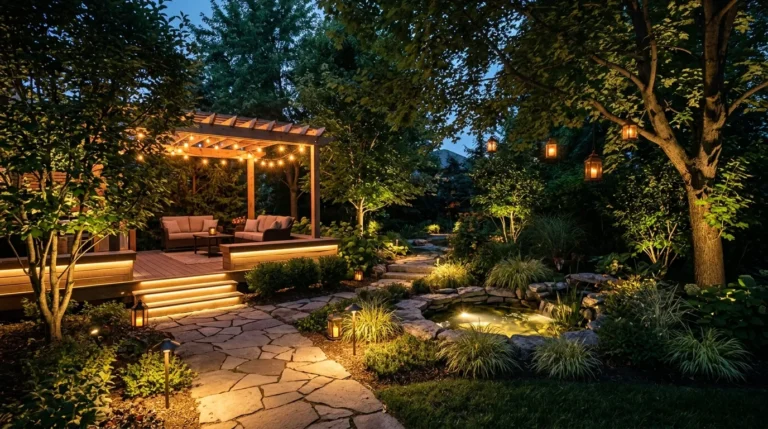
Layered lighting makes a garden useful after dark while highlighting its most attractive features. Begin with safe illumination for routes and level changes, then add a small number of accent lights to create depth. Avoid aiming bright fixtures into neighboring windows or directly into people’s eyes. Weather resistance, correct installation and appropriate electrical protection matter more than the number of lights you buy.
Garden Trellis Dividers
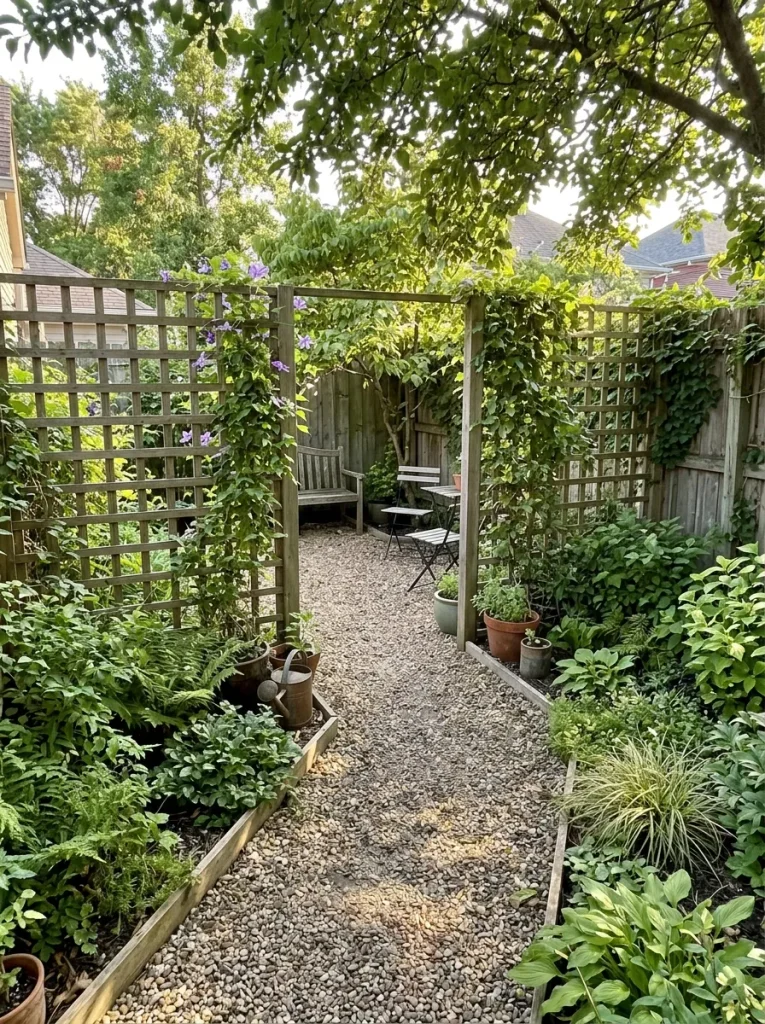
- Identify the zones. Decide whether you want to separate seating, vegetables or a quiet planting corner.
- Select a suitable trellis. Choose weather resistant materials and a height appropriate for your space.
- Anchor it securely. Use suitable fixings and supports that can handle wind and the mature weight of the plants.
- Train climbing plants. Guide stems through the lattice without tying them too tightly.
- Keep access open. Position the divider so it does not obstruct paths or reduce necessary sunlight.
A trellis divider introduces height and structure without making a small garden feel completely enclosed. It can provide partial screening, support climbing plants and create the impression of separate outdoor rooms. Use a simple design that complements existing fences or furniture. Before installation, check boundary rules and underground services and choose plants that will not overwhelm the structure as they mature.
Mixed-Texture Garden Borders

Cost: Low to moderate, especially when dividing established plants or starting with small specimens.
Time: One afternoon to prepare and plant a modest border.
Skill Level: Beginner-friendly with basic plant selection and spacing.
Best For: Garden edges, fence lines and areas that need more visual depth.
Result: A fuller-looking landscape with contrast, structure and seasonal interest.
A mixed-texture border brings a garden together by combining plants that look different even when they are not flowering. Pair broad leaves with fine grasses, rounded shrubs, and low ground covers to create contrast without relying on expensive blooms. Repeat a few varieties throughout the border so the design feels connected. Check mature sizes and growing requirements, then fill the bed gradually as your budget allows.
Conclusion
Creating a beautiful garden doesn’t require expensive materials or a complete landscape makeover. Small changes, such as defining flower beds, adding affordable plants, refreshing old containers or creating a simple gravel path, can make your outdoor space feel more inviting.
With these Garden Landscaping Ideas, you can choose projects that fit your budget, gardening experience and available space. Start with one area, reuse materials whenever practical and select plants suited to your local climate.
Save this article on Pinterest for inspiration, try your favorite idea and share it with someone who dreams of a beautiful garden on a budget. Your garden can grow into something special, one thoughtful improvement at a time.
One Comment