25 Kitchen Island Ideas That Upstage Everything Else
Your kitchen island should be the first thing guests notice and the last place they want to leave. The right kitchen island ideas can make that happen, whether your space is tiny, rented or ready for a full remodel.
Choosing one can feel overwhelming. Should it have seating, a sink or extra storage? Which finish will hold up to daily life? In my experience, the hardest part is seeing what works before you spend any money.
This article shares 30 clear, practical ideas, from bold colors and rich materials to smart storage and cozy seating. Each one includes real tips on sizing, cost and care, so you can plan with confidence. Scroll through, save your favorites and find the island that fits how you actually live.
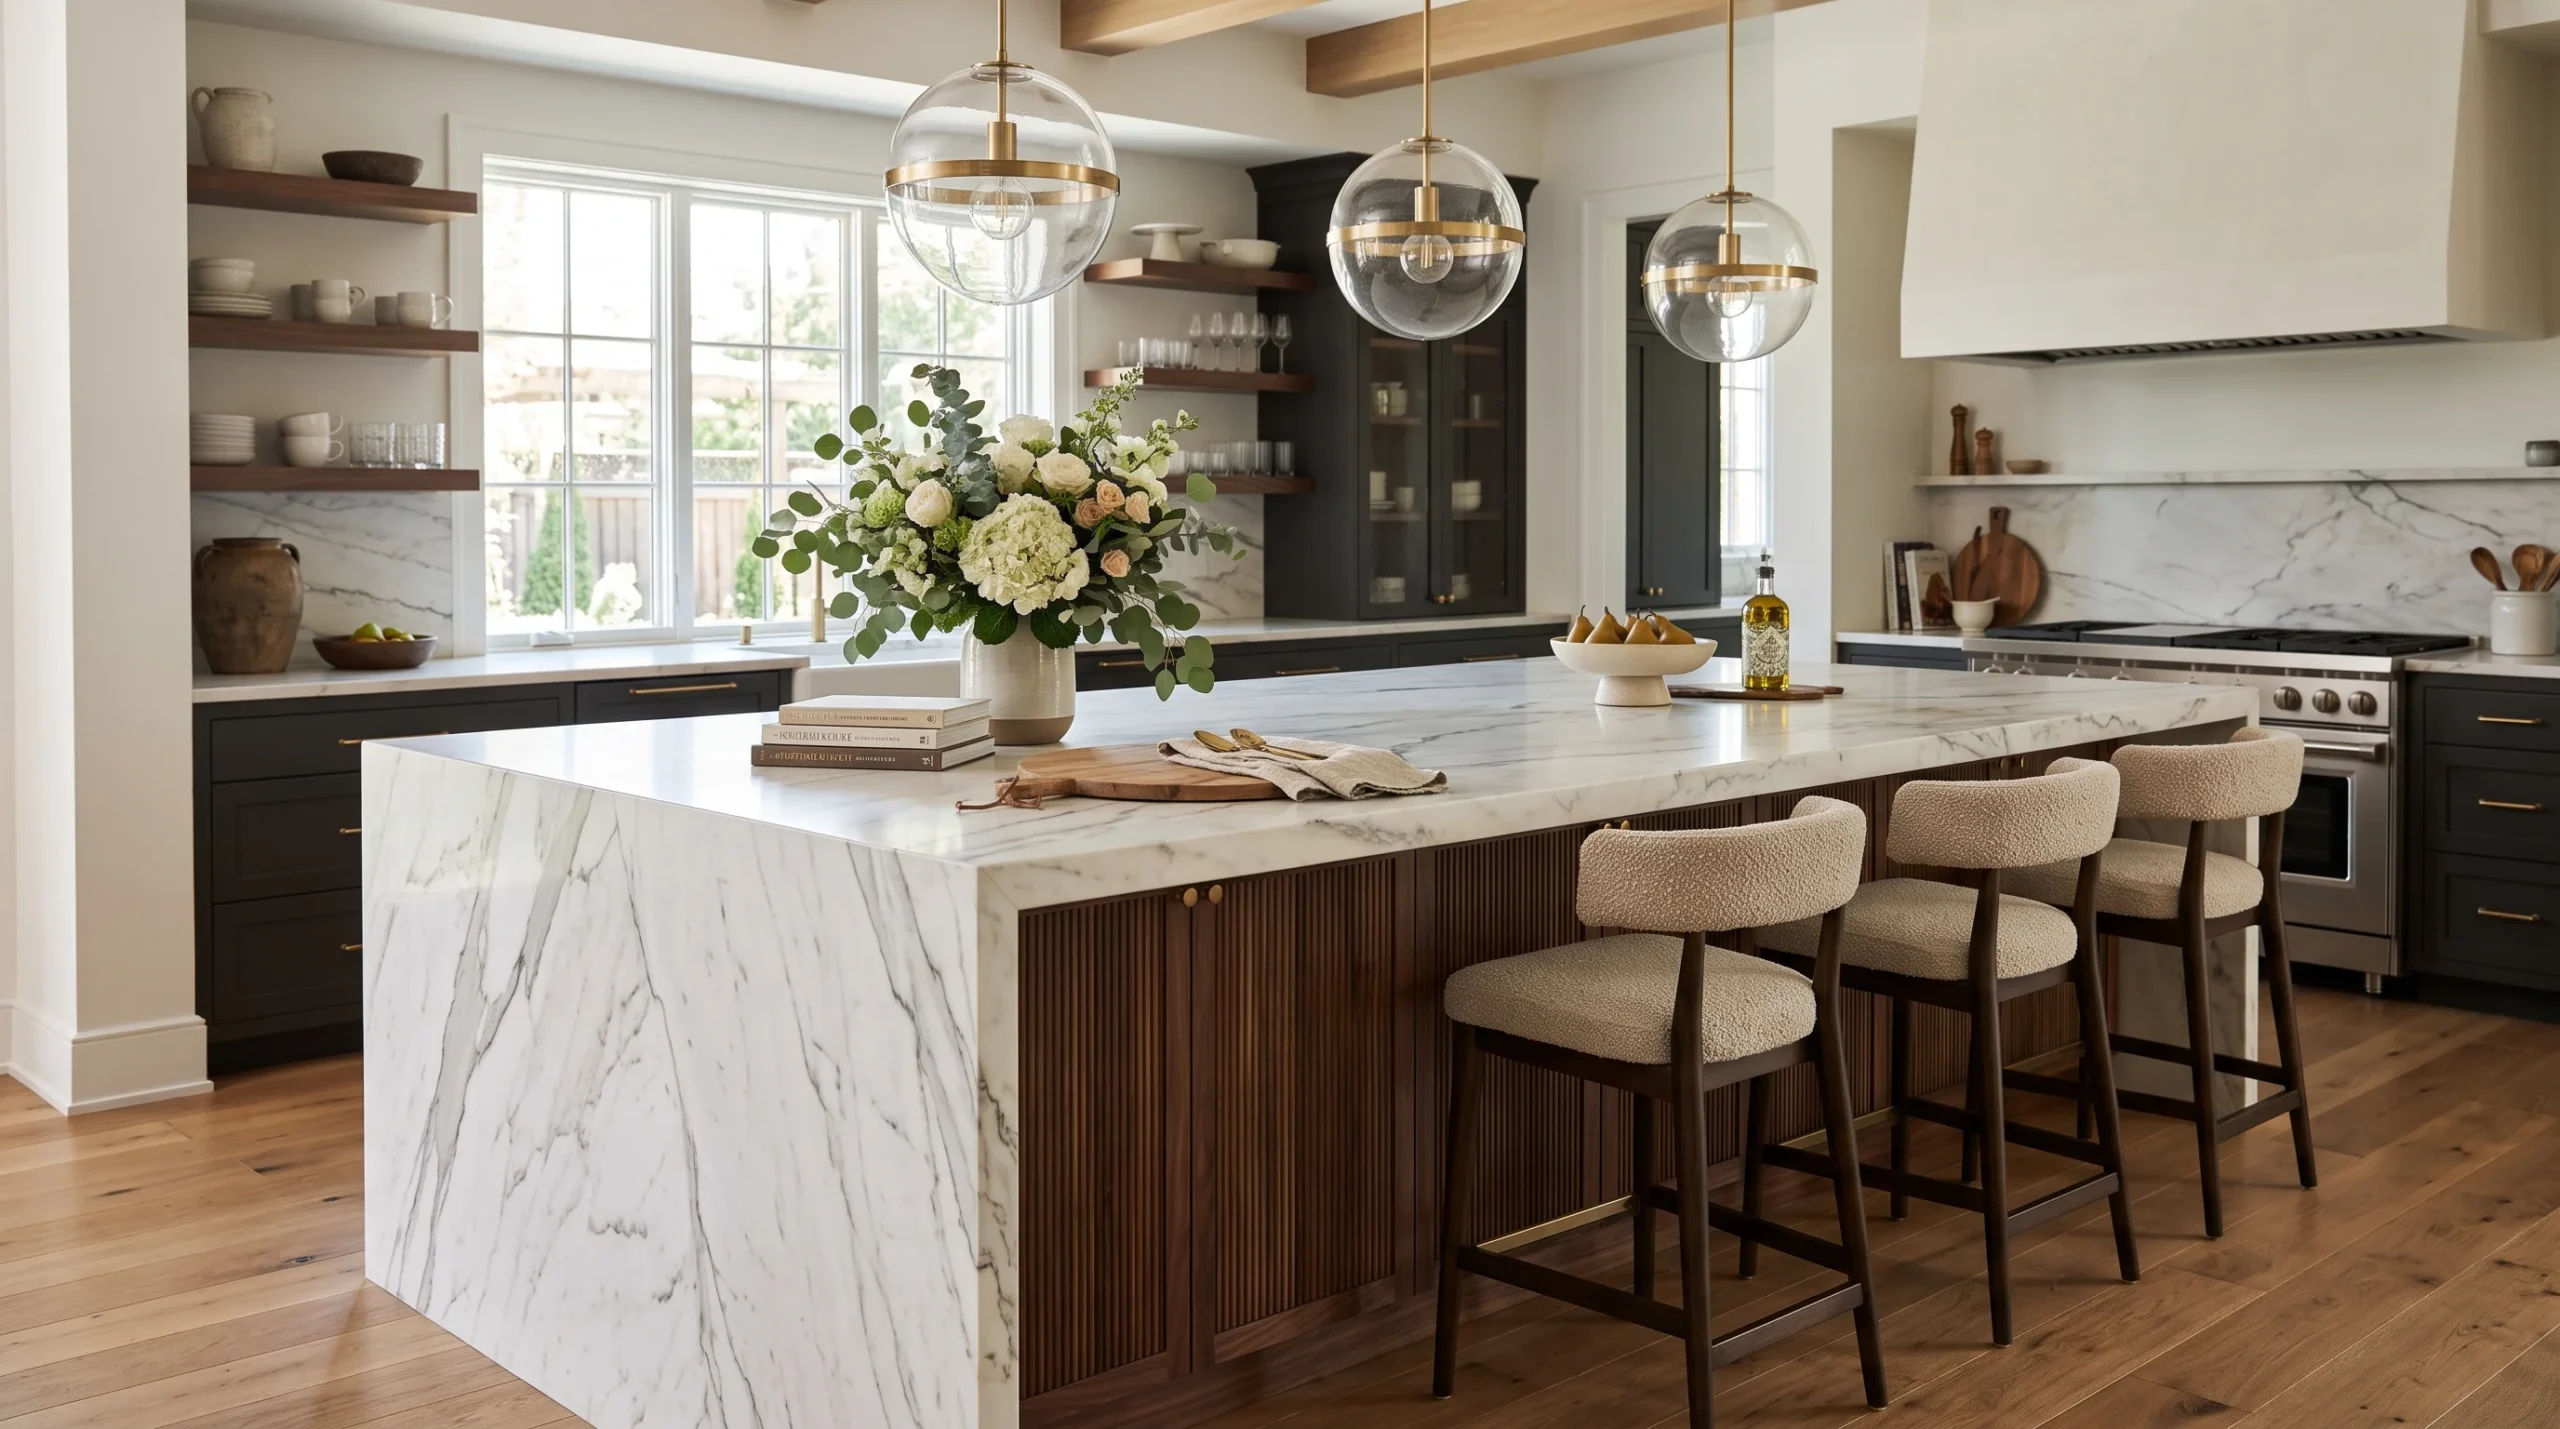
Waterfall Edge Marble

Stone that spills down the sides turns a plain island into the room’s focal point. The slab runs past the countertop and drops straight to the floor, so the whole piece reads as one solid block. In my experience, guests touch it before they sit down.
Choose quartz if you cook often, since it resists stains and needs no sealing. Real marble etches from lemon juice and wine, so reserve it for a light use kitchen. Ask your fabricator to mitre the corners and match the veining, because a clean seam is what makes the look work.
Two-Tone Cabinetry

- Paint the island a deep shade like navy, forest green or charcoal. Keep the surrounding cabinets light so the island stands out.
- Match the island color to one small item nearby, such as a rug or a vase, so the room feels planned.
- Stick to two colors only. A third one starts to look busy fast.
- Swap the island hardware to brass or matte black for extra contrast.
Contrast does the heavy lifting here. Plain white kitchens can gain real personality from a single painted island, and the cost is a few cans of cabinet paint. Test a sample on a door panel first, then check it at night under your own bulbs.
Butcher Block Top

Quick Tip:
Oil the wood with food safe mineral oil every month for the first three months. After that, once every few months keeps the grain sealed and rich. Wipe spills right away so water never sits on the surface.
Wood brings warmth that stone cannot copy. I’ve noticed that a butcher block island becomes the spot where everyone gathers, because it feels friendly under your hands. Small scratches and dents add character over time and a light sanding brings the surface back to new whenever you want.
Read More: Dream Pantry? 25 Kitchen Pantry Ideas to Try Today
Built-In Wine Rack

Before: Bottles crowd the counter or hide in a dark cabinet across the room. Every dinner party starts with a search.
After: A slim rack on the island end keeps bottles in reach and on display. Guests can pick one without opening a single door.
Measure the end panel first. A standard bottle needs about four inches of width, so a three by three grid holds nine bottles in roughly a foot of space. Store bottles on their sides to keep corks damp. I’ve seen this work well on shallow ends where deep cabinets waste space.
Open Shelf End

- Choose the island end that faces the dining area, not the cooking side.
- Install two or three shelves about 12 inches deep, spaced 10 to 12 inches apart.
- Fill the lowest shelf with baskets to hide clutter.
- Style the upper shelves with cookbooks and one small plant.
Open shelving gives a blocky island a lighter profile. Keep the items in a tight palette of two or three colors so the shelves read as styled, not stuffed. Cookbooks you actually use look better than decor bought just to fill gaps. Dust them weekly.
Rolling Cart Island

| Feature | Fixed Island | Rolling Cart |
|---|---|---|
| Cost | High | Low |
| Moves when needed | No | Yes |
| Installation | Contractor | None |
| Storage | Large | Moderate |
Small kitchens and rentals benefit most. Pick a cart with locking wheels and a top at least 36 inches high, so it matches standard counters. Renters can roll it against a wall after dinner and gain a full walkway. Check the weight limit before loading it with appliances.
Seating Overhang

Do:
- Leave 12 inches of overhang for comfortable knee space at counter height.
- Allow 24 inches of width per stool.
- Support any overhang beyond 10 inches with hidden brackets or corbels.
- Choose stools with a back if guests will sit through long meals.
Don’t:
- Don’t skip bracket support on stone, since long overhangs can crack.
- Don’t place stools where a fridge or oven door swings open.
- Don’t buy stools before checking that the seat sits 10 to 12 inches below the counter.
Among all kitchen island ideas, seating gives you the biggest daily payoff. Kids do homework there, friends linger with coffee and the cook never feels alone. People choose the island over the dining table once the overhang is comfortable. Get the legroom right and the rest follows.
Pop-Up Power Outlets

Cost: Medium
Time: Half a day
Skill Level: Licensed electrician
Best For: Remote work and small appliances
Cords snaking across the counter ruin a clean surface fast. A pop up outlet hides inside the island and rises with a gentle press. Local codes often require outlets within reach of an island, so confirm the rules before cutting stone. Hire a licensed electrician and plan the wiring before the countertop goes in.
Sink Island Setup
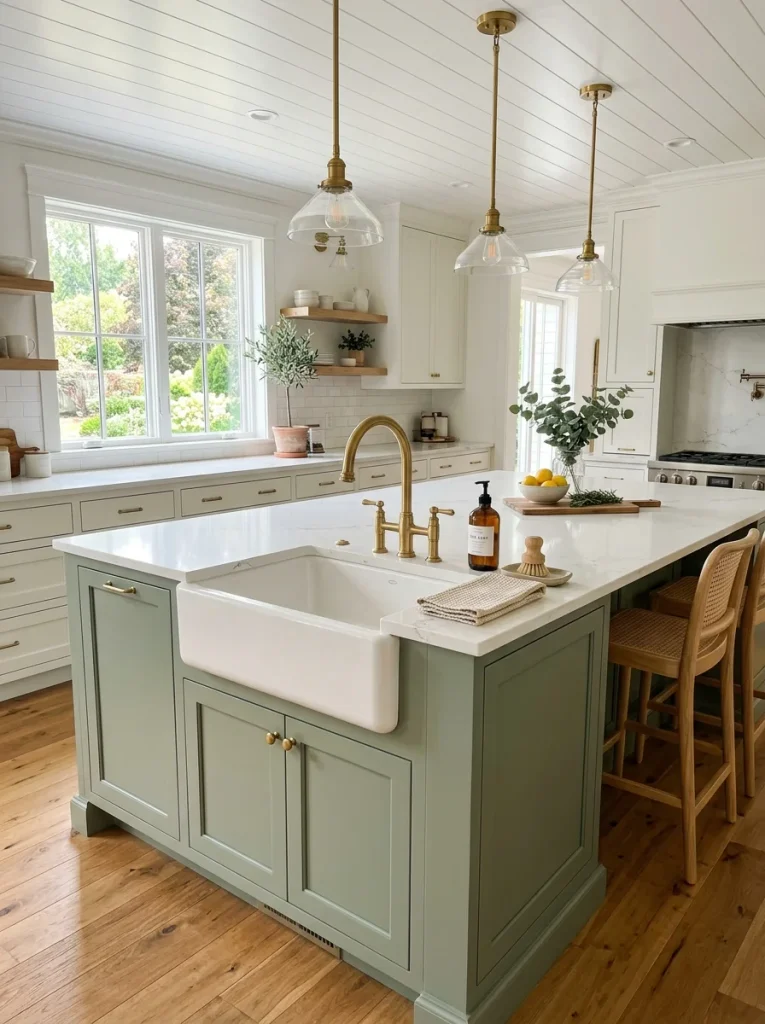
Washing dishes with your back to the room gets old quickly. A sink in the island turns you around to face family, guests and the view. It also frees the perimeter counters for prep and appliances. Plan for plumbing early, since moving pipes costs more than any finish.
Keep at least 18 inches of counter on one side of the sink for drying and stacking. Add a deep single bowl so large pots fit. Consider a raised back edge or splash guard on the seating side, so guests stay dry and clear of dishwater.
Cooktop Island

- Choose induction if you want a cooler surface and easier cleanup. Spills do not bake on.
- Plan a ventilation path early. A downdraft vent or a ceiling hood both work, but each needs ducting.
- Leave at least 15 inches of counter on each side of the cooktop for hot pans.
- Face the cooktop toward the room so you can talk to guests while you cook.
Cooking at the island turns dinner into a shared event. Families tend to gather around it with drinks while one person sautés and the room feels alive. Keep the burners well away from the seating edge and add a small guard if kids sit nearby.
Curved Corner Design

Quick Tip:
Ask your fabricator for a corner radius of two to three inches. Tighter curves look sharp, while wider ones can waste counter space. Request a cardboard template before the stone is cut.
Hip bumps happen in busy kitchens, and square corners leave bruises. Rounded edges soften traffic flow, especially in tight walkways under four feet wide. In my experience, families with young kids notice the difference within a week. The shape also relaxes a room full of straight lines.
Glass Pendant Lighting

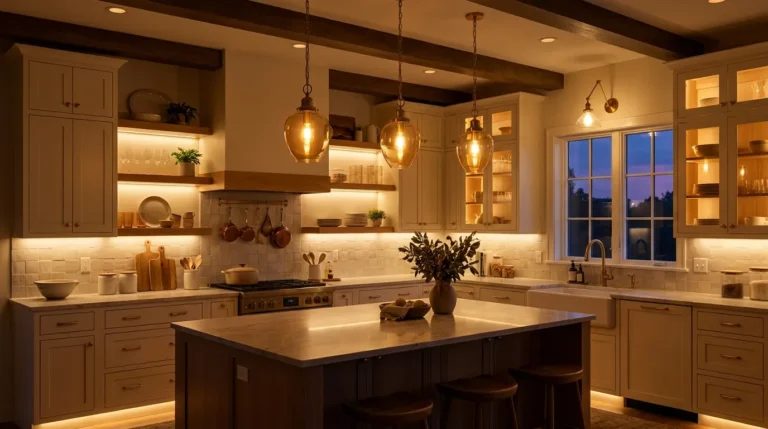
Before: One recessed light casts flat shadows across the counter. Chopping happens in your own shadow, and the island fades into the ceiling.
After: Three pendants hung over the island bring light right where you work. The glow also gives the room a defined center at night.
Hang pendants 30 to 36 inches above the countertop so they light the surface without blocking views. Space them about 24 to 30 inches apart. Clear glass keeps sightlines open, which suits low ceilings. Put them on a dimmer, and evenings feel softer right away.
Reclaimed Wood Base

- Build a simple frame from standard lumber or start with a stock cabinet base.
- Brush the reclaimed boards clean, pull any nails and let them dry indoors for a week.
- Seal each plank with a matte water based polyurethane.
- Screw the boards to the frame from the inside so no fasteners show.
Old wood carries history that new lumber cannot fake. Source boards from salvage yards or local demolition sales and ask where they came from. Skip planks with old lead paint or heavy chemical treatment. A matte finish keeps the weathered look while making wiping easy.
Narrow Galley Island

| Feature | Wide Island | Narrow Island |
|---|---|---|
| Depth | 36 to 42 inches | 16 to 24 inches |
| Walkway left | Often too tight | Comfortable |
| Best seating | Three or more stools | One or two stools |
| Storage | Deep cabinets | Shallow shelves |
Galley kitchens often feel too tight for an island. A slim version fixes that without blocking movement. Keep at least 36 inches of clearance on each side and 42 is better. A 20 inch deep island still gives enough prep space for everyday cooking and snacks.
Beadboard Panel Sides

Do:
- Use moisture resistant panels with a semi-gloss paint.
- Start the first panel from a corner so the grooves line up.
- Caulk every seam before painting for a smooth finish.
- Paint a sample first and check how it looks beside your wall color.
Don’t:
- Don’t mix beadboard widths on the same island.
- Don’t skip priming, since bare wood soaks up paint and looks patchy.
- Don’t choose thin boards that dent when stools bump them.
Beadboard brings texture without adding any new storage or plumbing. It hides scuffs from stools and kicked toes better than flat paint does. Cottage kitchens go from plain to charming with one weekend of panel work. Pair it with simple knobs and keep the countertop clean.
Dual-Level Counter

Cost: Medium to high
Time: One to two weeks with a fabricator
Skill Level: Professional install
Best For: Hiding messy prep from seated guests
A raised ledge acts like a screen. Guests sit at bar height while dirty bowls and cutting boards stay on the lower level. Keep the step about 12 inches above the working surface. Hosts love this layout, because the mess never faces the dining side.
Fluted Wood Panels

Straight grooves catch light and cast tiny shadows that change through the day. That small movement gives a flat island front real depth. Fluted panels also hide fingerprints and light scuffs better than smooth finishes. Of all the kitchen island ideas here, this one adds texture fastest.
Choose oak or walnut for warmth, or paint the flutes the same color as the cabinets for a quiet look. Pre made fluted sheets save hours of cutting and fit most standard bases. Seal the grooves well and wipe them with a soft brush so dust never settles inside.
Matte Black Island
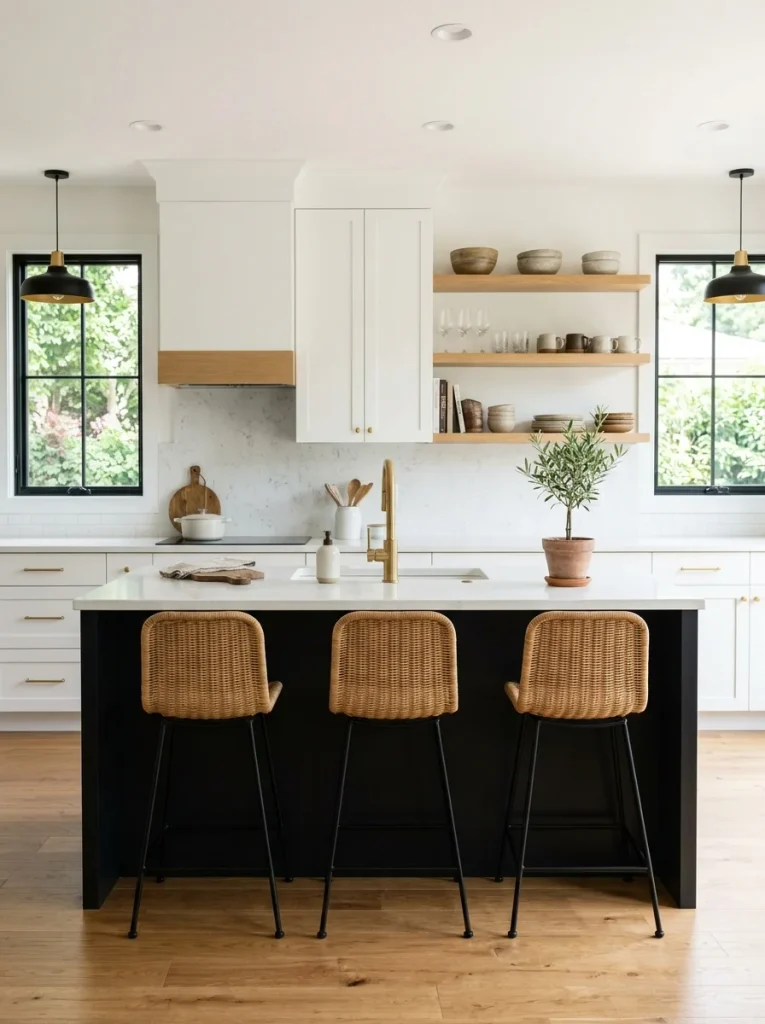
- Pick a true matte finish with a satin sealer. Glossy black shows every smudge.
- Pair black with warm materials such as oak, brass or rattan so the room stays inviting.
- Repeat black once or twice elsewhere, like in the faucet or lighting, to tie the room together.
- Choose a light countertop. A dark base with a dark top feels heavy.
Black anchors an island in a way no other color does. It gives a bright kitchen a strong, graphic outline. This look works best in kitchens with plenty of daylight. In darker rooms, pick charcoal instead and bring in some warm lighting to soften the edges.
Concrete Countertop

Cost: Medium
Time: One to two weeks including curing
Skill Level: Professional recommended
Best For: Industrial and modern kitchens
Concrete has an honest, handmade look no factory slab can match. Every pour is slightly different. Seal it twice a year, because untreated concrete stains from oil and wine. In my experience, hairline cracks are normal and add to the charm, so go in expecting them.
Pull Out Trash Drawers

Nobody wants a trash can standing in the middle of the kitchen. A pull out drawer hides it behind a clean, flat cabinet front. Choose a double bin for trash and recycling and place it near the prep zone so scraps travel only a few steps.
Look for soft close slides rated for at least 75 pounds, since full bins get heavy fast. Choose bins with lids to hold odors in. The side facing the sink works best, since you rinse and toss in one motion. Measure the bins before ordering the cabinet.
Island With Banquette

- Build the bench 17 to 18 inches high with a seat depth around 18 inches.
- Drop the table section to 30 inches so it sits comfortably with the bench.
- Pick performance fabric or leather that wipes clean, since crumbs and spills are guaranteed.
- Use the bench base for deep drawers, which suits seasonal storage.
A banquette turns the island into a proper dining spot. A bench seats more people in less floor space than separate stools do. Kids and guests also stay longer on a bench than on a stool. Tape the layout on the floor first, then walk through it.
Round Island Shape

Cost: High
Time: Two to three weeks
Skill Level: Custom fabricator
Best For: Open floor plans and large kitchens
A circle removes every sharp corner, so people move around it with ease. It also makes conversation easier, because everyone faces the middle. Leave about 42 inches of clearance all around. Round shapes need more floor space than rectangles, so measure carefully in smaller kitchens.
Terracotta Tile Base
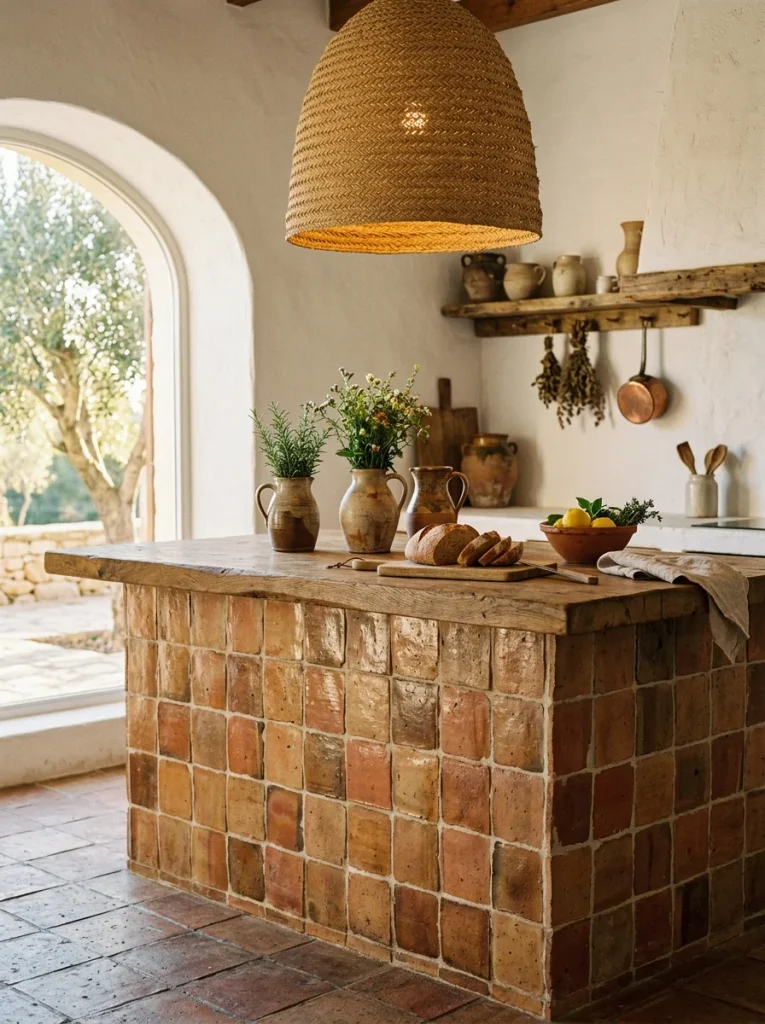
Clay tones make a kitchen feel sun-warmed even on gray days. Terracotta tiles on the island front bring that glow without repainting a single wall. Handmade tiles vary in shade, which is the point. The imperfections look intentional once the whole front is covered.
Use unglazed tiles only on the front panel, not the countertop, since porous clay soaks up spills. Seal them with a penetrating sealer and choose a warm gray grout. Order ten percent extra tiles so a replacement is always possible. Wipe with a damp cloth, and avoid acidic cleaners that dull the clay.
Table Style Island

- Choose turned or tapered legs at least 3 inches thick so the island feels sturdy.
- Leave the lower area open for baskets, which keeps the look light.
- Stain the top and paint the legs to give the piece a collected feel.
- Anchor the piece to the floor if kids climb on it, since freestanding tables can tip.
An island that looks like furniture softens a kitchen full of cabinets. It feels collected over time, not installed on one day. Open space underneath also lets the floor show, which makes small rooms look bigger. Style the lower shelf with two baskets and one wooden bowl.
Vintage Dresser Island
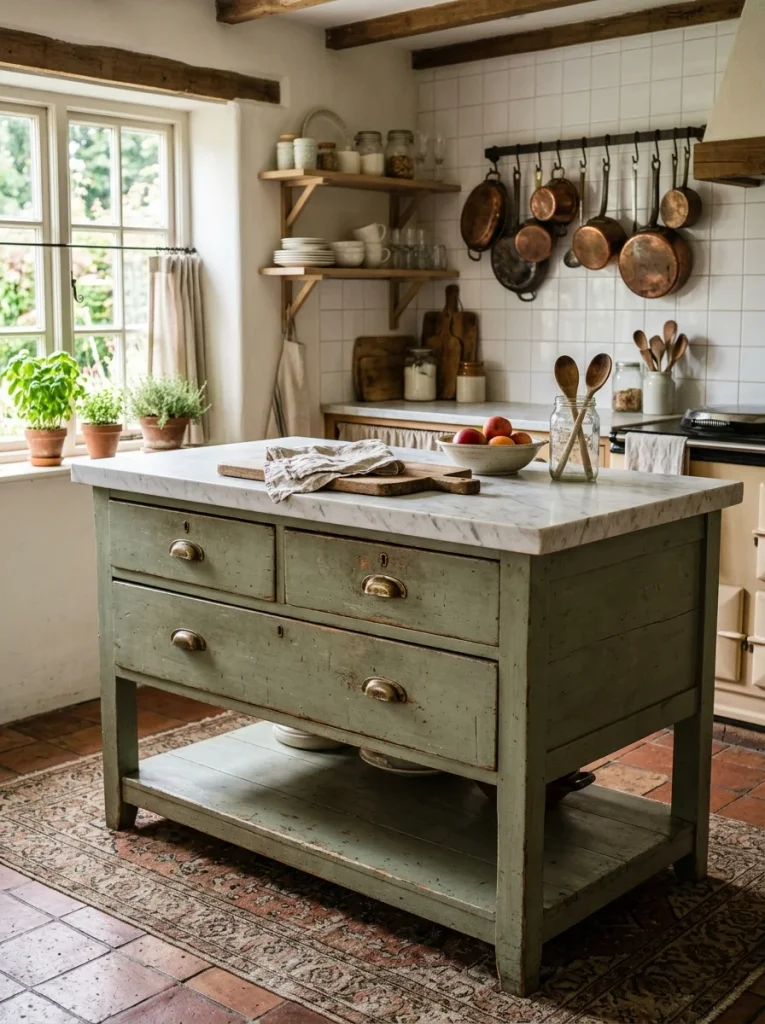
Cost: Low to medium
Time: One weekend
Skill Level: Beginner to intermediate
Best For: Eclectic and cottage kitchens
A thrifted dresser comes with built-in drawers and plenty of character. Seal the top with polyurethane or add a stone slab, so spills do not ruin old wood. Check that the piece is sturdy and about 36 inches tall. I’ve seen secondhand finds outshine custom cabinets.
Open Cubby Storage

Cubbies turn the back of an island into storage that stays useful. Keep daily items here, like cookbooks, dish towels, napkins and a fruit bowl. Everything stays within arm’s reach, so you stop opening doors to hunt for the same three things every single morning.
Size the openings at about 12 by 12 inches so standard baskets fit. Use baskets with lids for small items, and leave one or two cubbies empty for breathing room. Fabric bins also quiet the clatter. Label the baskets if several people share the kitchen, so everything returns home.
Zellige Tile Front

- Choose a rich color like emerald, cobalt or deep clay. Strong color shows off the glaze best.
- Hire a tile setter who has handled zellige before, since uneven edges need patience.
- Use a tight grout line in a matching shade so the surface reads as one piece.
- Keep the countertop simple and light, because the tile is already the star.
Light moves across zellige like water. Each tile reflects slightly differently, so the island front changes from morning to night. It costs more than standard ceramic, but a small island front needs very few tiles. Order samples first and look at them in your own kitchen light.
Attached Dining Table
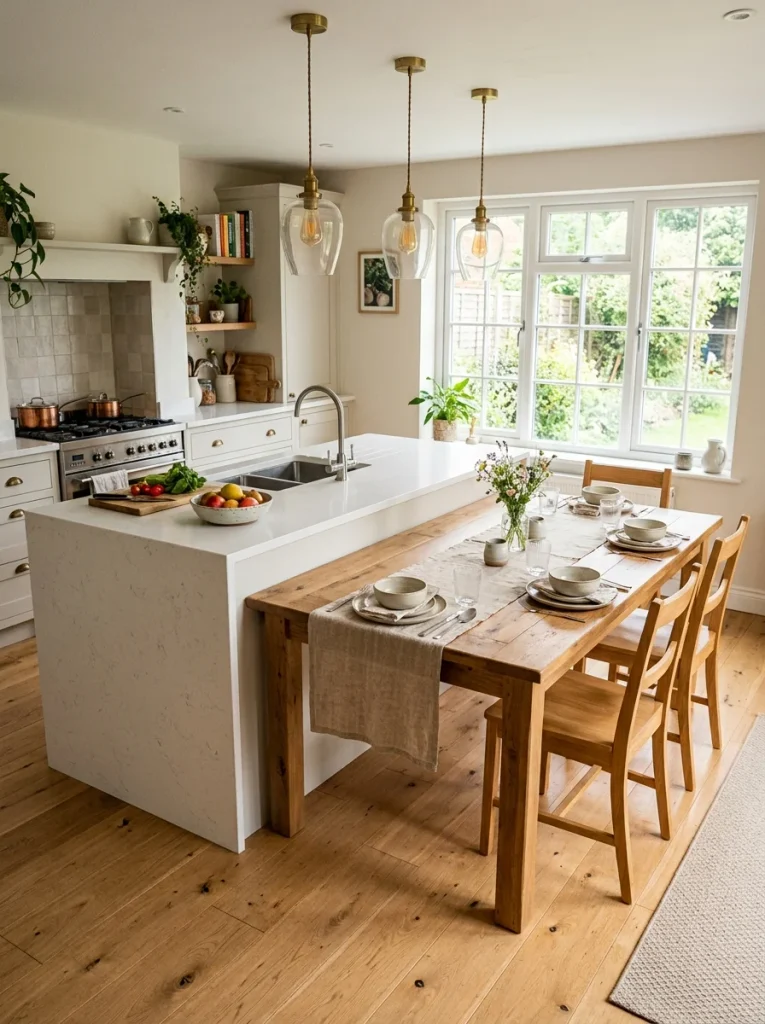
Cost: Medium to high
Time: One to three weeks
Skill Level: Carpenter or fabricator
Best For: Open plans and families of four or more
A continuous surface lets cooking and eating blend into one smooth flow. The table sits at 30 inches while the island stays at 36, so the step down feels natural. Allow 36 inches of space behind each chair. Test the layout with painter’s tape before any cutting.
Charcoal Soapstone Top

Soapstone feels silky and ages beautifully. It resists heat, stains and etching, which makes it one of the most forgiving natural stones for a working kitchen. Hot pans can sit on it without damage and spills wipe off. Few kitchen island ideas deliver that much toughness with so much character.
Know that soapstone scratches, but that is part of its appeal. Rub the surface with mineral oil to deepen the color and blend small marks. I’ve noticed that owners stop worrying about scratches within a month, since the stone gets better with wear.
Mixed Material Finish
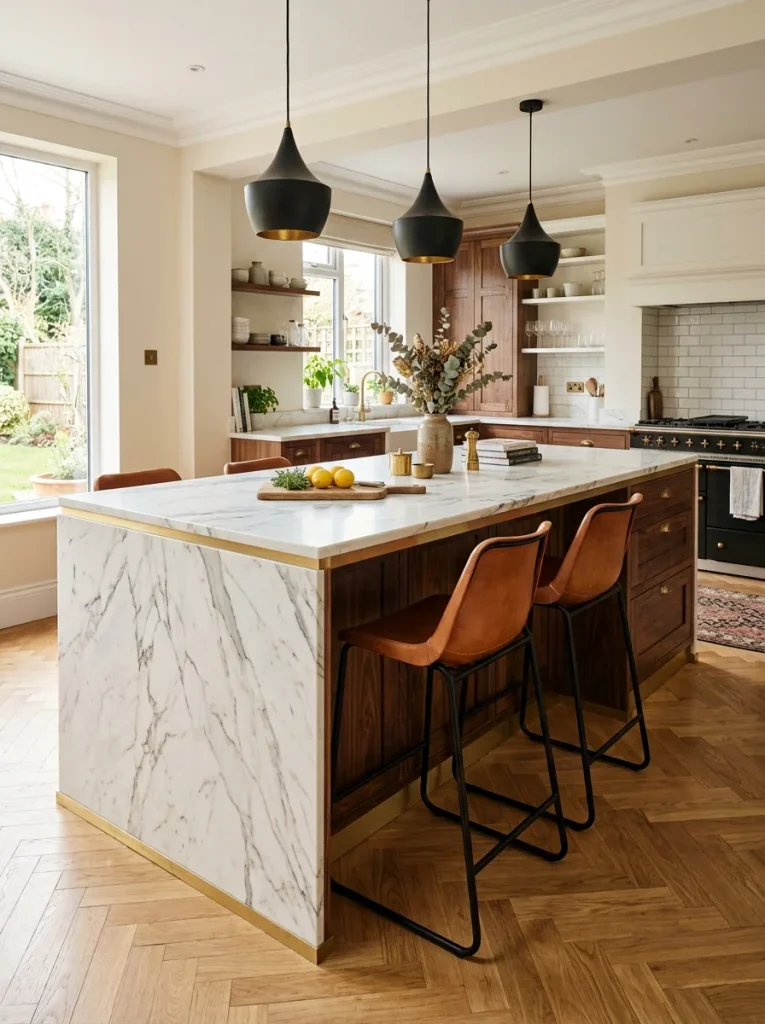
- Limit yourself to three materials: one for the base, one for the top, and one accent.
- Mix a warm material with a cool one, such as wood with stone, for balance.
- Repeat one material elsewhere in the kitchen, like brass in the faucet, so the island feels connected.
- Keep patterns to one. If the stone has bold veining, choose a plain wood grain.
Layered materials make an island look designed rather than ordered from a catalog. Start with the countertop, since it is the hardest to change, and choose the base to complement it. Bring home small samples and view them together in daylight and at night before you decide.
Conclusion
A great island does more than hold a countertop. It gives you a place to cook, gather, work, and linger. Whether you choose a bold color, a warm wood top, or a simple rolling cart, small changes can shift how your whole kitchen feels. I’ve seen how one thoughtful update can turn a busy room into the heart of a home. Keep these kitchen island ideas close as you plan. Save this post on Pinterest, try one idea that fits your space, and share it with a friend who is dreaming up a new kitchen. Your best island is waiting.


One Comment