
28 Garden Design Ideas Inspired by English Cottages
A cottage garden never feels rushed. It feels like a place where flowers spill over paths and every corner invites you to slow down. These garden design ideas bring that relaxed English charm to yards of any size, even if you have never planted a thing before.
Maybe your lawn feels flat or your borders look bare and you are not sure where to begin. I’ve seen many people stare at an empty patch for months, simply because the options felt overwhelming. This list solves that with 28 simple, visual ideas, from foxglove borders and gravel paths to herb corners and tiny ponds. Each one comes with practical, beginner friendly tips you can follow step by step. Pick a favorite, save it, and start planting.
Foxglove Back Border
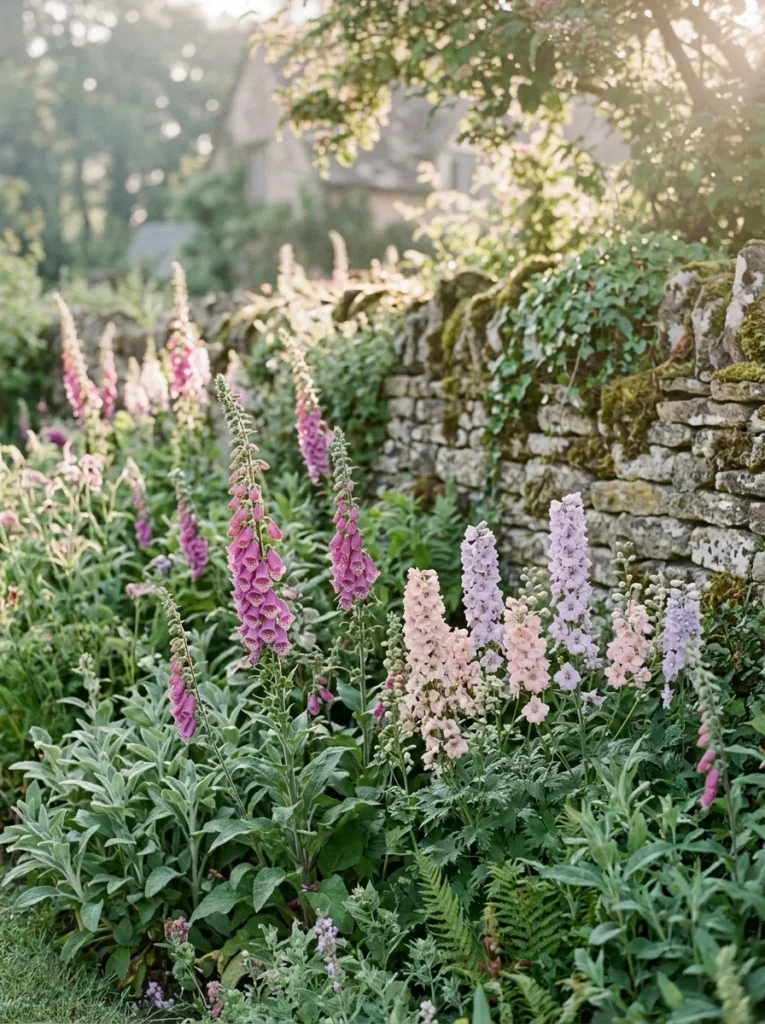
Tall flowers belong at the back and foxgloves prove it. Their spires reach four to five feet, so they frame everything planted in front of them. Set them against a wall or fence and shorter plants like lady’s mantle and catmint fill the gap below.
I’ve noticed foxgloves look best planted in loose groups of three or five, spaced about 18 inches apart. They are biennial, so let a few seed heads drop each summer. Next year’s spires will pop up in random spots, which is exactly the casual look you want.
Winding Gravel Path
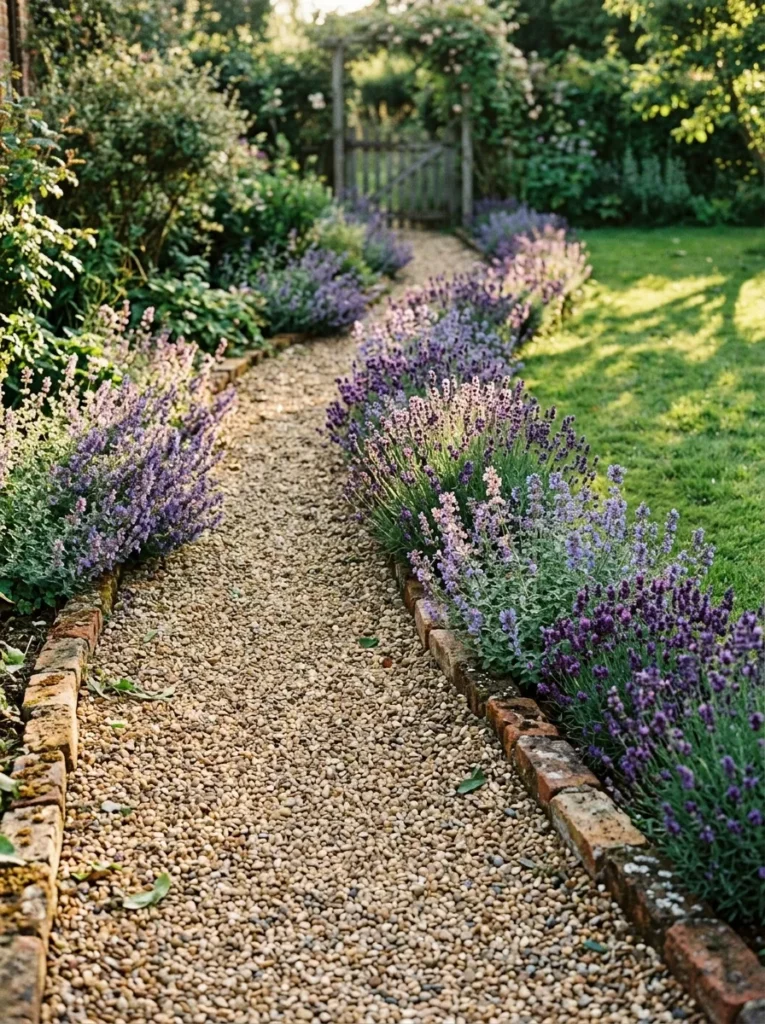
- A straight path says shortcut, but a curve says stay awhile. Bend it gently so the far end stays hidden from the entrance.
- Make it at least 36 inches wide so two people can walk side by side.
- Spread pea gravel about two inches deep over landscape fabric to keep weeds down.
- Edge both sides with brick or steel strips so the gravel stays put.
- Let catmint and lavender spill over the edges to soften the lines.
Gravel also crunches softly underfoot, a sound that makes any walk feel slower. It drains well after rain, so the path never turns muddy. Materials usually cost just a few dollars per square foot. Pick a dry week to lay it and most beginners can finish in a weekend.
Rose Arch Entrance
Quick Tip:
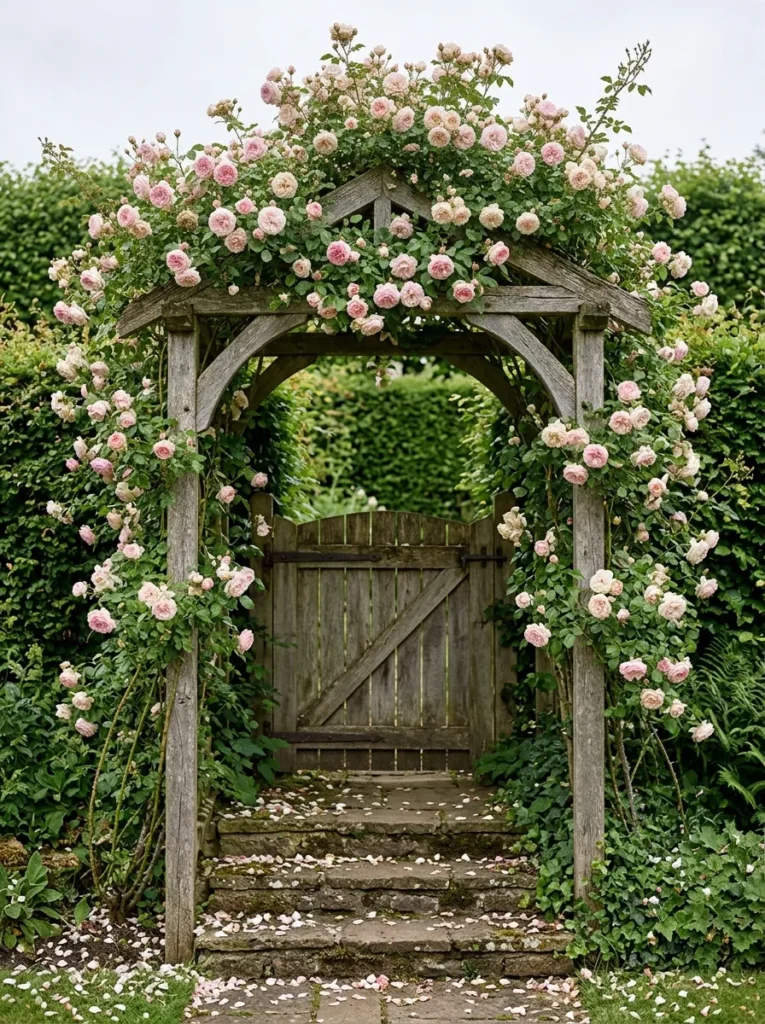
Plant the rose 12 to 18 inches away from the arch leg, not right at its base. The roots need room, and the canes can lean inward toward the frame. Tie new growth sideways with soft twine to get more blooms.
Climbing roses like Zephirine Drouhin and New Dawn suit beginners well. Both bloom repeatedly and handle partial shade. Choose a sturdy arch, since mature roses get heavy. Give it two or three seasons to fill in. Until then, sweet peas grown at the base add scent and color without any extra work.
Read More: Garden Organization Ideas: 29 Tricks for a Tidy Shed
Picket Fence Border

Before: A bare fence line feels flat and cold. The boards stand there like a wall, with nothing soft to catch the eye.
After: A low picket fence backed by honeysuckle and edged with geraniums feels like a welcome. Flowers push through the gaps and the line becomes part of the garden.
Paint the pickets soft white or pale grey and keep the fence under four feet tall. I’ve seen taller fences swallow the flowers planted beside them. Plant geraniums 12 inches from the base, and train honeysuckle along horizontal wires. Prune it hard after flowering to keep it tidy.
Kitchen Herb Corner

- Pick a sunny spot within a few steps of the kitchen door. You will use herbs more when they are easy to reach.
- Build or place a bed about three feet wide, so you can reach the middle from either side.
- Mix coarse sand or grit into the soil for rosemary, thyme and sage, since they hate wet roots.
- Give mint its own pot, because it spreads fast and crowds out its neighbors.
- Plant chives and parsley along the front edge and water well for the first two weeks.
Snip herbs in the morning after the dew dries and the flavor is strongest. Regular cutting keeps plants bushy instead of leggy. A small bed like this can feed a family’s weeknight cooking from spring through autumn and the planting itself takes an afternoon. Even beginners get quick results.
Wildflower Meadow Patch

| Feature | Mown Lawn | Meadow Patch |
|---|---|---|
| Upkeep | Mowing every week | Cut once or twice a year |
| Wildlife | Very little | Bees, butterflies, and beetles |
| Water | Regular watering | Little once established |
| Look | Neat and flat | Soft, tall, and colorful |
Start small, with a patch of about 10 by 10 feet. Meadows look messy if they cover too much ground, and a mown path through the middle keeps the whole thing looking intentional. Sow seed in autumn or early spring on bare, poor soil, because rich soil favors grass over flowers.
Sweet Pea Teepee

Do:
- Build the teepee from six 6 foot canes tied together at the top.
- Sow seeds in late autumn or early spring for stronger roots.
- Pinch out the tips when seedlings reach four inches tall.
- Pick blooms often to keep new flowers coming.
Don’t:
- Don’t let the soil dry out during summer.
- Don’t plant in deep shade.
- Don’t leave seed pods to ripen, since that ends the flowering.
- Don’t crowd more than two plants onto each cane.
Sweet peas smell like honey and cost very little to grow from seed. A single teepee gives enough stems for a small vase every other day through summer. Choose a spot that gets six hours of sun, and the vines will climb on their own.
Stone Birdbath Corner

Cost: Low to medium
Time: About one hour
Skill Level: Beginner
Best For: Shady corners and small lawns
Birds look for water more than food in hot weather. Set the basin on a flat, stable base in light shade, with a shrub a short flight away for cover. Refill every two days and scrub it weekly with a stiff brush. Fresh water limits algae and mosquito larvae.
Hollyhock Wall Planting

Whitewashed walls make hollyhocks glow like lanterns. These giants reach six to eight feet and lean on the wall for support, so staking is rarely needed. Plant them 18 inches from the base in full sun, where the wall holds warmth and nudges blooms along.
Rust is the one headache, showing up as orange spots on the leaves. Pull off affected leaves early and clear fallen debris in autumn. Leave the spent stalks until seed pods turn brown and the plants will resow themselves, giving you fresh flowers for years.
Espalier Apple Wall

- A flat tree takes up six inches of border but gives you a full harvest. Choose a dwarf rootstock like M9 or M26, which stays compact and fruits early.
- Stretch horizontal wires every 15 to 18 inches up the wall, held about four inches out so air can move behind the branches.
- Tie young branches to the wires with soft ties, bending them gently rather than forcing them.
- Prune in summer, cutting new side shoots back to three leaves.
- Plant in winter while the tree is dormant and water it through its first dry summer.
Espaliered apples crop well in gardens barely wider than a hallway. The wall also shelters blossom from frost and speeds ripening. Allow two to three years for the framework to form. After that, a few minutes of summer pruning each year keeps the shape clean and the fruit coming.
Clipped Boxwood Edging
Quick Tip:
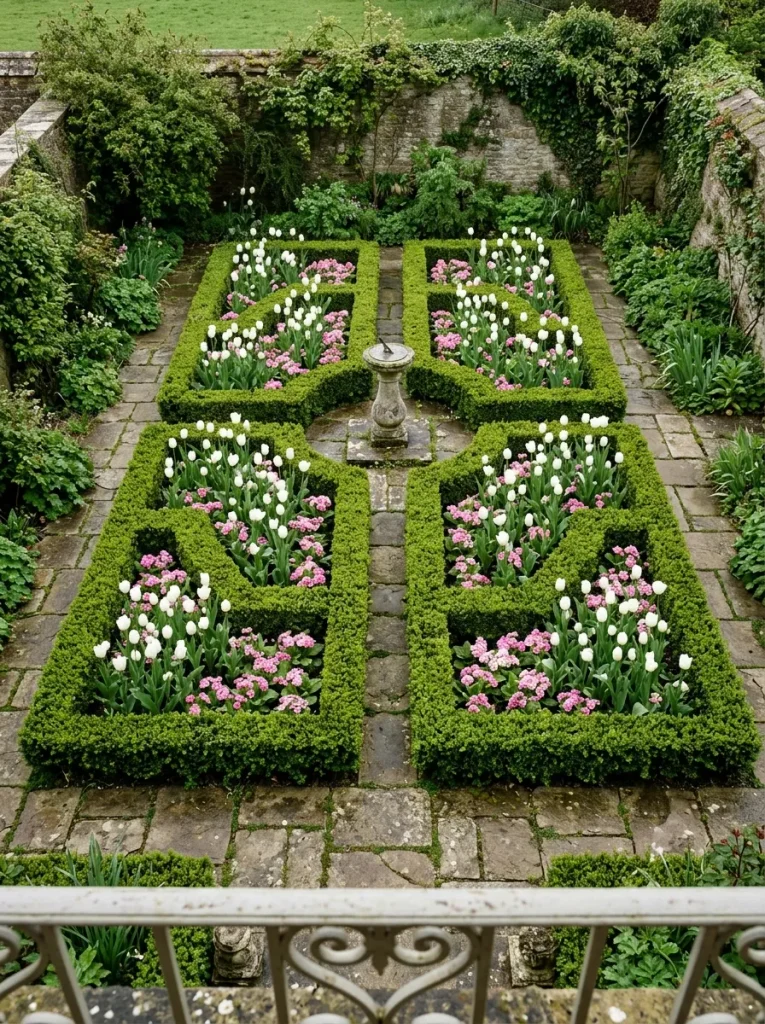
Buy boxwood in 12 inch plants and space them 10 inches apart for a solid line within two years. Trim after the first flush of growth in early summer, using sharp hand shears and a string line for straight edges. If boxwood blight is common in your area, choose Japanese holly instead.
Soft, loose flowers need something crisp beside them. A neat edge makes a wild border look cared for. Keep the hedge about 12 inches tall so blooms stay visible. In winter, the green outline still holds the garden together when everything else has died back.
Rustic Potting Bench

Before: Pots, soil bags and tools pile up on the patio floor. Every planting job starts with a hunt for the trowel.
After: A waist high bench gives everything a home. Soil sits in a bin below, tools hang on hooks above and you work standing up instead of bending over.
Set the bench at hip height, usually around 34 inches, so your back stays comfortable during a long planting session. Seal the top with outdoor oil and leave the lower shelf slatted so wet pots can drain. Reclaimed scaffold boards make a sturdy, low cost top.
Potager Raised Beds

- Build four beds, each four feet wide and eight feet long, so you can reach the center from the path.
- Leave 24 inches between beds so a wheelbarrow fits through.
- Fill them with a mix of topsoil and compost, about two parts to one.
- Plant tall crops like beans at the back and low crops like lettuce at the front.
- Tuck marigolds between the vegetables to add color and draw in pollinators.
A potager treats vegetables as part of the design, not something to hide. In my experience, mixing flowers with crops also cuts down on pests, since insects struggle to find their favorite plants. Repeat the same edging on all beds so the layout feels calm.
Cozy Bench Corner

| Feature | Painted Wood Bench | Natural Stone Bench |
|---|---|---|
| Comfort | Warm to sit on | Cold and hard |
| Upkeep | Repaint every two or three years | Almost none |
| Cost | Low to medium | Higher |
| Look | Soft and cottage like | Aged and timeless |
Place the bench where it faces the best view, not the back door. Leave about three feet of clear ground in front for legs and pots. Plant something scented like lavender or sweet alyssum nearby and the spot becomes a place people truly use, not just admire.
Clematis Trellis Wall
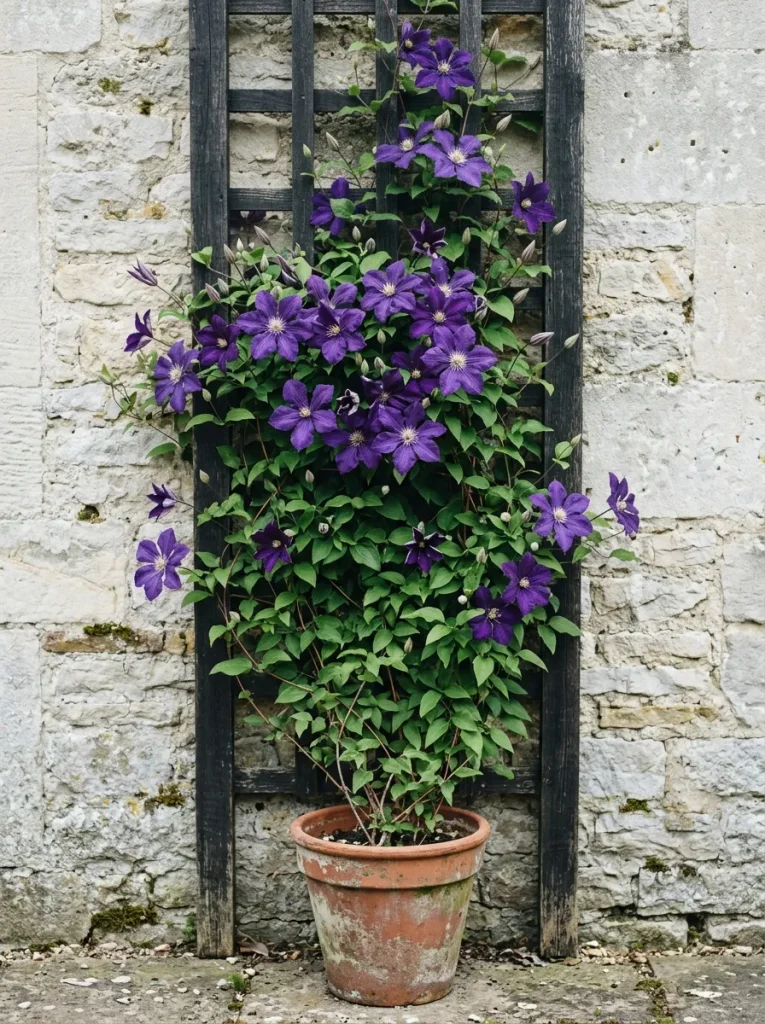
Do:
- Plant the root ball deep, with two inches of stem below the soil.
- Shade the roots with low plants or a layer of mulch.
- Fix the trellis an inch or two off the wall for good air flow.
- Feed with a high potash fertilizer in spring.
Don’t:
- Don’t plant it in a sunbaked spot with bare, hot soil at its feet.
- Don’t prune without checking its group, since timing differs by type.
- Don’t let it sit in soggy ground.
- Don’t tie the stems tightly, as they snap easily.
Clematis likes a cool root run and a sunny head. That one rule explains most successes and most failures. A flat stone or low pot placed over the roots keeps them cool. Water deeply once a week in dry spells. Plant it in spring or early autumn for the best start.
Terracotta Pot Cluster

Cost: Low
Time: One hour
Skill Level: Beginner
Works In: Patios, steps, and tiny yards
Odd numbers work best, so group three, five, or seven pots in different heights. Raise the back pots on bricks or an upturned planter. Water terracotta more often than plastic, since the clay breathes and dries fast. Group the pots by thirst, so one watering session covers each cluster.
Peony Garden Corner

Peonies earn a place among the best garden design ideas because one plant can bloom for decades. Plant the roots with the pink buds just two inches below the surface, in full sun and well-drained soil. Planting too deep is the main reason they refuse to flower.
Give each plant three feet of space for air movement, which helps prevent mold on leaves. Stake or use a peony ring in early spring, before the stems get heavy with blooms. Expect few flowers in year one and a full show by year three. Patience pays off here.
Weathered Garden Gate
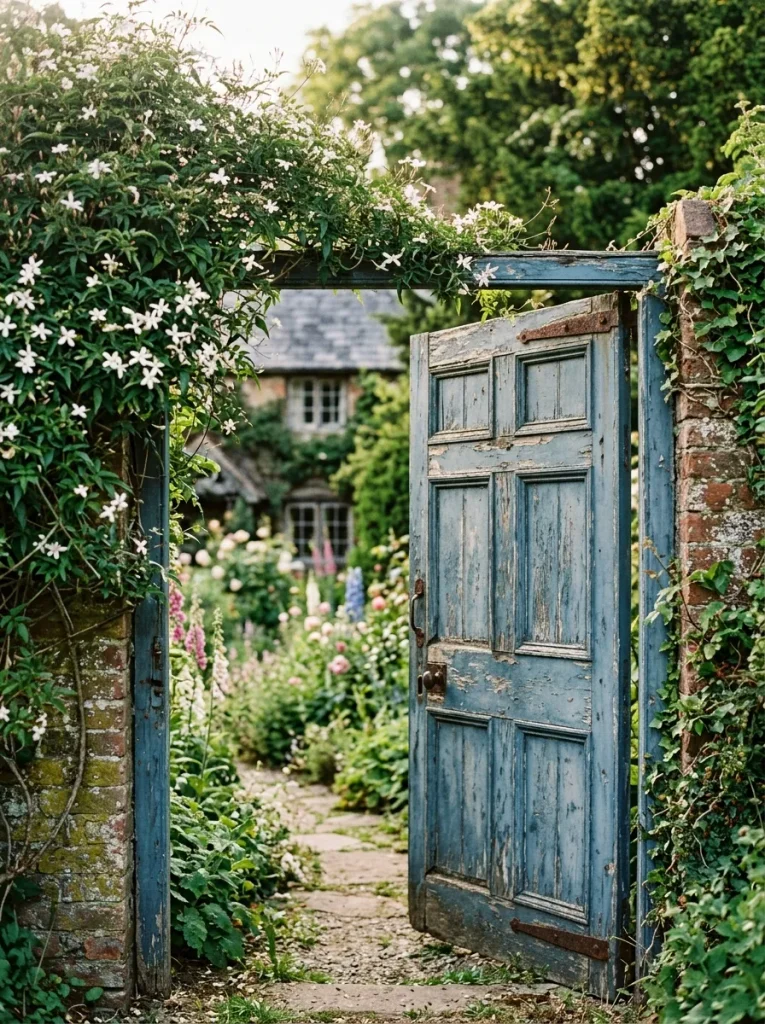
- A gate is the first thing a visitor notices, so give it some personality. Paint it a faded blue, sage or soft grey rather than stark white.
- Hang it on strong galvanized hinges, because wooden gates sag within a few years on weak hardware.
- Leave a one-inch gap at the latch side so the gate swings freely in damp weather.
- Plant jasmine or honeysuckle beside one post and let it drape over the top bar.
- Place a pot of white flowers at each side to frame the opening.
A glimpse of the garden beyond makes visitors curious. Choose a gate with open slats instead of solid boards, so the border peeks through. Width matters too, so aim for at least 36 inches to let a wheelbarrow pass. Wood treated once a year will age well.
Dry Stone Wall

Quick Tip:
Plant crevice flowers as you stack the wall, not afterward. Slide a small plant with its roots into the soil between stones as each layer goes up. Angle the wall slightly backward, about one inch per foot, so it stays stable and sheds water into the slope.
Aubrieta, rock cress and thyme thrive in the thin soil of stone gaps and need almost no feeding. Water them well for the first month, then leave them alone. Bees visit them in spring. Keep a self-built wall under three feet, since taller ones need proper engineering.
Wisteria Pergola
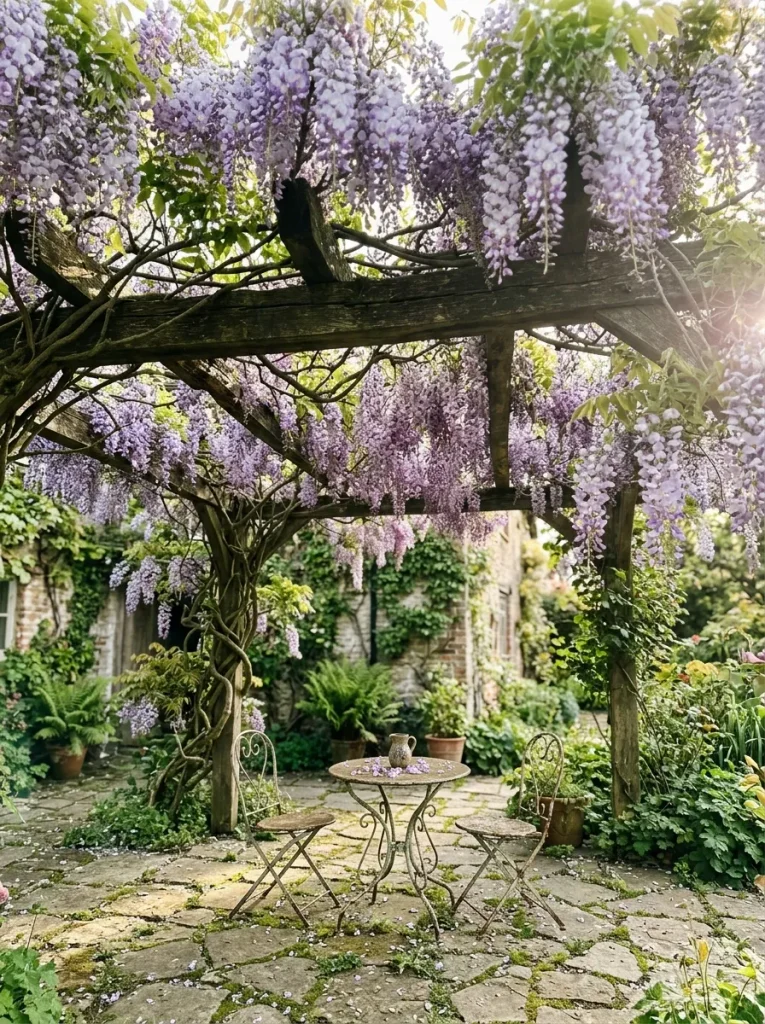
Before: A bare patio bakes in afternoon sun. Furniture sits exposed and the space feels more like a slab than a room.
After: A wisteria covered pergola adds a ceiling of flowers and cool shade. The patio now has height, scent and a sense of enclosure.
Build the pergola with posts set in concrete and beams strong enough to carry a heavy vine, since mature wisteria weighs hundreds of pounds. Choose a grafted plant, which flowers sooner than seed grown ones. Prune twice a year, in midsummer and midwinter, to keep it flowering instead of just growing.
Small Wildlife Pond
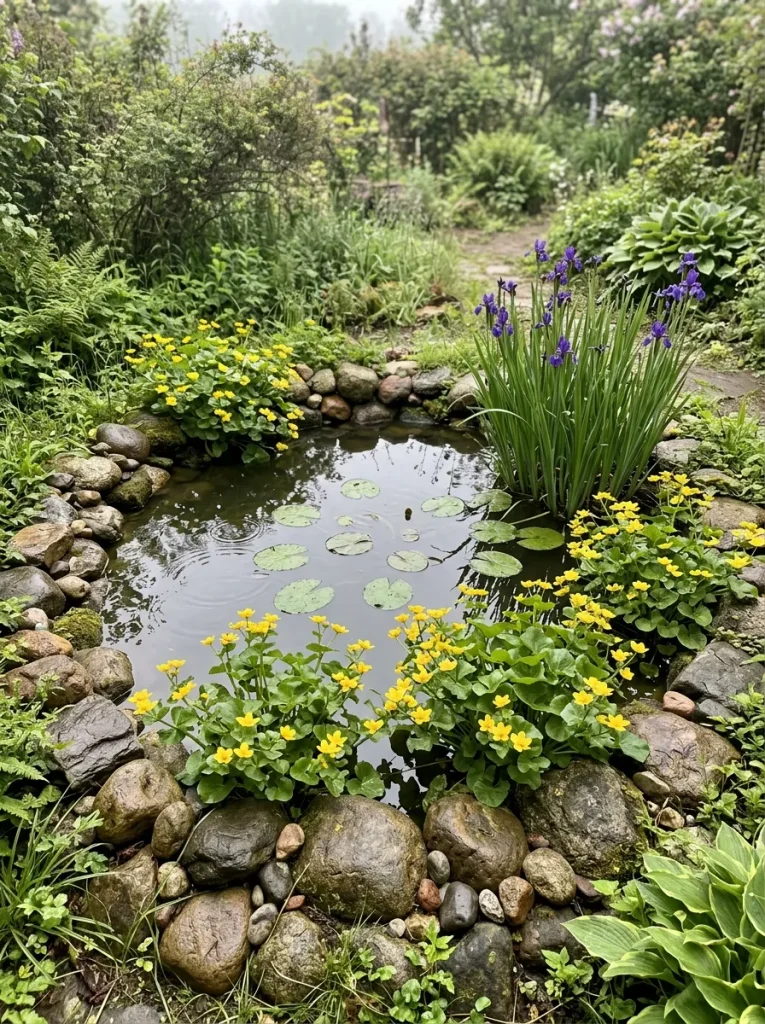
- Mark a shape about four feet across with a hose or rope, in a spot with partial sun and no overhanging trees.
- Dig it 18 to 24 inches deep, with one gently sloping side so frogs and hedgehogs can climb out.
- Line the hole with a layer of sand, then a pond liner, leaving 12 inches of extra liner around the edge.
- Fill with rainwater if you can, then add oxygenating plants and a few marginals like marsh marigold.
- Cover the liner edges with stones, and let the water settle for a few weeks before adding more plants.
Skip the fish, because they eat the tadpoles and insects that make a pond lively. Within a season, dragonflies and frogs often show up. Even four feet of water becomes a mini nature reserve. If small children visit, cover the pond with a sturdy grille until they are older.
Fern and Hosta Shade
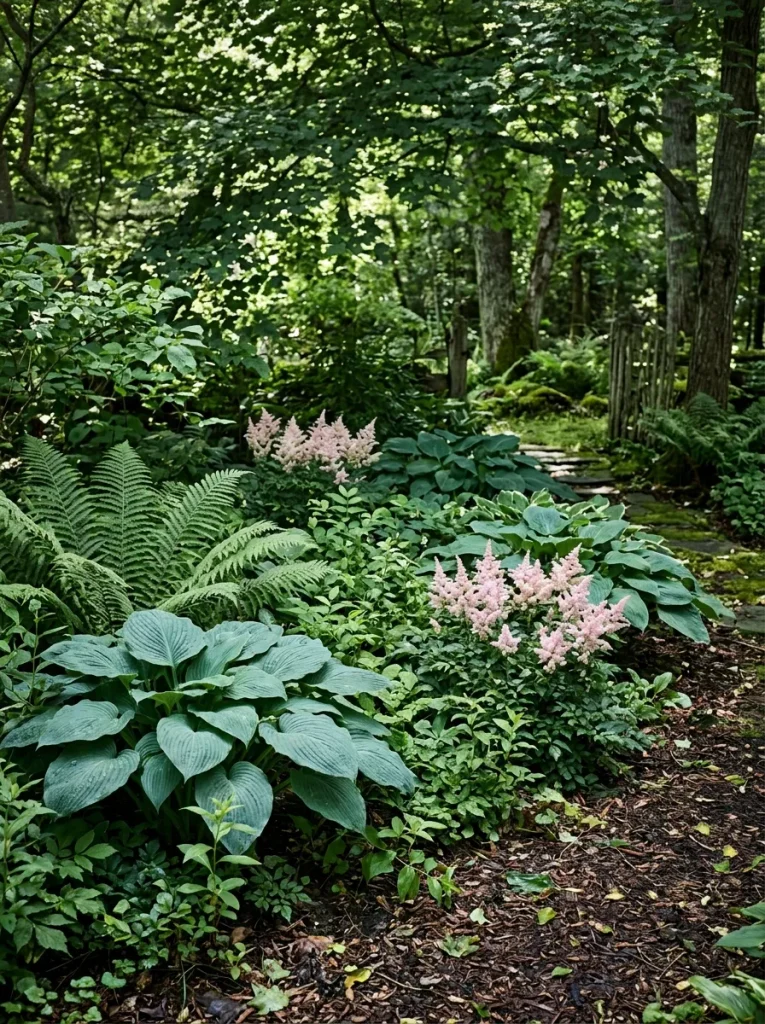
| Feature | Bare Shady Spot | Fern and Hosta Bed |
|---|---|---|
| Color | Dull and patchy | Fresh greens with soft blooms |
| Texture | Flat | Large leaves and feathery fronds |
| Upkeep | Weeds and moss take over | Dense leaves block weeds |
| Wildlife | Very little | Shelter for frogs and beetles |
Shade is not a problem, it is a different palette. Plant hostas first, then tuck ferns between them and finish with astilbe for height. Slugs love hostas, so check leaves at dusk and pick slugs off by hand. Water deeply during dry spells, since shade near trees stays surprisingly dry.
Cutting Flower Rows

Do:
- Plant in rows at least 18 inches apart so you can reach each flower.
- Cut stems in the early morning and place them straight into water.
- Pick often, since cutting encourages new buds.
- Pinch zinnias and cosmos when young for bushier plants.
Don’t:
- Don’t plant in shade, because most cut flowers need six hours of sun.
- Don’t crowd the rows or air flow suffers and disease spreads.
- Don’t cut with dull blades, which crush the stems.
- Don’t forget stakes for tall dahlias.
A cutting patch pays you back with a fresh vase every week. Zinnias are the easiest start, since they sprout fast and bloom in about eight to ten weeks. A single 4 by 8 foot bed can supply bouquets all summer, with plenty to share.
Bee Friendly Borders
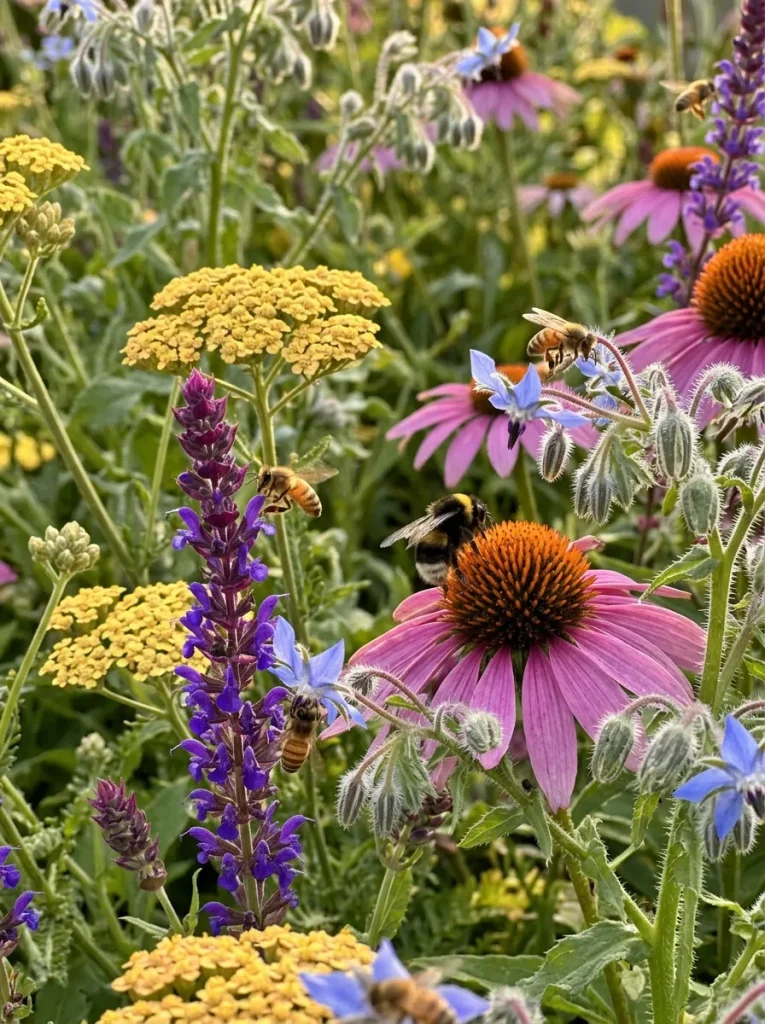
Cost: Low
Time: One weekend
Skill Level: Beginner
Result: Buzzing flowers from spring to autumn
Pick flowers with open, simple blooms, since double flowered types hide their nectar. Plant each type in clumps of three or more. Aim for something in bloom in every season, from crocus in early spring to sedum in autumn. Skip pesticides entirely. Even one spray can harm the bees you are trying to attract.
Lantern Evening Glow
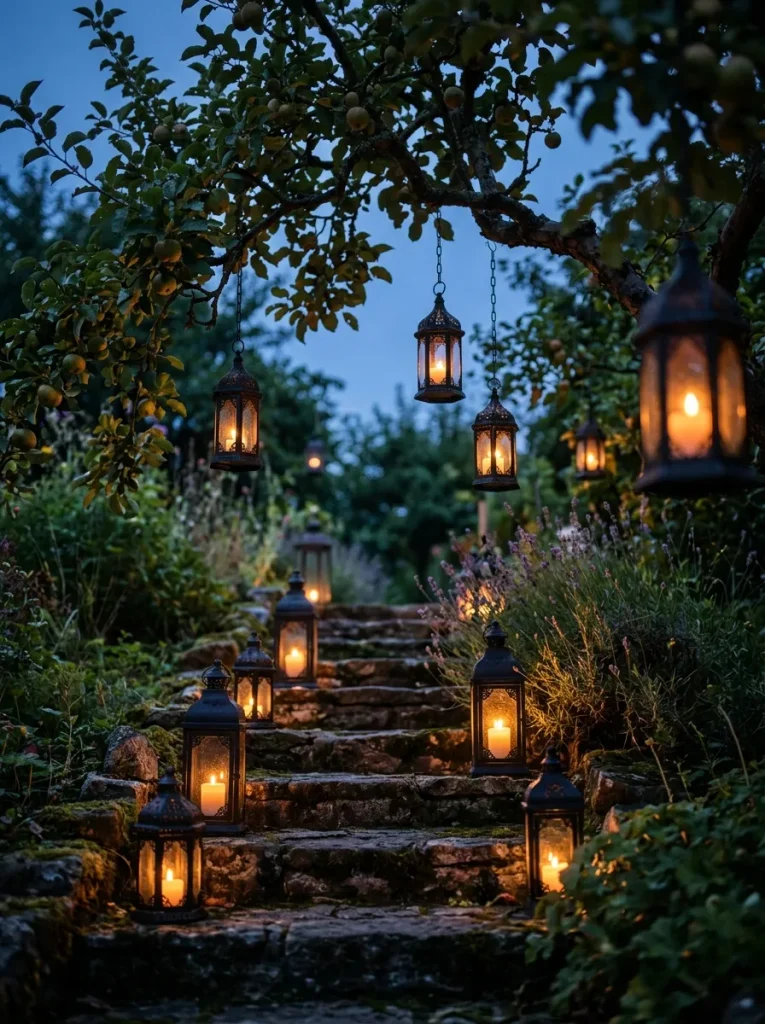
Evening is when a cottage garden truly softens. Skip bright floodlights and choose warm, low lights instead. Hang two or three lanterns from sturdy branches at different heights and set a few on steps or low walls. Use warm white bulbs rated around 2700 kelvin.
Solar lanterns need no wiring, and flicker-effect LEDs look close to real candlelight. Place them near white and silver flowers, which catch the glow best. Keep real candles away from dry leaves and fabric. Light the path, not the whole garden, so shadows stay soft.
Tiny Lean-To Greenhouse

- A greenhouse does not need much room. A lean to model about three feet deep fits against a sunny wall and starts seeds weeks early.
- Choose the sunniest wall you have, ideally one that catches the midday sun.
- Add slatted shelves to hold trays and let air move through.
- Install a small vent or roof window, since closed greenhouses overheat fast on sunny days.
- Shade the glass with a light wash or mesh in midsummer to protect leaves from scorching.
Seed trays started in a greenhouse in early spring give you strong tomato, pepper and flower seedlings ready before the last frost. Water in the morning so leaves dry by evening, which cuts down on mold. Keep a cheap thermometer inside, and check it on sunny days.
Nasturtium Edible Border
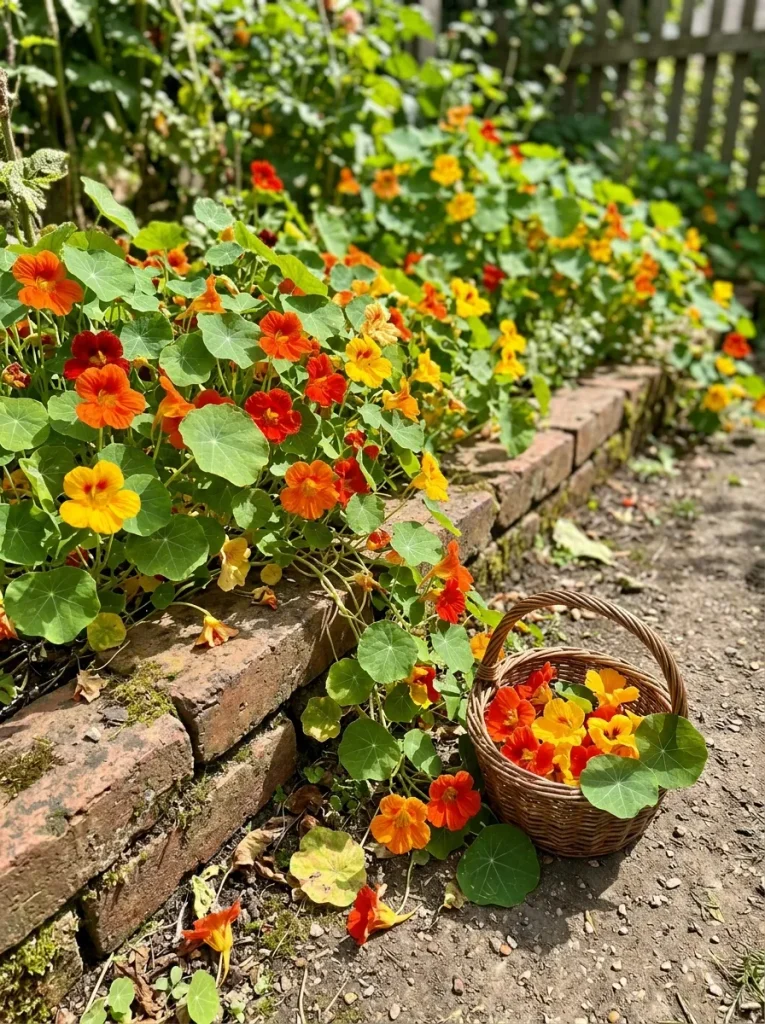
Quick Tip:
Sow nasturtium seeds directly in poor soil, about an inch deep and 10 inches apart. Rich soil gives you leaves but few flowers, so skip the fertilizer. Soak seeds overnight before sowing for faster sprouting.
Every part of this plant is edible, from peppery leaves to bright flowers. Toss petals into summer salads for a pop of color. Wash them first and use only plants grown without chemicals. Blackfly may arrive, but they tend to cluster on nasturtiums instead of your vegetables.
Mixed Hedgerow Boundary
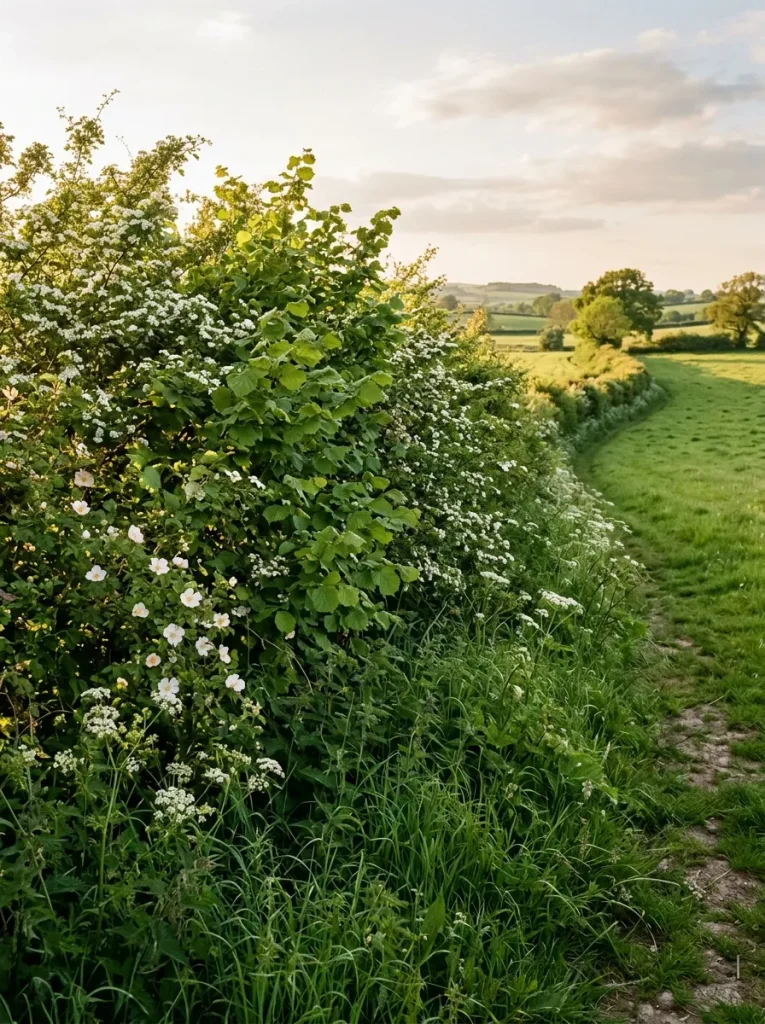
Before: A plain wire or panel fence marks the boundary but offers nothing to birds. It stays flat, silent, and the same all year.
After: A mixed hedge of hawthorn, hazel and dog rose brings blossom in spring, berries in autumn, and shelter all year. Birds nest in it, and the boundary finally looks alive.
Few garden design ideas give so much back for so little money. Buy bare-root whips in winter, plant them in a staggered double row about 18 inches apart and water through the first summer. Cut back by a third after planting to encourage bushy growth. Trim in late winter, never during nesting season.
Conclusion
A beautiful garden does not need a big budget or years of experience. It needs one good idea and a little courage to begin. Whether you start with a rose arch, a herb corner, or a simple bench, these garden design ideas show how small changes can bring real charm to your outdoor space. I’ve seen a single border completely change how a yard feels. Save this post on Pinterest so you can come back to it each season, try one idea this month and share it with a friend who loves flowers. Your cottage garden starts today.



One Comment