
29 Bathroom Shelf Ideas You’ll Want to Steal Right Now
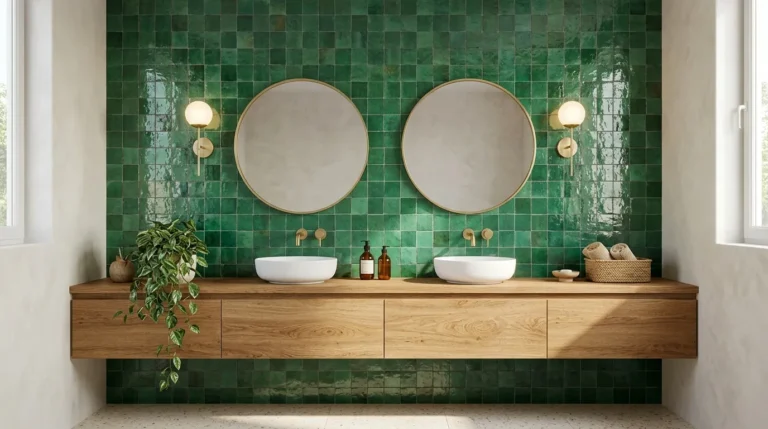
The right bathroom mirror can completely transform your space, making it feel brighter, more stylish and more inviting. Sometimes, one simple change is all you need to create a fresh new look!
These Bathroom Mirror Ideas will help you discover beautiful designs that combine style, functionality and everyday convenience. Whether you’re updating a small bathroom, refreshing your vanity or planning a complete makeover, you’ll find inspiration to suit different spaces and decorating styles. From elegant round mirrors and modern LED designs to eye catching statement pieces, there are plenty of ways to make your bathroom feel special without changing everything. I’ve noticed that thoughtful details, such as mirror shape, frame color and lighting, can make a real difference in how a bathroom looks and feels. Explore these ideas, find the styles you love and discover simple ways to create a bathroom that feels both beautiful and practical.
Floating Wooden Shelves
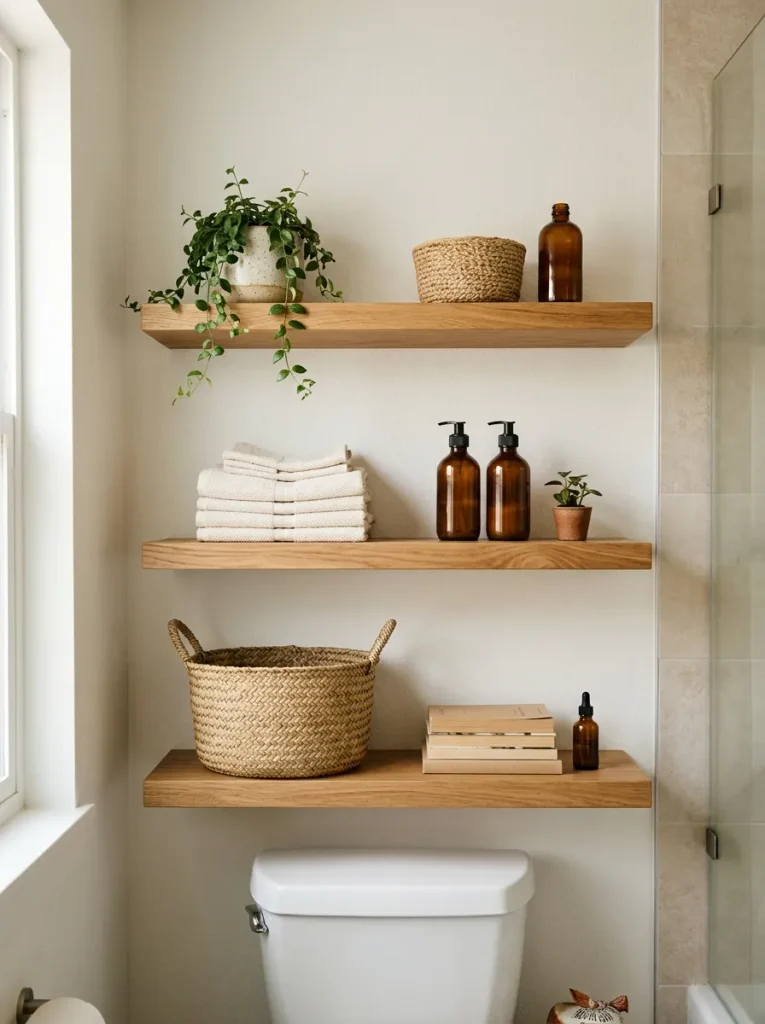
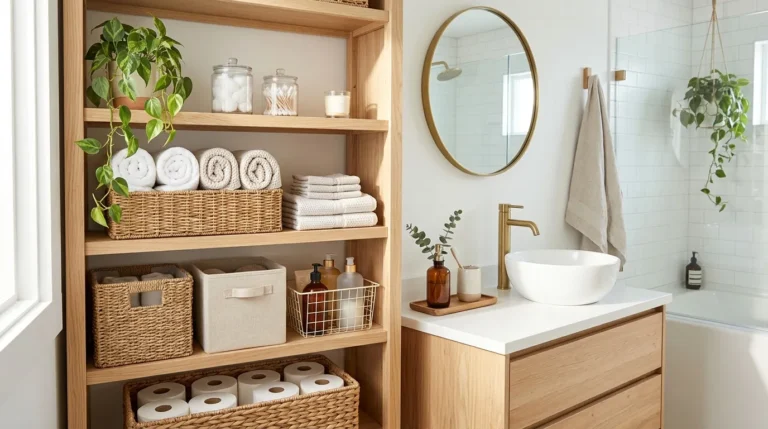
Floating wooden shelves bring warmth and useful storage to empty bathroom walls without taking up valuable floor space. Above a toilet or beside a vanity, they provide room for everyday toiletries, neatly folded hand towels and a few decorative accents. Choose natural oak for a light, airy look or walnut for deeper contrast.
For a balanced arrangement, leave some open space between objects rather than filling every inch. Place frequently used items on the lowest shelf, then reserve the upper levels for spare towels, attractive containers, or small plants suited to bathroom humidity. Before installation, check the wall construction and use appropriate anchors to support the expected weight.
Above Toilet Storage
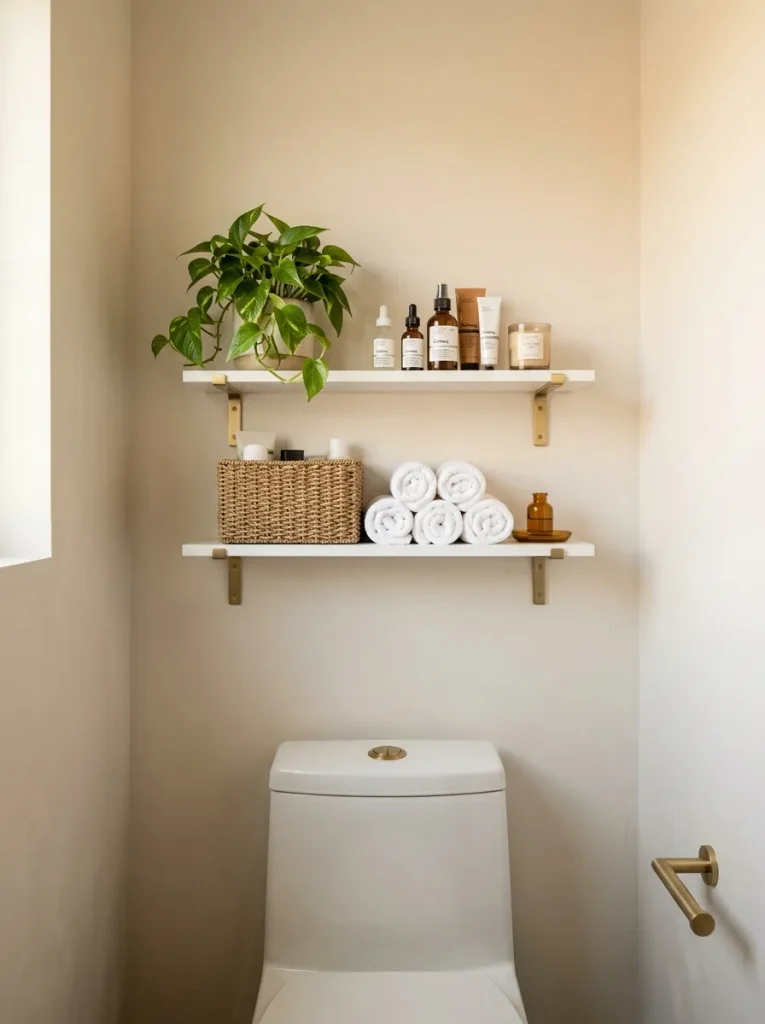
- Measure the wall: Check the available width above the toilet and leave comfortable clearance around the tank and plumbing.
- Choose slim shelves: Narrow designs keep the area functional without making a compact bathroom feel crowded.
- Group everyday essentials: Store toilet paper, hand towels and frequently used products in easy to reach places.
- Use matching containers: Small baskets or lidded boxes hide packaging and keep loose items organized.
- Secure the brackets: Use suitable wall anchors and check the shelf’s weight limit before loading it.
Above toilet shelving makes use of wall space that often goes unused, especially in small bathrooms with limited cabinets. Keep the lower shelf practical and the upper shelf lighter, with just a few decorative pieces. If you rent, check whether a freestanding over toilet unit is a better choice than drilling into the wall.
Glass Bathroom Shelves

Quick Tip: Choose tempered glass designed for shelving, with brackets rated for the shelf’s intended load. Wipe away water spots regularly and avoid placing heavy glass bottles near the edge.
Glass shelving helps a bathroom feel open because the shelves allow light and sightlines to pass through. This makes them useful beside a mirror, above a vanity, or in a narrow space where solid shelves might look bulky. Pair clear glass with chrome for a crisp finish, or use understated brackets to keep the arrangement visually light.
Keep the display selective, since fingerprints and product clutter are more noticeable on transparent surfaces. Group similar bottles together and leave a little breathing room between items. For family bathrooms, prioritize secure installation and place breakable products somewhere less likely to be bumped.
Read More: Bathroom Mirror Ideas: 25 Showstopping Styles to Try
Recessed Wall Niches

BEFORE: Bathroom essentials sit on the vanity or crowd narrow shelves, leaving the room looking busy. Bulky storage units can also make a small bathroom feel tighter.
AFTER: Built in wall niches provide storage without protruding into the room. Toiletries, folded washcloths and decorative accessories have a dedicated place, while the surrounding walls remain visually clean.
Recessed niches work especially well during a bathroom renovation because they can be planned around the wall structure and existing plumbing. Use moisture appropriate materials and proper waterproofing wherever a niche is installed in a shower or other wet area. A contrasting tile inside the niche adds detail without requiring extra decorations and a small shelf can separate daily products from display items.
Corner Floating Shelves
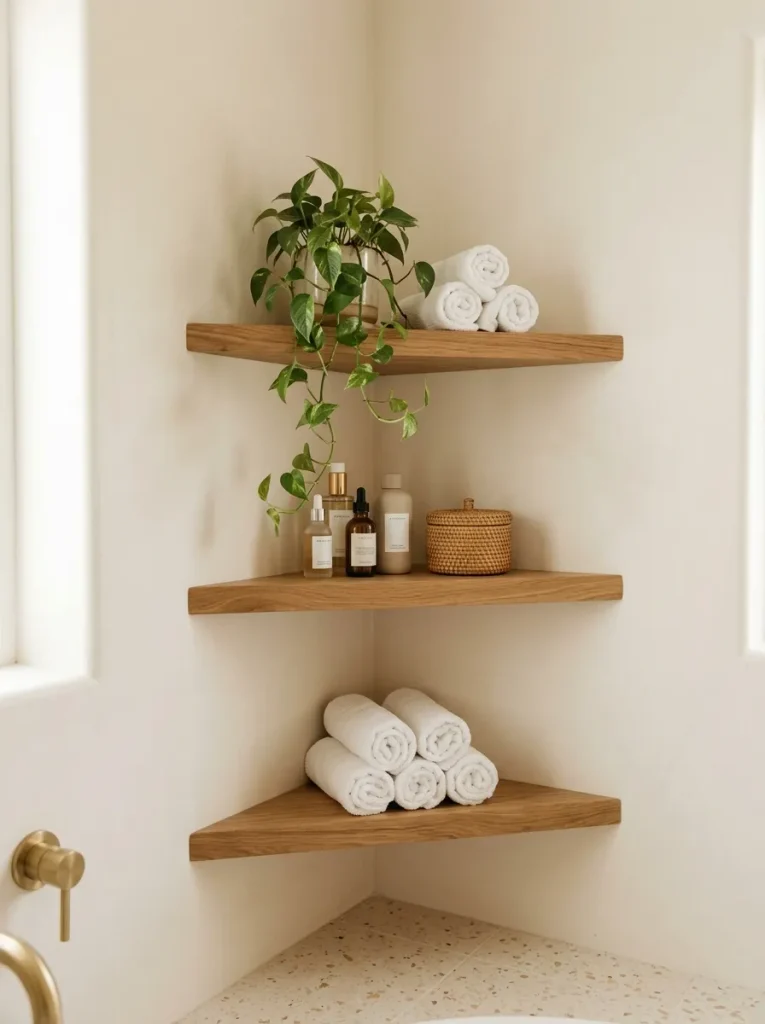
- Measure the corner. Check both wall lengths and available depth so the shelves fit without obstructing movement.
- Choose the shape. Triangular shelves suit tight corners, while rounded designs create a softer appearance.
- Plan the arrangement. Place frequently used toiletries on the most accessible shelf and reserve higher levels for spare towels or decor.
- Match the finish. Select wood, glass, or painted shelving that complements your vanity and hardware.
Corner shelving makes use of awkward spaces that might otherwise remain empty. It is especially useful beside a vanity, near a bathtub, or in a compact guest bathroom where every inch matters. Keep the items lightweight and avoid crowding the shelves. Before drilling, confirm that the mounting points are clear of hidden pipes and electrical wiring.
Open Shelves vs. Cabinets
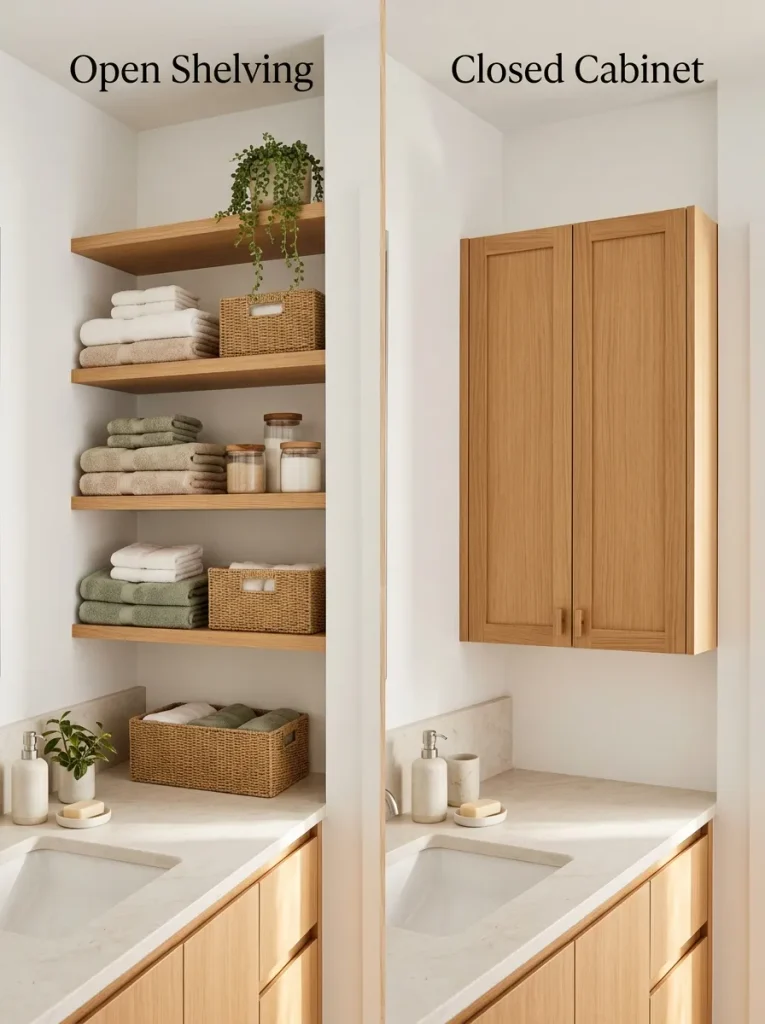
| Feature | Open Shelves | Closed Cabinets |
| Appearance | Airy and decorative | Neat and streamlined |
| Access | Items are easy to reach | Items stay behind doors |
| Organization | Requires tidy displays | Hides everyday clutter |
| Cleaning | Items need regular dusting | Surfaces need routine wiping |
| Best use | Towels, baskets, attractive bottles | Cleaning supplies and personal items |
The right choice depends on what you need to store and how much maintenance you prefer. Open shelves make towels and attractive containers easy to access, while cabinets conceal packaging and less decorative essentials. Many bathrooms benefit from a mix of both: display a few useful items on open shelves and keep backups behind closed doors. Consider moisture exposure, shelf depth and available wall space before deciding.
Industrial Pipe Shelves

DO:
- Pair reclaimed wood with matte black metal brackets for a balanced industrial look.
- Use sturdy wall anchors suitable for the wall material and expected load.
- Store towels, baskets and frequently used toiletries within easy reach.
- Repeat black accents in faucets, mirror frames, or cabinet handles for a cohesive finish.
DON’T:
- Don’t overload shelves with heavy glass bottles or oversized decor.
- Don’t leave rough wood unfinished where moisture could cause damage.
- Don’t install brackets without checking for hidden pipes and wiring.
- Don’t crowd every shelf with accessories that collect dust and water residue.
Industrial shelving adds texture and character while providing practical storage for everyday bathroom essentials. Sealed wood helps protect against humidity, while dark metal brackets create contrast against light walls. Keep the styling simple with coordinated containers and folded towels, allowing the materials to stand out. This design works especially well in modern farmhouse and loft inspired bathrooms.
Ladder Shelf Styling
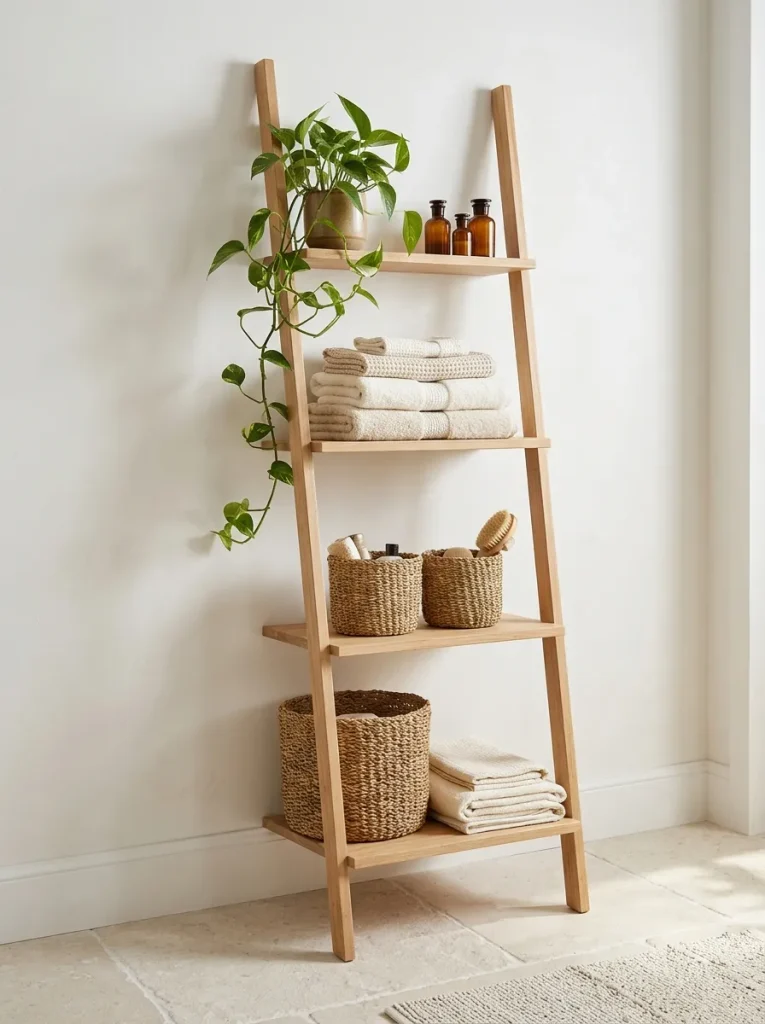
Cost: Low to moderate, depending on material and size.
Time: Around 15 to 30 minutes for basic styling.
Skill Level: Beginner, especially with a ready made shelf.
Best For: Small bathrooms, rental homes and guest bathrooms.
A ladder shelf provides several storage levels without requiring a row of wall mounted brackets. Place it beside the vanity or in an unused corner, then use baskets on lower rungs for spare toiletries and folded towels higher up. Choose a moisture resistant finish and secure the unit according to its instructions to prevent tipping. Leave enough clearance for doors, drawers and normal movement around the bathroom.
Minimalist White Shelves

Minimalist shelving makes a bathroom feel calm by giving essentials a clear home without introducing visual clutter. White shelves blend into light walls, allowing neatly arranged towels and containers to stand out gently. Choose simple rectangular designs with concealed brackets for a streamlined appearance, especially in small rooms.
Keep each shelf focused on a few useful items rather than filling every open spot. Matching jars can hold cotton pads or hair accessories, while a small basket conceals less attractive packaging. In my experience, leaving some empty space is often what makes minimalist storage look intentional rather than unfinished. Wipe shelves regularly and choose finishes that tolerate bathroom humidity.
Built In Shower Shelves
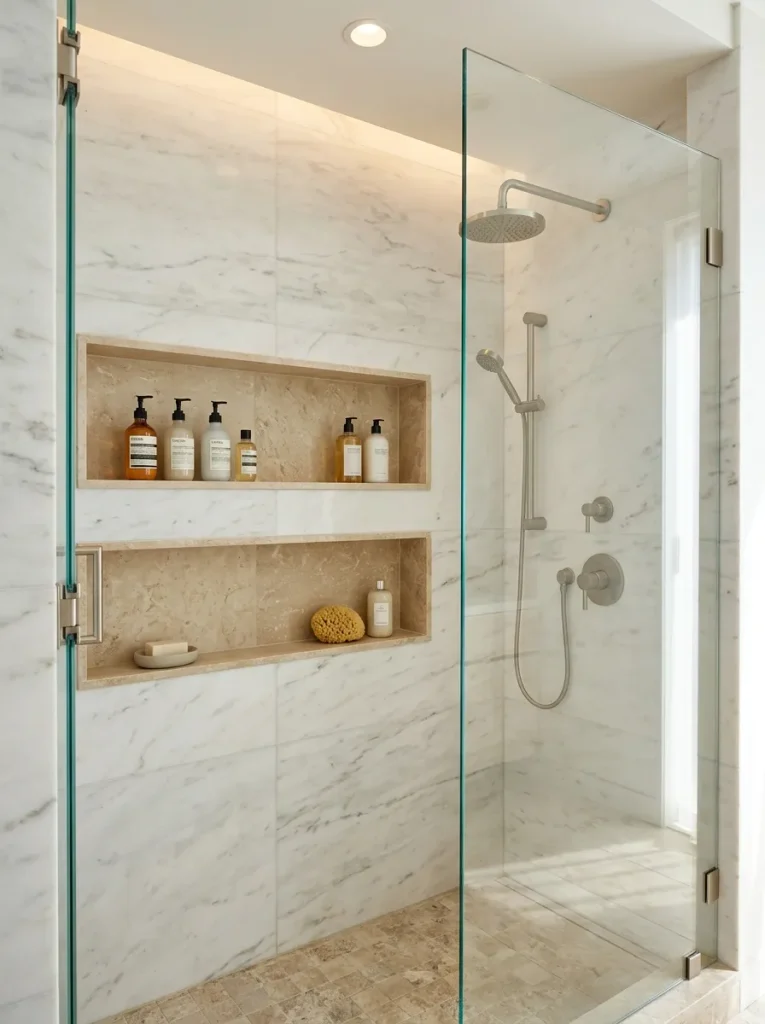
Before: Shampoo bottles, conditioners and body washes crowd the shower floor or sit in bulky hanging caddies. The result can look messy and make cleaning more difficult.
After: Built in shower shelves keep bathing products organized in a dedicated wall recess. The shower floor stays clear and matching tile creates a cohesive finish that feels intentional.
Plan the niche placement around the height of the people using the shower and the products they reach for most often. A longer niche can hold several bottles, while separate compartments help divide family members’ toiletries. Proper waterproofing is essential, so have the niche installed with suitable materials and correct drainage details. For an existing shower, a compatible wall mounted shelf may offer a simpler alternative to cutting into the wall.
Rustic Reclaimed Wood

- Select suitable wood. Choose sound timber without rot, deep cracks, or signs of moisture damage.
- Sand the surface. Smooth rough edges and remove splinters before bringing the shelf into daily use.
- Apply a protective finish. Use a suitable sealer that helps the wood tolerate bathroom humidity.
- Choose sturdy brackets. Match the supports and wall anchors to the shelf dimensions and expected load.
- Style with restraint. Combine towels, neutral containers and one or two decorative accents.
Reclaimed wood brings character to bathrooms filled with smooth tile, porcelain and glass. Its natural variations make each shelf distinctive, while a protective finish helps reduce damage from everyday humidity. Avoid placing untreated wood where it receives direct splashes and wipe away standing water promptly. This style pairs beautifully with farmhouse, rustic and modern organic interiors.
Shelves With Baskets

| Storage approach | Loose items | Basket storage |
| Appearance | Products remain visible | Small items look grouped |
| Organization | Items can spread across shelves | Each basket has a clear purpose |
| Access | Every item is directly exposed | Items are grouped for easy retrieval |
| Maintenance | Surfaces are easy to inspect | Baskets need occasional cleaning |
| Best use | Decorative bottles and towels | Backups, toiletries and small essentials |
Baskets make open shelving more practical by hiding packaging and grouping items by purpose. Use one for spare toilet paper, another for skincare backups and a smaller container for hair accessories. Choose materials suited to bathroom conditions, since natural fibers can hold moisture if they stay damp. Leave enough room to pull baskets out comfortably and label them if several people share the bathroom.
Marble Floating Shelves
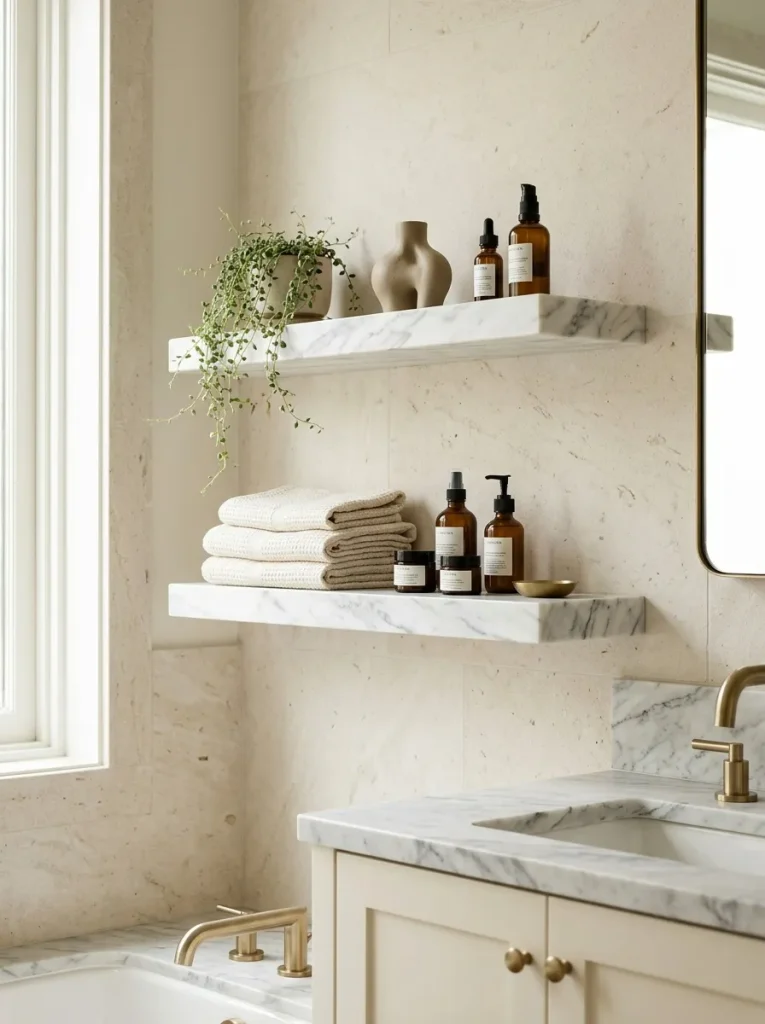
DO:
- Choose marble tones that complement your countertop and wall tiles.
- Keep heavier items near secure support points and follow the shelf’s weight limit.
- Use a protective finish recommended for the specific stone.
- Style with a few coordinated bottles and small decorative pieces.
DON’T:
- Don’t assume every marble finish resists staining or etching.
- Don’t use harsh cleaners that may damage the stone.
- Don’t install heavy shelves with unsuitable wall anchors.
- Don’t place delicate items where they could be knocked off easily.
Marble shelves add natural pattern and a polished finish without requiring a full bathroom renovation. Their veining creates visual interest, so simple styling usually works best. Pair them with neutral towels and understated containers to let the stone remain the focal point. Because marble can be sensitive to certain products, wipe away spills and follow the stone supplier’s care recommendations.
Over Vanity Shelving

Cost: Low to moderate, depending on shelf material and brackets.
Time: Approximately 1 to 3 hours for measuring and installation.
Skill Level: Beginner to intermediate, depending on wall construction.
Best For: Bathrooms with limited counter space and unused wall area above the vanity.
Shelves above the vanity keep everyday products accessible while freeing up the countertop for handwashing and grooming. Measure carefully around the mirror, faucet and lighting before deciding on placement. Avoid positioning shelves so low that they obstruct the mirror or create a head bumping hazard. Store lightweight essentials within reach and reserve higher shelves for items used less often. If the wall contains plumbing or electrical wiring, check the installation area before drilling.
Recessed Cabinet Shelves

DO:
- Measure the available wall cavity before selecting the cabinet or shelf dimensions.
- Store daily essentials at comfortable reaching height.
- Use adjustable shelves to accommodate bottles, towels, and changing storage needs.
- Choose moisture resistant materials and finishes suitable for bathrooms.
DON’T:
- Don’t cut into a wall without checking its structure and hidden services.
- Don’t overlook waterproofing requirements near showers or tubs.
- Don’t overload shelves beyond their rated capacity.
- Don’t use deep containers that prevent cabinet doors from closing properly.
Recessed storage creates a tidy finish because the shelves sit within the wall rather than projecting into the room. It is especially useful in narrow bathrooms where every bit of clearance matters. Planning is important, since wall cavities, plumbing and electrical routes can limit installation options. For a simpler alternative, consider a shallow surface mounted cabinet that offers a similar organized look without major construction.
Black Metal Shelving
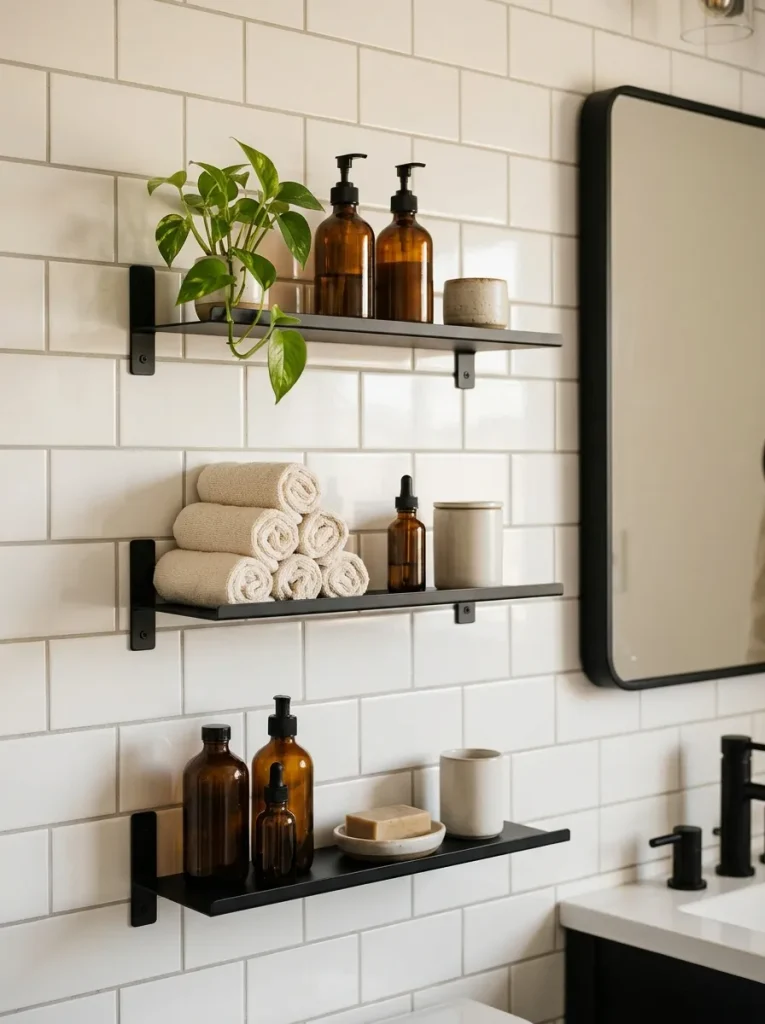
Black metal shelving creates a striking contrast against pale walls while keeping the storage design visually light. Slim frames work particularly well in modern, industrial and farmhouse bathrooms, especially when paired with wood accents or woven baskets. Choose a finish designed to resist corrosion in humid environments and wipe away water droplets to keep the shelves looking fresh.
For a coordinated look, repeat black in just a few other details, such as the mirror frame or cabinet handles. This prevents the shelves from feeling disconnected from the rest of the room. Keep the display practical with folded towels, attractive dispensers, and a small amount of greenery rather than filling every level with accessories.
Bathtub Side Shelves
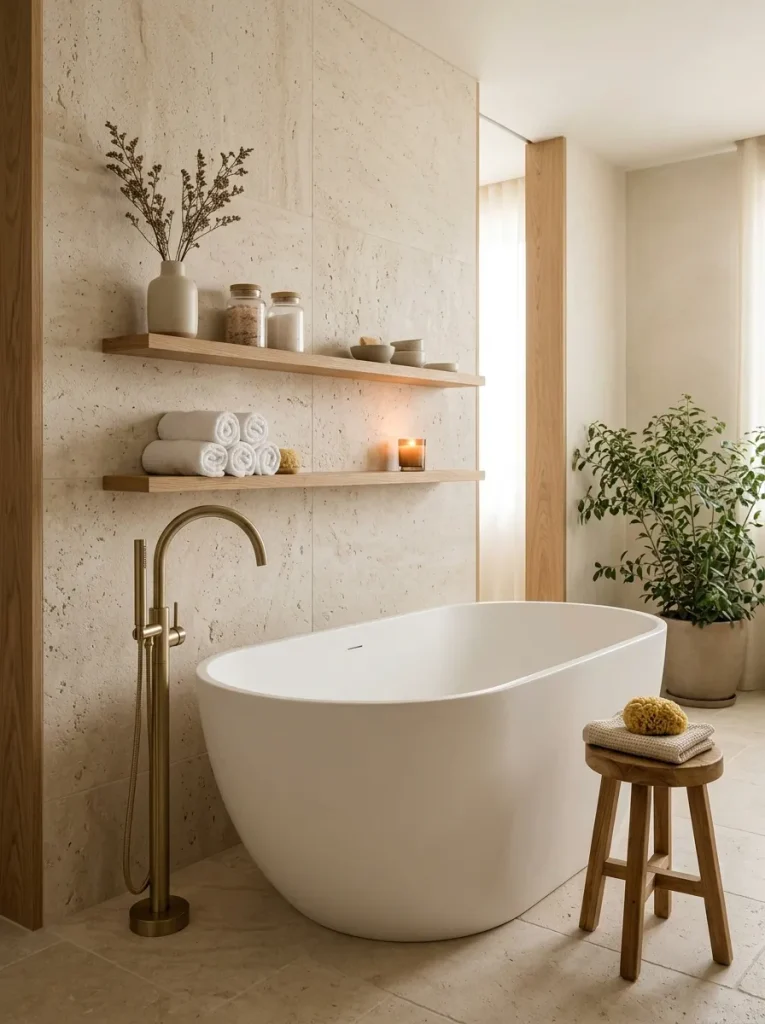
- Measure the available space. Check the gap beside the tub and leave enough room to enter, exit and clean comfortably.
- Choose moisture resistant materials. Sealed wood, suitable metal and bathroom rated finishes can handle humid conditions better than untreated materials.
- Store bath essentials together. Keep towels, bath products and washcloths within easy reach.
- Secure the shelves properly. Use appropriate fixings and check the wall for hidden pipes and wiring before drilling.
Shelving beside the bathtub makes bath time more convenient by giving everyday essentials a dedicated place. A narrow vertical arrangement can work well in smaller rooms, while a wider shelf offers space for folded towels and a few decorative touches. Keep candles and fragile containers away from edges where they could fall into the tub. For a rental friendly alternative, consider a freestanding narrow storage unit that can be moved when needed.
Wood vs. Metal Shelves

| Feature | Natural Wood | Metal |
| Visual style | Warm and organic | Modern and industrial |
| Color options | Oak, walnut, painted finishes | Black, brass, chrome, white |
| Moisture care | Benefits from suitable sealing | Needs a corrosion resistant finish |
| Styling partners | Woven baskets, linen, ceramics | Glass, monochrome containers, clean lines |
| Best use | Cozy and natural bathrooms | Sleek and contemporary spaces |
The best material depends on your bathroom’s style, humidity and storage needs. Wood adds warmth to rooms with cool tile, while metal can provide a slim, structured look that suits smaller spaces. Check product specifications rather than assuming a material is waterproof and consider how easy the shelves will be to clean. Matching the shelf finish to existing hardware helps the entire arrangement feel intentional.
Farmhouse Bathroom Shelves

DO:
- Pair whitewashed wood with black brackets for classic farmhouse contrast.
- Use woven baskets to hide extra toiletries and small bathroom essentials.
- Display folded towels and a few simple ceramic accessories.
- Coordinate shelf styling with existing wood finishes and hardware.
DON’T:
- Don’t overload shelves with oversized signs or decorative objects.
- Don’t use untreated wood in areas exposed to frequent splashes.
- Don’t mix too many competing finishes or patterns.
- Don’t forget to secure the shelves with suitable wall fixings.
Farmhouse shelving combines useful storage with warm, lived in character. Whitewashed boards brighten the walls, while natural baskets and wood grain keep the room from feeling sterile. Use everyday essentials as part of the display so the shelves remain functional rather than purely decorative. A few repeated materials and colors will help the arrangement look cohesive, even in a compact bathroom.
Narrow Vertical Shelves

Cost: Low to moderate, depending on the material and mounting system.
Time: Around 1 to 2 hours for a simple wall mounted installation.
Skill Level: Beginner to intermediate.
Best For: Narrow gaps beside vanities, toilets or bathroom doors.
Vertical shelving takes advantage of wall height instead of spreading storage across a limited floor area. A slim unit can hold toiletries, spare washcloths and small baskets without crowding the vanity. Measure the available width carefully and check that cabinet doors, drawers and the bathroom door can open freely. Keep heavier items on lower shelves and lighter accessories above for a practical, balanced arrangement.
Decorative Picture Ledges
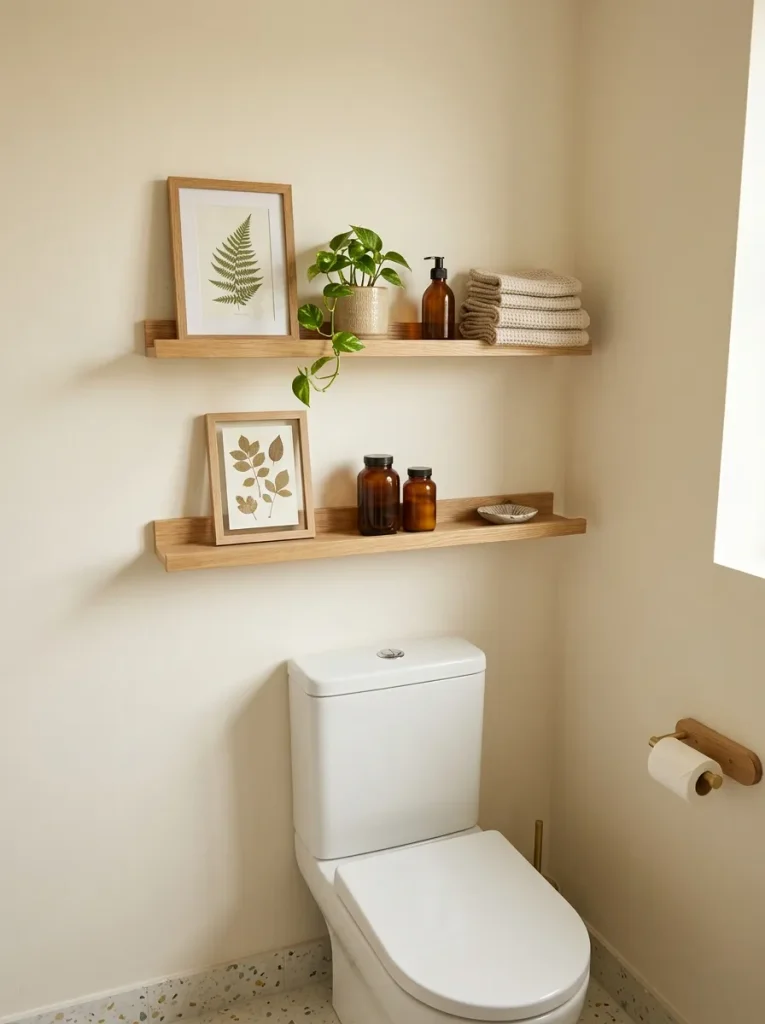
Picture ledges offer a shallow shelf design that works well for lightweight bathroom accessories and small decorative items. Their narrow profile keeps the wall from feeling bulky, while the front lip helps prevent displayed objects from sliding forward. Use them for small framed prints, attractive bottles, or compact containers that fit securely.
Although picture ledges can add charm, they are not intended for every storage need. Check the manufacturer’s load limit and avoid placing heavy toiletries or breakable objects where they could fall. In humid bathrooms, choose suitable materials and keep paper artwork away from direct moisture. For a coordinated display, repeat a few colors from your towels, tiles or vanity accessories.
Tiered Corner Shelving
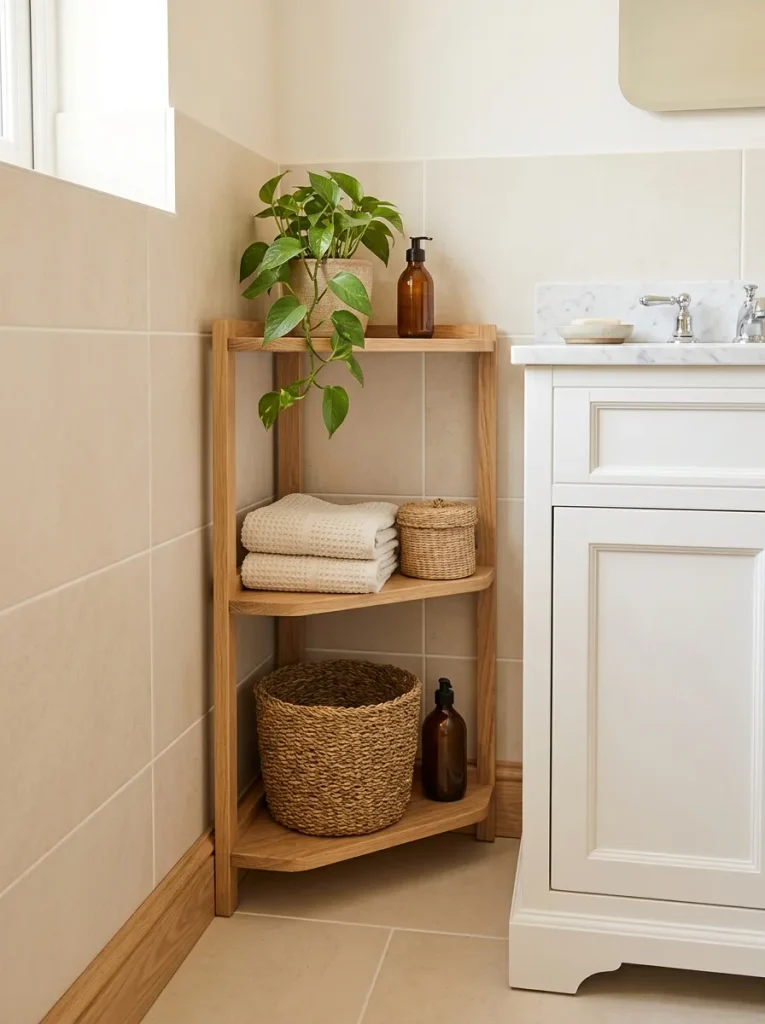
Cost: Low to moderate, depending on the shelf material and design.
Time: Around 30 minutes to 2 hours, depending on assembly and installation.
Skill Level: Beginner for freestanding units, intermediate for wall mounted designs.
Best For: Small bathrooms, unused corners and compact guest bathrooms.
Tiered corner shelving makes awkward spaces useful without taking up much floor area. Each level can serve a different purpose, with daily toiletries on the easiest to reach shelf and spare towels or decorative pieces above. Choose a unit with dimensions that fit the corner comfortably and secure taller designs according to the manufacturer’s instructions. Keep the display simple so the shelves remain easy to clean and practical for everyday use.
Colorful Painted Shelves
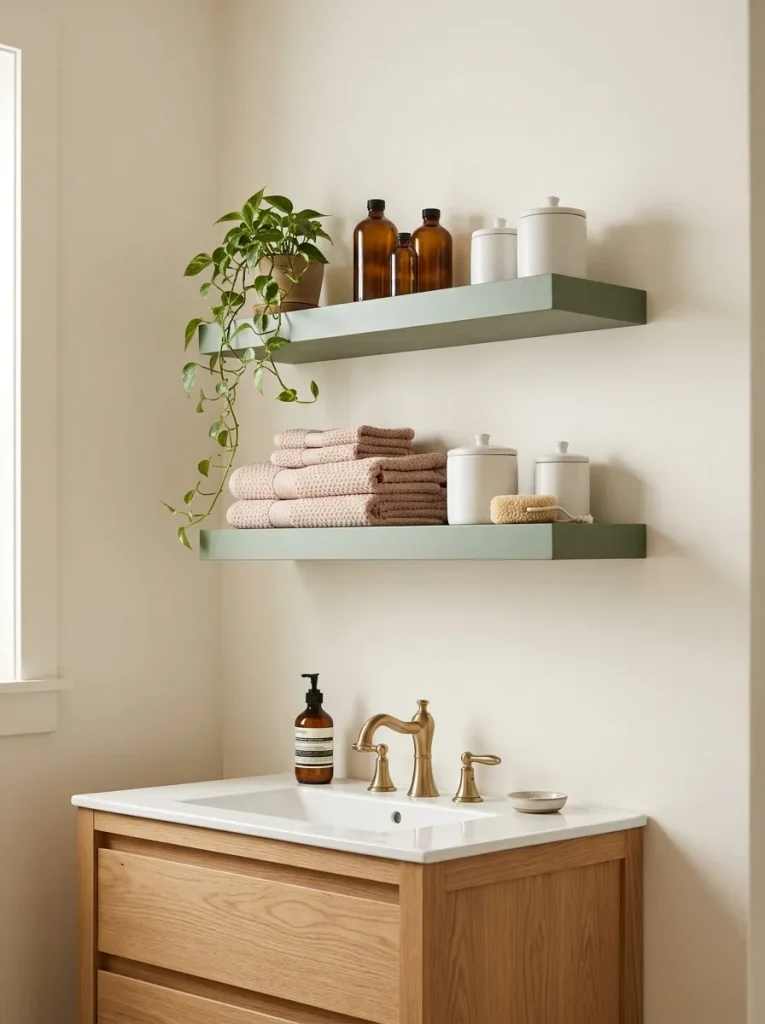
Quick Tip: Choose a shelf color that connects with an existing detail, such as your towels, shower curtain, or vanity. Use a moisture resistant finish suitable for the shelf material and bathroom environment.
Painted shelves can introduce personality without requiring new tiles or expensive fixtures. Sage green creates a relaxed natural look, dusty blue feels fresh and muted terracotta adds warmth to neutral bathrooms. If you’re unsure about a bold shade, start with one small shelf and keep the surrounding decor simple so the color feels intentional.
Before painting, prepare the surface according to the paint manufacturer’s instructions and allow the finish to cure fully. Avoid placing damp towels or wet products on freshly painted shelves. Coordinating the shelf color with one or two accessories helps create a pulled together look without making the room feel overly busy.
Symmetrical Shelf Styling

BEFORE: Shelves filled with unrelated bottles, mismatched containers and scattered accessories can make a bathroom feel cluttered. Even attractive pieces may look disconnected when there is no consistent arrangement.
AFTER: Matching containers, repeated colors and balanced spacing create a more organized display. Similar objects on each shelf give the wall a deliberate appearance while keeping everyday essentials accessible.
Start by choosing two or three colors that already appear in your bathroom, then repeat them through towels, containers and small decorative pieces. Symmetry does not require identical objects on every shelf. Matching the visual weight of items, such as a basket on one side and a ceramic container on the other, can achieve a similar effect. Leave some empty space to keep the arrangement from feeling crowded and place frequently used products where you can reach them easily.
Minimalist Rectangle Mirrors

Minimalist rectangular mirrors are perfect for bathrooms where simplicity and functionality matter most. Their clean lines complement modern interiors, making them an excellent choice for small powder rooms and spacious master bathrooms alike.
Choose a frameless design for a seamless appearance or a slim black frame for a subtle contrast. Position the mirror above your vanity to reflect natural light and make the room feel brighter. Pair it with simple lighting, uncluttered countertops and neutral colors for a fresh, timeless look.
Oval Bathroom Mirrors
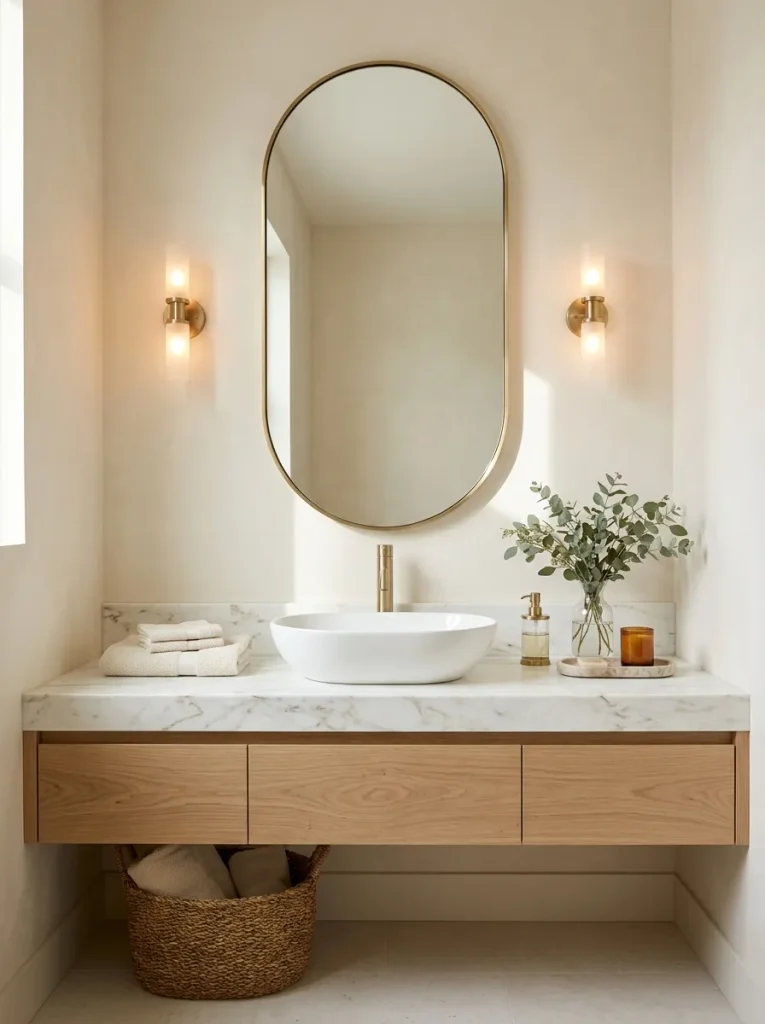
Oval mirrors offer a beautiful balance between the softness of round designs and the height of rectangular mirrors. Their elongated shape works especially well above narrow vanities, where a wide mirror might overwhelm the wall.
Choose a brass frame for warmth or a frameless design for a cleaner appearance. Position the mirror centrally above the basin, allowing enough room for wall lights if needed. This style pairs beautifully with marble countertops, natural wood cabinetry and neutral bathroom accessories.
Double Sided Magnifying Mirrors
DO:
- Choose a magnifying mirror with adjustable positioning for comfortable grooming.
- Check the magnification level before purchasing to suit your personal needs.
- Select a wall mounted model with a sturdy, corrosion resistant arm.
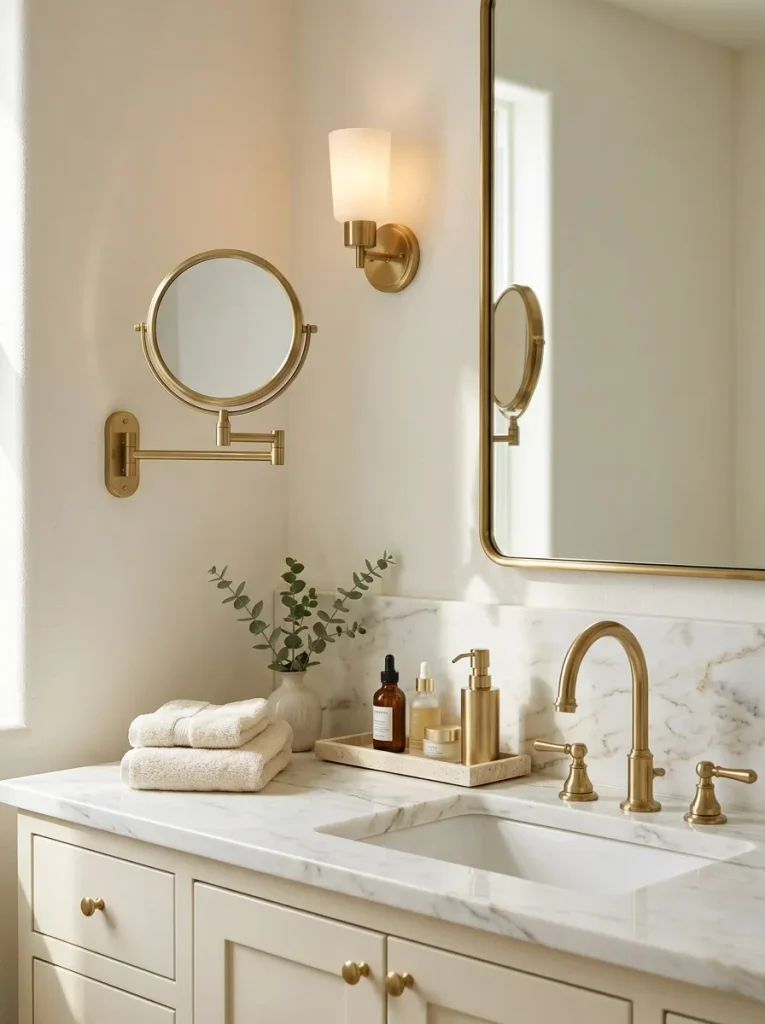
- Coordinate its finish with your faucet, cabinet handles, or wall lights.
DON’T:
- Mount it where it blocks access to the main mirror.
- Choose an arm that extends into a busy walkway.
- Ignore the manufacturer’s weight and installation requirements.
A magnifying mirror provides a closer view for detailed grooming without replacing your main bathroom mirror. Its extendable arm allows you to move it into position when needed and fold it away afterward. This makes it particularly useful in shared bathrooms where countertop space is limited. Choose a location with good lighting for comfortable everyday use.
Round Mirrors With Leather Straps

Quick Tip:
Check that the strap, wall hook and mounting hardware are designed to support the mirror’s full weight. In a humid bathroom, choose moisture resistant materials and follow the manufacturer’s installation instructions.
Leather strap mirrors introduce a distinctive decorative detail while keeping the overall design simple. The hanging strap creates a subtle contrast against smooth tile, painted walls, or natural wood finishes. Choose a warm brown strap for an organic look or a darker finish for a modern interior. Keep nearby accessories minimal so the mirror remains the main focal point.
Antique Brass Framed Mirrors

Antique brass mirrors bring warmth and subtle character to bathrooms without the elaborate detailing of heavily ornamented frames. Their muted golden finish pairs beautifully with marble, walnut cabinetry, cream tiles and traditional fixtures.
For a coordinated appearance, repeat the brass tone in your faucet or cabinet handles while keeping other metallic finishes limited. A rectangular frame suits a classic vanity, while a rounded design creates a softer effect. Check the frame’s finish and moisture resistance before buying, especially if the mirror will be installed near a shower or bathtub.
CONCLUSION
Choosing the right bathroom mirror is a simple way to bring more beauty, light and personality into your space. From timeless framed designs to sleek modern styles, these Bathroom Mirror Ideas offer inspiration for bathrooms of every size and aesthetic. Remember, you don’t need a complete renovation to make a noticeable difference. Start with one design you love, consider your available space and lighting and create a look that feels right for you. Save this article on Pinterest so you can revisit your favorite ideas later, try a style that inspires yo and share this article with anyone planning a bathroom makeover. Your dream bathroom can start with one beautiful detail!


One Comment