
27 Bathroom Organization Ideas for a Spa Like Retreat
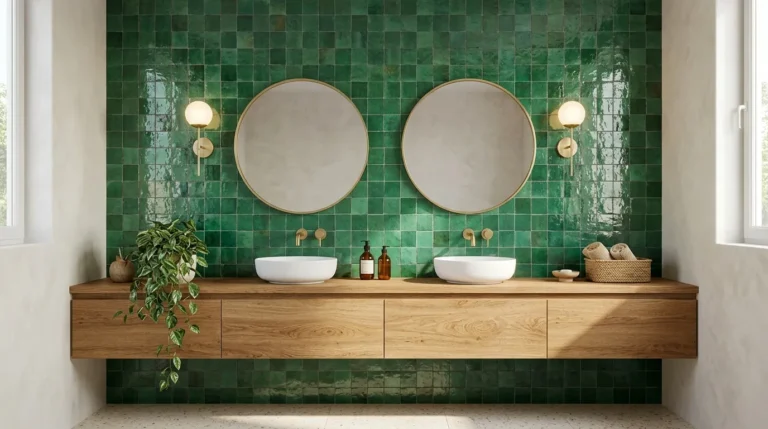
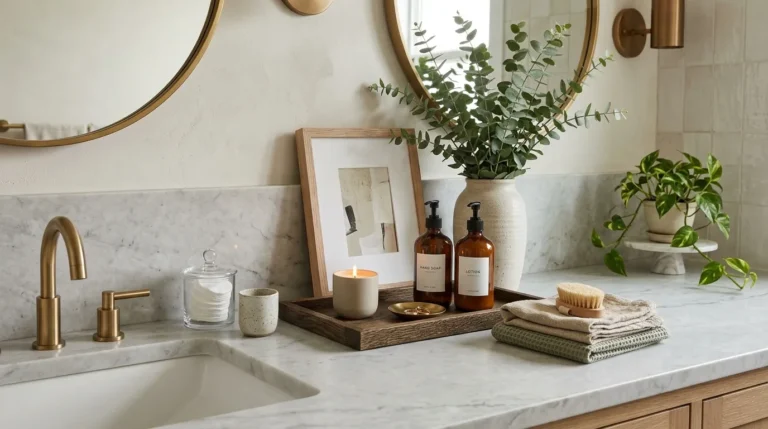
These 27 Bathroom Organization Ideas will help you create a bathroom that feels cleaner, more spacious and more relaxing without requiring a complete renovation. From woven baskets and drawer dividers to floating shelves and matching storage containers, you’ll find practical ways to organize everyday essentials while keeping your space beautiful. Whether you’re working with a tiny bathroom, sharing storage with family, or simply craving a more peaceful atmosphere, there’s an idea here for you. I’ve noticed that giving everyday items a designated home makes it much easier to maintain a tidy room. With a little planning and a few simple adjustments, you can create a spa inspired bathroom that supports your daily routine and feels welcoming every day.
Woven Storage Baskets
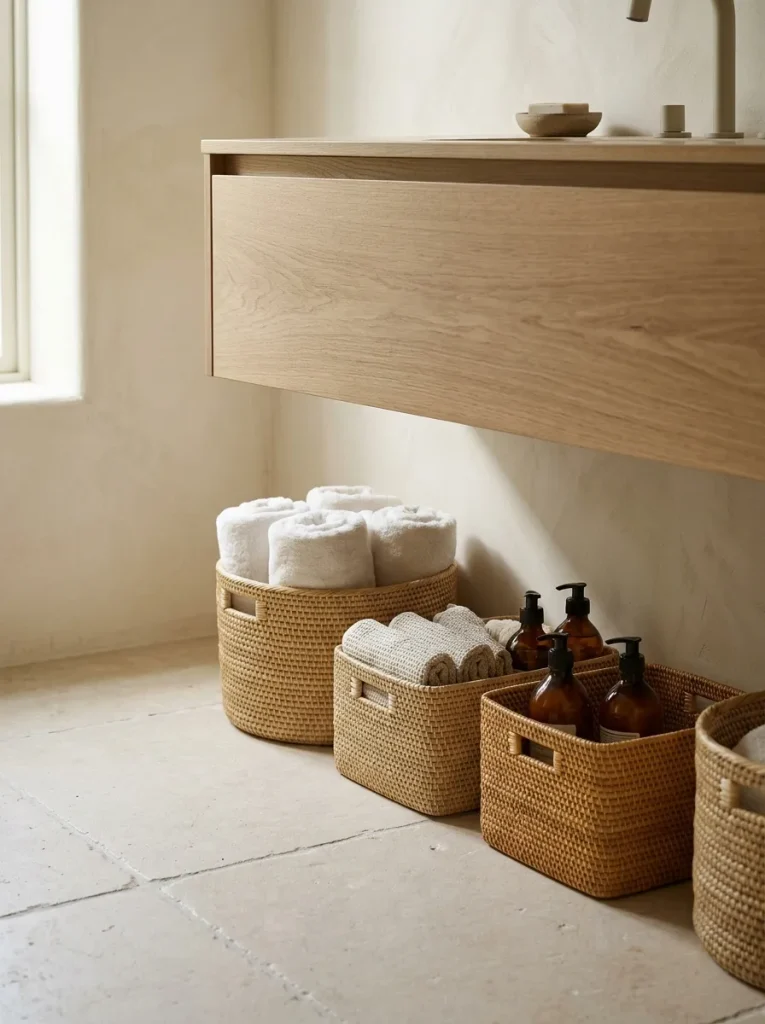
Cluttered countertops can make even a beautiful bathroom feel stressful, but woven baskets offer a simple fix. Place two or three baskets beneath your vanity to store extra toilet paper, clean towels and everyday toiletries. Natural textures add warmth while keeping practical essentials within easy reach.
Choose baskets in similar shades for a coordinated look. Measure the available space before buying, especially if you have a narrow vanity or need room for plumbing. Lined baskets are helpful for storing smaller items, while sturdy, moisture resistant materials hold up better in humid bathrooms.
Clear Vanity Containers

- Group similar items: Keep cotton pads, swabs and hair accessories in separate containers so everything has a designated place.
- Choose stackable designs: Small stackable organizers make better use of limited counter space.
- Match container sizes: Consistent shapes create a cleaner appearance without requiring expensive decor.
- Keep daily essentials visible: Store frequently used products at the front and occasional items in drawers.
- Clean containers regularly: Wipe away dust, water spots and product residue to maintain a fresh look.
Clear organizers help you spot what you need without opening multiple drawers or searching through crowded toiletry bags. They’re especially useful for shared bathrooms, where everyone may have different routines. Keep only the products you use regularly on display and store backups elsewhere to prevent visual clutter from returning.
Drawer Dividers

Quick Tip:
Measure the inside of each drawer before purchasing dividers. Adjustable bamboo or washable plastic inserts work well because you can change the compartments as your needs evolve. Keep items used together in the same section, such as daily skincare products or shaving supplies.
A well organized drawer makes busy mornings feel less rushed. Instead of digging beneath tangled cords and half empty bottles, you can reach directly for what you need. Assign each compartment a specific purpose and return items after use. If a product no longer fits your routine, remove it rather than letting it reclaim valuable space.
Read More: Tiny Bathroom? 28 Bathroom Storage Ideas You’ll Be Obsessed With
Over the Toilet Shelving

BEFORE
The space above the toilet often sits empty while towels, toiletries and spare toilet paper compete for limited cabinet space. In a small bathroom, that unused wall can make storage feel unnecessarily cramped.
AFTER
A narrow shelving unit creates several useful storage levels without taking up additional floor space. Matching baskets conceal smaller items, while neatly folded towels and a simple plant keep the arrangement looking intentional.
Choose shelves that fit comfortably above the toilet tank and leave enough clearance for maintenance. Secure wall mounted units to suitable supports and keep heavy objects away from the edge. This setup works particularly well in guest bathrooms, rental homes with limited cabinets, and compact bathrooms that need extra storage without a major renovation.
Wall Mounted Towel Hooks
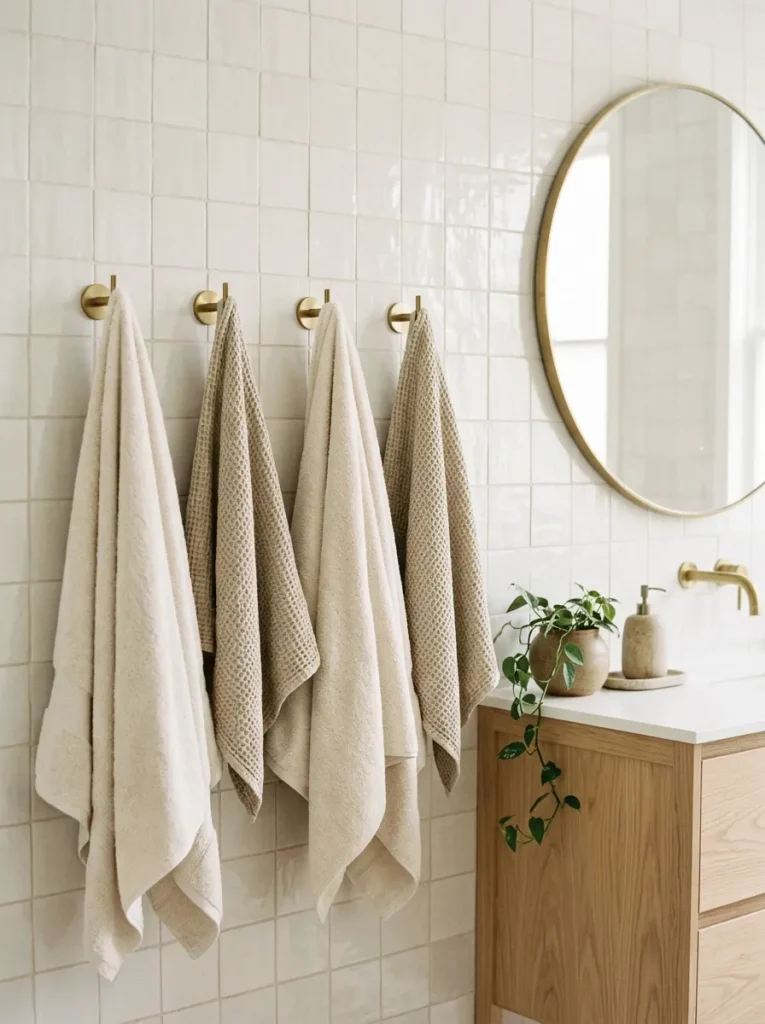
- Choose the location. Install hooks near the shower or beside the vanity so towels are easy to reach after washing.
- Measure the spacing. Leave enough room between hooks for damp towels to spread out and dry.
- Select suitable hardware. Use moisture resistant hooks and fasteners appropriate for your wall surface.
- Assign each hook. Give household members separate spots to prevent towels from piling up on counters or floors.
Replacing a bulky towel rack with individual hooks can free up valuable wall space and make daily routines simpler. In my experience, assigning one hook to each person also helps prevent the familiar problem of damp towels ending up on the bed or over the shower door. Choose finishes that complement your faucets for a coordinated appearance.
Pull Out Cabinet Organizers
| Storage Feature | Fixed Shelf | Pull Out Organizer |
| Access | Items at the back can be difficult to reach | The entire tray slides forward |
| Visibility | Products may hide behind one another | Contents are easier to scan |
| Best Use | Large, regularly used items | Small bottles and grouped supplies |
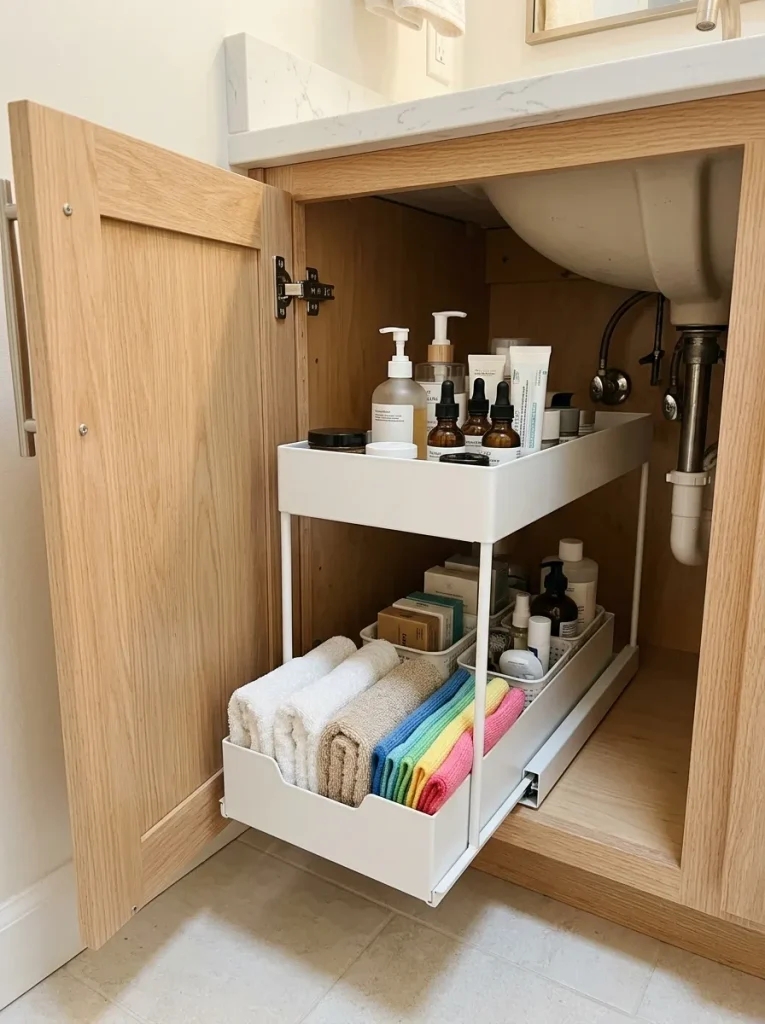
Deep vanity cabinets often hide products that get forgotten until they expire or run out. A pull out organizer brings everything into view, making it easier to find daily essentials and track supplies. Measure cabinet width, depth and plumbing clearance before choosing a model and select a water-resistant design that slides smoothly.
Tiered Counter Trays

DO
- Place daily skincare products on the upper tier for quick access.
- Reserve the lower tier for smaller bottles and folded washcloths.
- Choose a tray with a stable base and easy to clean surfaces.
- Leave some countertop space open around the display.
DON’T
- Mix too many colors and packaging styles.
- Store wet items on surfaces that trap moisture.
- Place heavy glass bottles on an unstable upper tier.
- Let backup products accumulate until the tray becomes crowded.
A tiered tray adds vertical storage without spreading toiletries across the vanity. Keep the arrangement simple by grouping products by routine, such as morning skincare on one level and evening essentials on the other. A little breathing room between items helps the display feel calm rather than cluttered.
Matching Storage Jars

Cost: Low to moderate, depending on jar material and size
Time: About 15 to 20 minutes to arrange
Skill Level: Beginner
Best For: Cotton pads, cotton swabs, bath salts and small dry essentials
Result: A coordinated countertop with everyday items easy to identify
Matching jars give small bathroom supplies a consistent home, so open packages no longer crowd drawers or sit loosely on the counter. Choose wide openings for easy access and secure lids for dusty environments. Keep jars away from direct splashes and make sure stored items are completely dry before closing the containers.
Floating Vanity Baskets

Open space beneath a vanity can look stylish, but it often becomes an awkward spot for loose supplies. Baskets turn that area into practical storage while preserving the light, spacious appearance of a floating cabinet. Select two matching baskets that slide in easily, leaving enough room to remove them without disturbing nearby plumbing.
Use one basket for clean towels and another for spare toiletries or toilet paper. Keep cleaning products separate from linensand avoid placing fabric directly on a damp floor. If your bathroom has limited ventilation, choose washable or moisture resistant baskets that can be cleaned and dried regularly.
Shower Corner Caddies

A crowded shower ledge makes daily bathing feel less relaxing, especially when bottles keep tipping over. A corner caddy uses space that often goes unnoticed and keeps frequently used products within comfortable reach. Choose a rust resistant model with drainage openings so water does not collect beneath your toiletries.
- Check the fit: Measure the corner and available height before purchasing a tension pole or wall mounted caddy.
- Group by routine: Keep shampoo and conditioner together, with body wash on a separate shelf.
- Reduce bottle clutter: Transfer products into compatible refillable containers if you prefer a uniform appearance.
- Clean regularly: Remove soap residue and allow the shelves to dry to discourage buildup.
Labeled Linen Bins
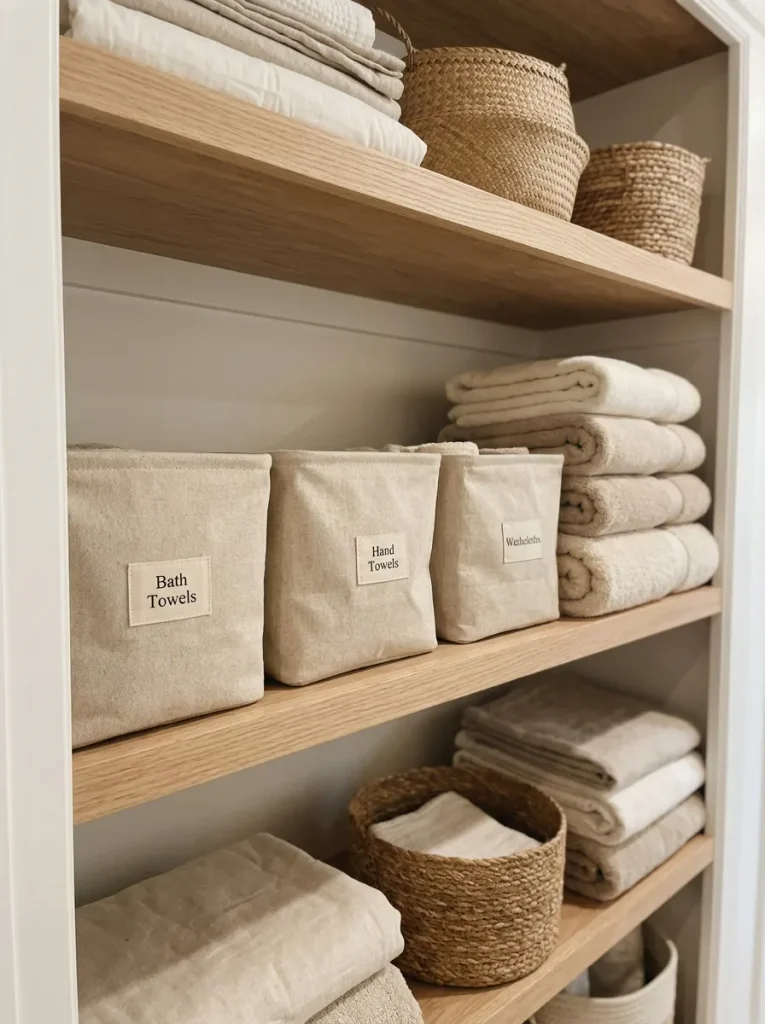
Quick Tip: Keep labels short and easy to read from the front of each bin. Use removable tags if the contents may change, and choose washable fabric bins for shelves that collect dust.
Sorting linens by type saves time when someone needs a fresh towel or when you’re restocking the bathroom after laundry day. Place frequently used hand towels and washcloths on the easiest-to-reach shelf, reserving higher spaces for spare sets. Avoid packing bins too tightly, since damp or compressed fabrics need room to stay fresh.
Under Sink Zones

BEFORE
The cabinet beneath the sink often becomes a jumble of half used products, cleaning supplies and spare toiletries. Items pushed toward the back are difficult to see and a small leak can go unnoticed beneath crowded containers.
AFTER
Separate bins and a compact shelf create clear zones for different categories. Everyday supplies sit near the front, backups stay together and cleaning products remain apart from towels and personal care items.
Start by removing everything and checking the cabinet for moisture or damage. Measure around the pipes before adding organizers and use waterproof trays to contain small spills. Keep chemicals in their original containers, away from children and follow product labels for safe storage. A quick monthly check helps prevent expired products and duplicate purchases from piling up again.
Magnetic Makeup Storage

- Choose a suitable board. Select a magnetic board with a wipeable surface and enough room for your everyday beauty essentials.
- Add compatible containers. Use magnetic cups or attach magnets securely to lightweight organizers.
- Group similar products. Keep brushes together, makeup tools in one area and small accessories in another.
- Mount it safely. Position the board away from direct splashes and secure it according to the manufacturer’s instructions.
A vertical makeup station frees up drawer and countertop space while keeping frequently used items visible. It works especially well in narrow bathrooms where every surface matters. Store heavier products in a cabinet, and clean the containers regularly to remove makeup residue and dust before they build up.
Stackable Towel Shelves
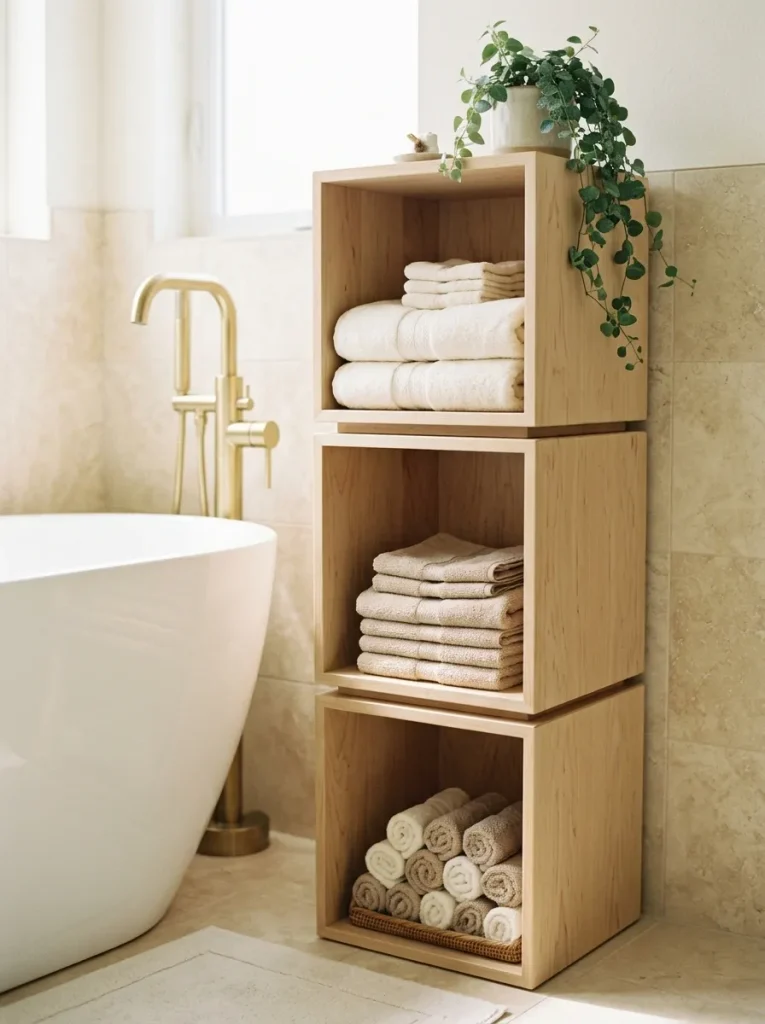
| Storage Choice | Single Shelf | Stackable Shelves |
| Capacity | Holds one main layer of towels | Adds several storage levels |
| Flexibility | Fixed amount of space | Can expand as needs change |
| Placement | Works on a counter or wall | Fits corners and unused vertical space |
Extra towels are useful, but storing them without a plan can quickly crowd a small bathroom. Stackable shelving lets you build upward instead of taking over the floor. Choose a stable unit that fits your available width and fold towels to consistent sizes so each shelf stays tidy and easy to maintain.
Daily Essentials Tray

DO:
- Keep only the products used every morning or evening on the tray.
- Arrange bottles by height for easy visibility.
- Choose a washable tray with a raised edge to catch small drips.
- Leave room to wipe the surrounding countertop.
DON’T:
- Store every skincare product in the same display.
- Place the tray where it blocks the faucet or sink.
- Mix wet washcloths with dry products.
- Ignore residue that collects beneath bottles.
A dedicated tray creates a clear boundary for daily toiletries, making it easier to keep the vanity clean. Choose three to five essentials and store occasional use products elsewhere. If several people share the sink, give each person a separate tray or small container to prevent products from spreading across the entire counter.
Slim Rolling Storage Carts

Cost: Low to moderate, depending on material and size
Time: About 20 minutes for assembly and organizing
Skill Level: Beginner
Best For: Small bathrooms, renters and homes with limited cabinet space
Result: Mobile storage that can move wherever supplies are needed
A slim rolling cart can turn an overlooked gap beside the vanity into useful storage. Measure the space between fixtures before buying and check that the wheels roll smoothly over your flooring. Keep heavier items on the bottom tier for stability and use small bins to prevent bottles from tipping when the cart moves.
Shower Wall Niches
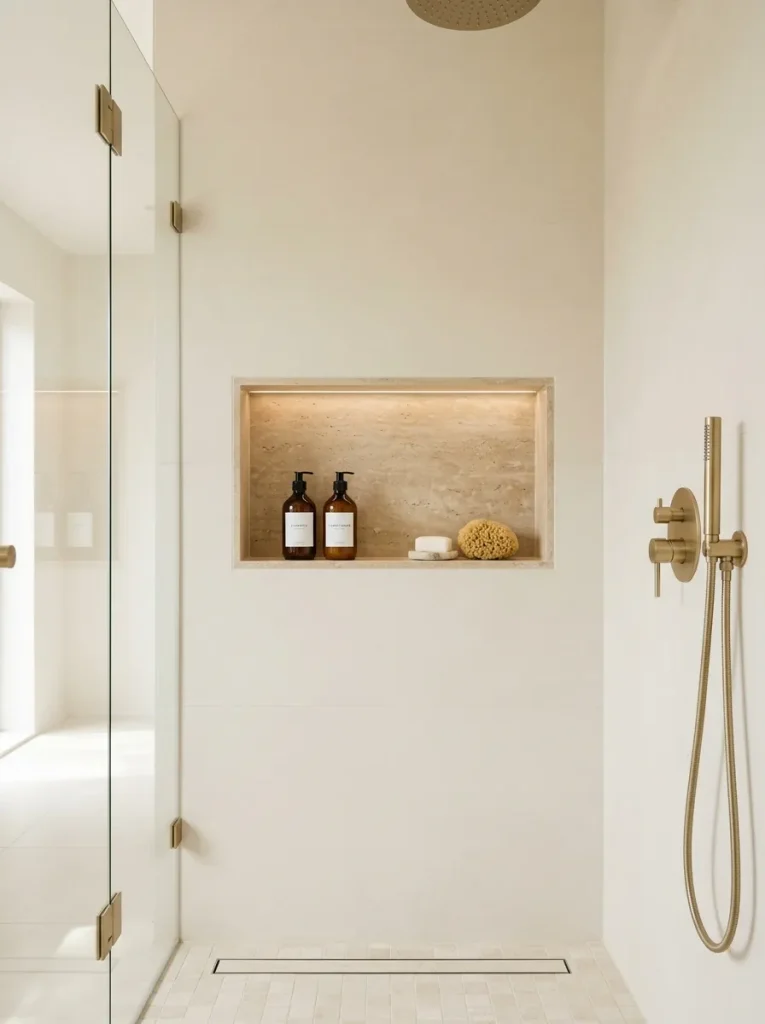
A recessed shower niche keeps bottles off the floor and gives the bathing area a clean, built in appearance. Because the shelf sits inside the wall, it adds storage without making a compact shower feel tighter. If you’re renovating, plan the niche location carefully so toiletries remain easy to reach without interfering with plumbing or wall framing.
For an existing shower, a surface mounted shelf may provide a simpler alternative to cutting into finished walls. Proper waterproofing is essential for recessed niches, so have a qualified professional handle installation when needed. Choose tile that complements the surrounding shower and a shelf depth that comfortably accommodates your regular bottles.
Over Door Organizers
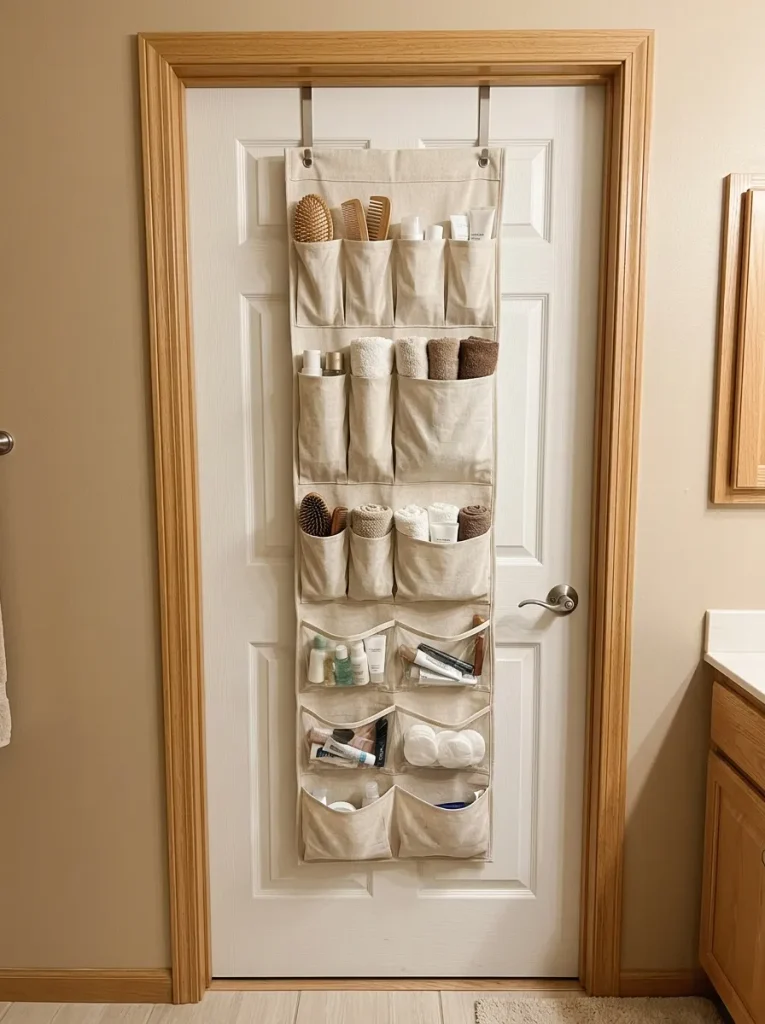
BEFORE
Bathroom cabinets fill up quickly with travel size products, hair tools and spare toiletries. Small items end up scattered across shelves, while the back of the door remains unused.
AFTER
A slim over-door organizer creates extra storage without requiring new cabinets or permanent wall fixtures. Clear pockets make small products easy to spot, while fabric compartments conceal less attractive packaging.
Check the door’s clearance before choosing an organizer, especially if nearby walls or towel bars limit movement. Keep heavy bottles in lower compartments and avoid overloading hooks or pockets. This solution works well for renters, shared bathrooms and anyone who wants additional storage without drilling into tile.
Vanity Drawer Inserts

- Empty the drawer. Remove every item and discard expired products or damaged tools.
- Measure the interior. Check the drawer’s width, depth and height before choosing inserts.
- Create practical categories. Group skincare, dental supplies, cosmetics and grooming tools separately.
- Arrange by frequency. Keep everyday essentials near the front and occasional use items toward the back.
- Review the layout. Open and close the drawer to make sure nothing catches or shifts.
Small items are often responsible for the most frustrating bathroom clutter. Modular inserts give each product a designated spot, so you can find what you need without rummaging through a crowded drawer. Choose washable organizers with smooth surface and leave a little room around frequently used items for easy removal.
Wall Mounted Toothbrush Holders
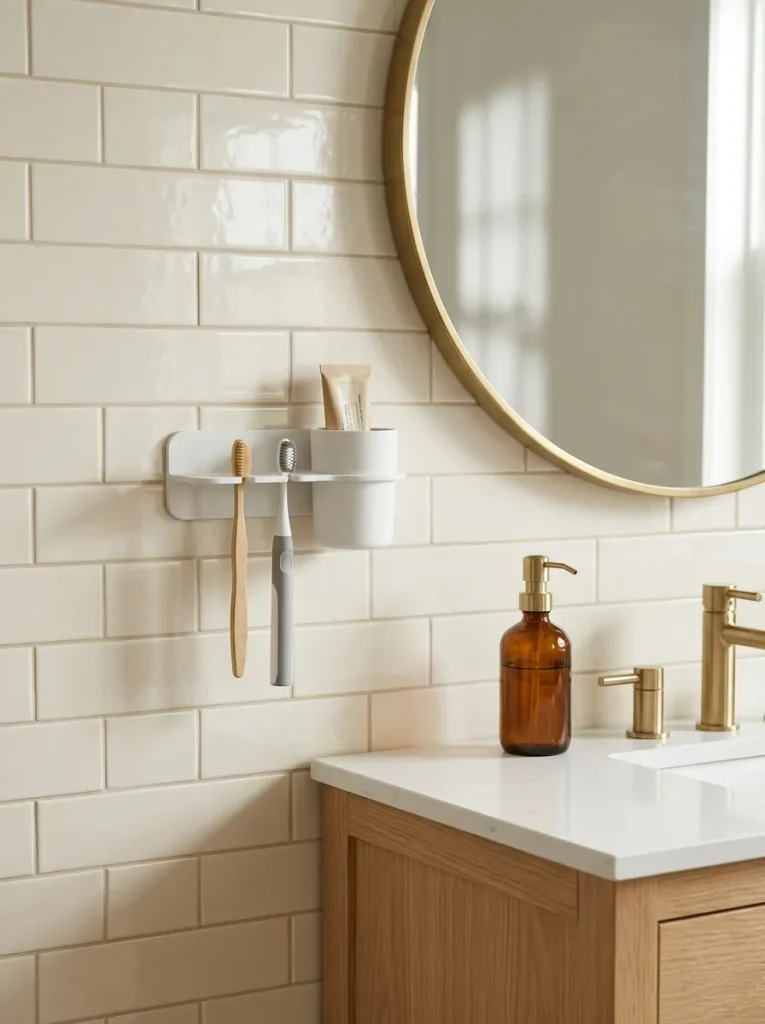
Cost: Low to moderate
Time: Around 10 to 30 minutes, depending on mounting method
Skill Level: Beginner for adhesive models
Best For: Shared bathrooms and narrow vanities
Result: More free countertop space and a designated place for dental tools
Moving toothbrushes off the sink creates a tidier vanity and makes wiping the counter easier. Choose a holder that allows toothbrush heads to dry between uses, with enough space to prevent brushes from touching one another. Follow the manufacturer’s cleaning instructions and check that adhesive mounts are suitable for your tile or wall finish.
Refillable Soap Dispensers
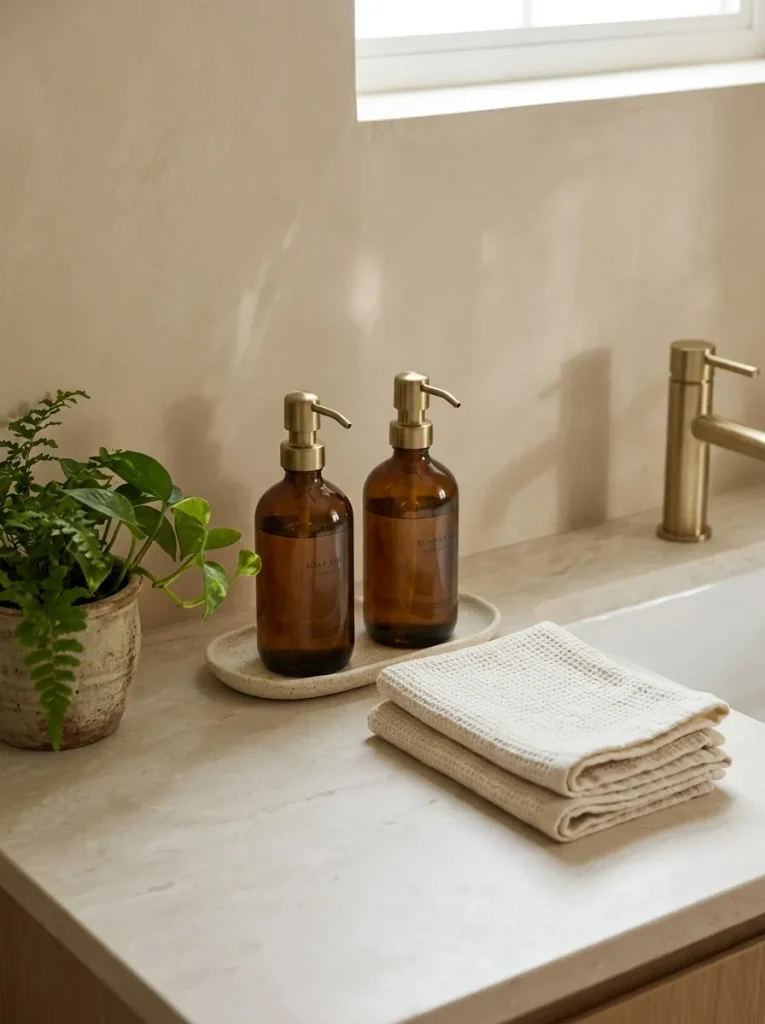
DO
- Choose dispensers that are easy to refill and clean.
- Use waterproof labels if you keep different products in similar bottles.
- Match the finish to your faucet or cabinet hardware.
- Place bottles on a small tray to contain drips.
DON’T
- Refill containers without cleaning them as directed.
- Mix products that are not intended to be combined.
- Leave pumps sticky with dried soap.
- Choose oversized bottles that crowd the sink.
Matching dispensers make everyday handwashing supplies look more coordinated while reducing the visual noise of mismatched packaging. Select durable, moisture-resistant bottles with pumps that work reliably and label them clearly when the contents are not obvious. Keep refills stored safely in their original containers until needed.
Ladder Towel Rack

A leaning ladder rack adds towel storage without the visual weight of a bulky cabinet. Its open design keeps the bathroom feeling airy while giving damp towels room to spread out. Choose a stable ladder with slip resistant fee and position it where it cannot block doors, walkways, or access to the bathtub.
For a coordinated look, use towels in two or three complementary shades, such as cream, sand and soft gray. Avoid overcrowding the rungs, since tightly packed towels take longer to dry. If you have children or pets, secure the ladder according to the manufacturer’s guidance so it cannot tip easily.
Lidded Storage Canisters

Cost: Low to moderate, depending on material
Time: About 15 minutes to arrange
Skill Level: Beginner
Best For: Shelves, vanity corners and open storage areas
Result: Small essentials concealed in a coordinated display
Lidded canisters help hide the little packages that can make open shelves look messy. Choose different sizes for different supplies and label the bases or lids if the contents are difficult to identify. Keep moisture sensitive items in a dry location and avoid placing heavy ceramic containers on narrow or unstable shelves.
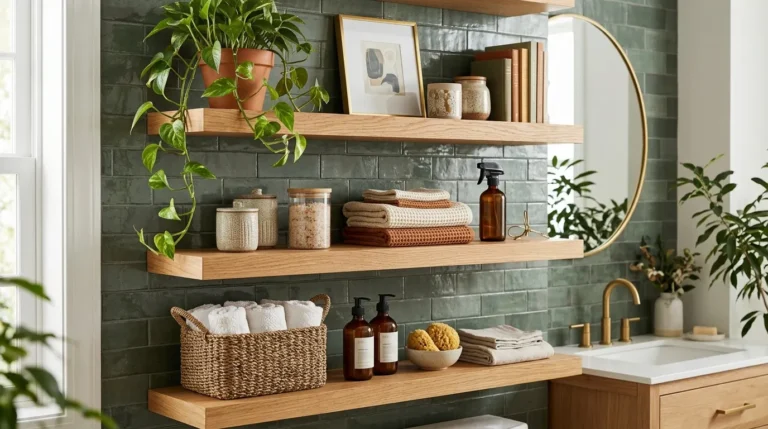
Shallow Wall Shelves
BEFORE
A bathroom with limited cabinetry often has toiletries stacked on the vanity and spare towels hidden wherever space is available. Empty wall areas contribute little, even though the floor and countertops are already crowded.
AFTER
Two shallow floating shelves create useful storage while keeping the room open. Folded towels, a small basket, and a few everyday products provide function without overwhelming the wall.
Measure carefully before installing shelves, especially above toilets or near sinks where items could fall into fixtures. Use anchors suitable for the wall material and keep heavy containers on securely mounted shelves. Limit decorative pieces to a few practical items so the shelves remain easy to dust and genuinely useful.
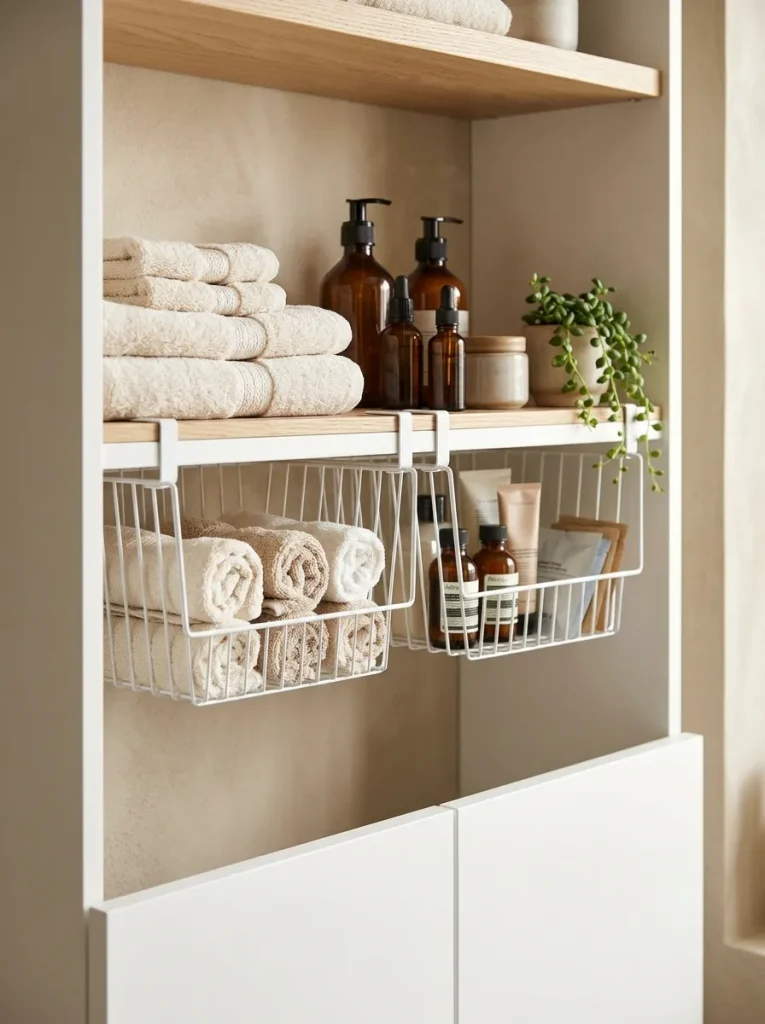
Under Shelf Hanging Baskets

- Measure the shelf thickness. Check that the basket clips fit securely without damaging the shelf.
- Choose lightweight supplies. Store washcloths, cotton pads, or small toiletry items rather than heavy bottles.
- Group similar products. Give each basket a clear purpose to keep the arrangement easy to maintain.
- Check the clearance. Make sure the basket does not interfere with cabinet doors or items stored below.
Under-shelf baskets create an extra storage level without requiring a larger cabinet. They’re especially useful when a shelf has unused space underneath but little room for another container. Select rust-resistant baskets for humid bathrooms, and avoid overfilling them so the clips remain secure and the shelf stays easy to use.
Conclusion
Creating a peaceful bathroom doesn’t require expensive upgrades or a complete makeover. Small changes, such as organizing drawers, adding wall shelves and grouping toiletries in matching containers, can make your space feel calmer and more functional. The best Bathroom Organization Ideas are the ones that fit your room, budget and daily habits. Start with one cluttered corner, choose a solution that works for your needs and build from there. Save this article on Pinterest for inspiration, try your favorite ideas and share it with someone who could use a more organized bathroom. Your relaxing retreat can begin with one simple change.


One Comment