
Want a Bold Bedroom? Try These 29 Bedroom Accent Wall Ideas
A plain wall can make a bedroom feel like it is waiting for something. One bold wall changes that fast. These bedroom accent wall ideas show you how to add color, texture and personality without a big budget or a long to do list.
Whether you rent or own, there is a simple option here for you. You will find paint tricks, peel and stick wallpaper, wood panels and lighting ideas, each with clear steps you can follow in a weekend. I’ve seen many people spend months choosing a color, then wish they had started sooner. Scroll through, save your favorites and pick the wall that feels like home.
Deep Navy Paint

Dark walls scare people until they see one done right. Navy behind the bed gives the whole room a calm, hotel quiet feel and it makes white bedding glow. These bedroom accent wall ideas start here because paint costs little and the result shows up in a single weekend.
I’ve noticed that navy works best on the wall your bed leans against, since you rarely look straight at it while lying down. Choose a matte finish to hide bumps and keep the other three walls a soft warm white so the room never feels heavy.
Wood Slat Panels
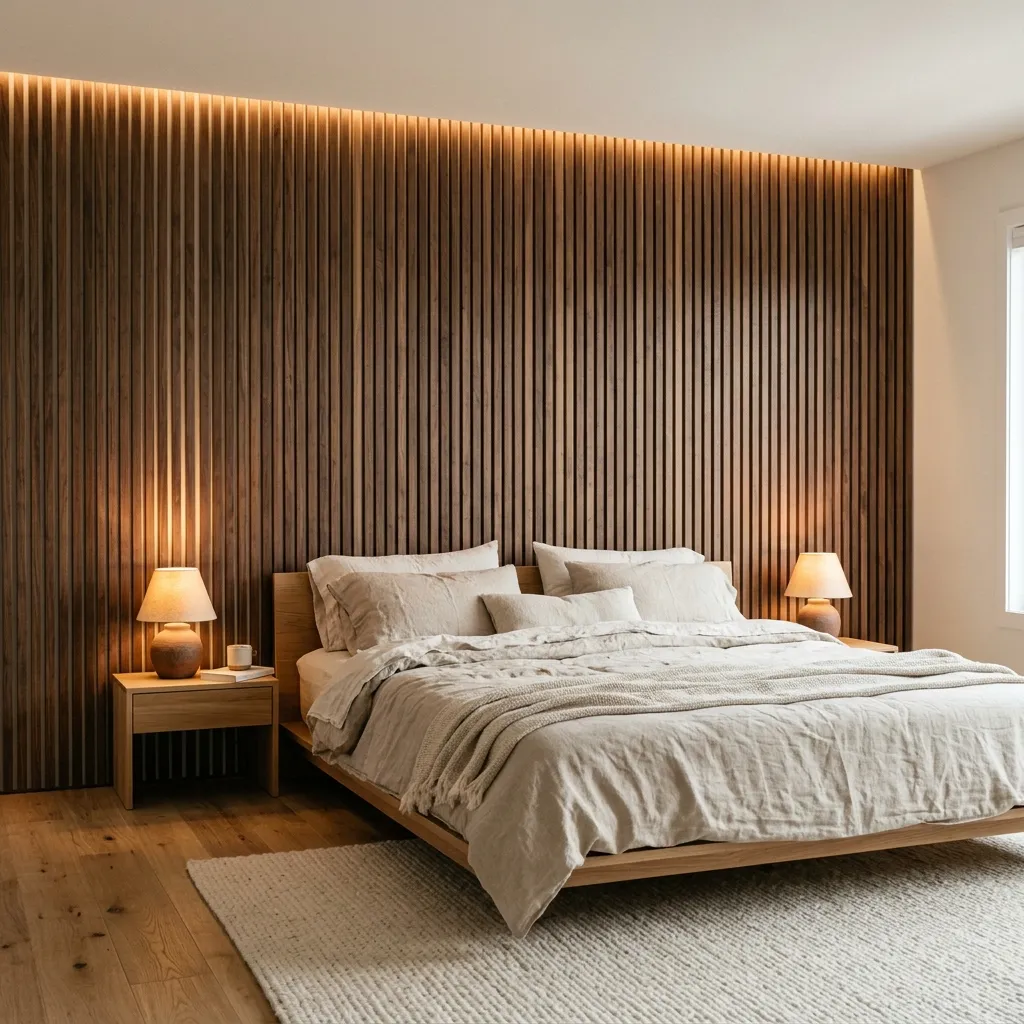
- Slats add depth and soft sound absorption that flat paint cannot copy. They also hide small wall flaws.
- Pick slats about one inch wide with half inch gaps for a clean modern rhythm.
- Pre made panels on felt backing install with construction adhesive in an afternoon.
- Paint the wall black behind the gaps so the shadows look deep and intentional.
- Run slats floor to ceiling to make low ceilings feel taller.
Wood slats suit anyone who wants warmth without color. I’ve seen this work well in small rooms, because the vertical lines pull the eye upward. Keep furniture simple and let the grain do the talking. Real veneer costs more, but vinyl versions look convincing in photos.
Peel and Stick Wallpaper

Quick Tip:
Wipe the wall with mild soap and let it dry fully before sticking anything. Start from the top corner with a level line and smooth outward with a plastic card. Order one extra roll so pattern matching never leaves you short.
Renters love this one because it peels off clean when the lease ends. Smooth painted walls hold the adhesive best, so test a small patch before committing. Textured walls often cause curling at the edges. Pick a pattern with a loose repeat, since tiny prints show every seam.
Read More: 27 Bedroom Curtain Ideas That Instantly Elevate a Room
Board and Batten

BEFORE
A flat builder white wall sits behind the bed and disappears. The room feels unfinished and the headboard has nothing to stand against.
AFTER
Tall vertical battens in deep gray frame the bed like a built in feature. Shadows between the boards add depth and the whole wall suddenly looks custom.
Cut battens from primed MDF strips and space them about eight inches apart. Use a level and a nail gun, then caulk every seam before painting. In my experience, the caulk step separates a cheap look from a custom one, so do not skip it.
Painted Arch Headboard
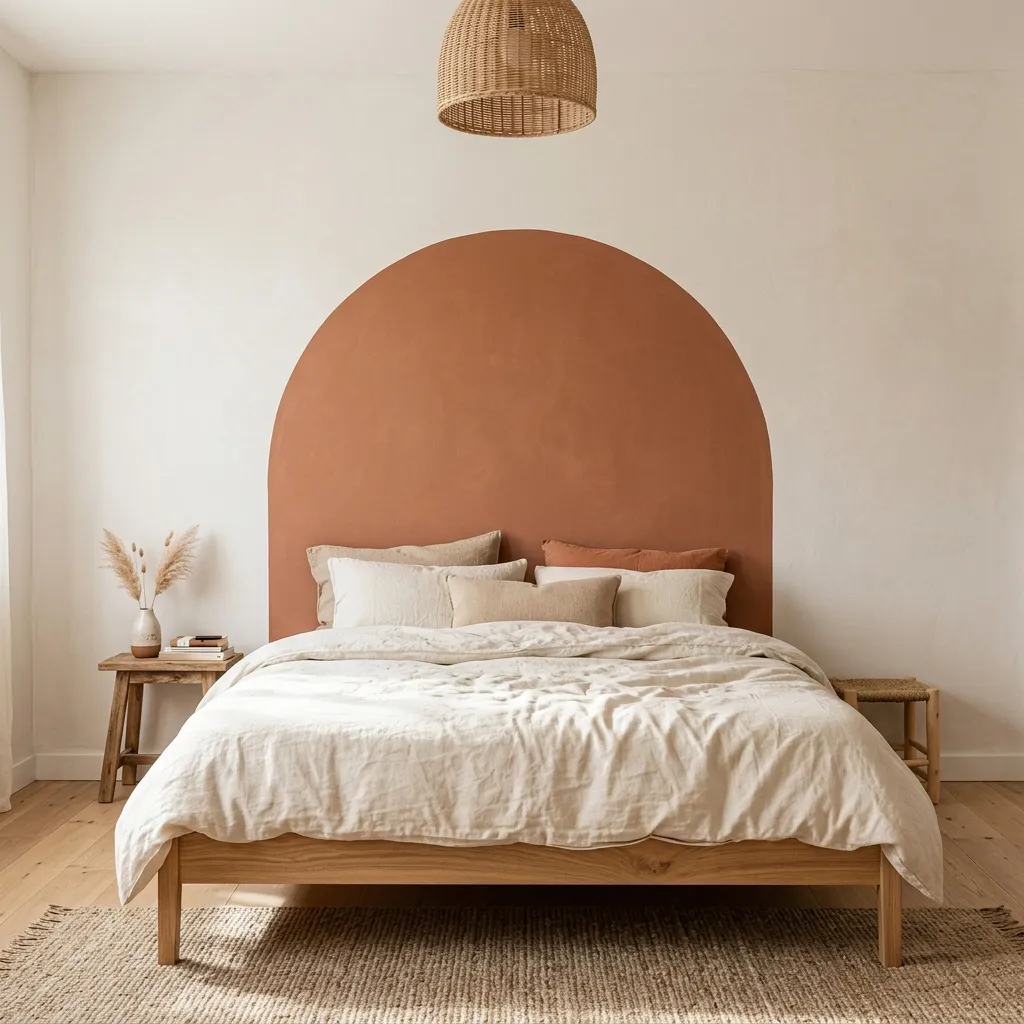
- Center your bed and mark the middle point on the wall with painters tape.
- Tie a string to a pencil, hold it at the center point and draw a half circle wider than the bed.
- Extend two straight lines down to the floor and tape along the outside edge.
- Roll on two coats of paint, then peel the tape while the second coat is still slightly damp.
A painted arch gives the look of a statement headboard for the price of one paint sample. It also suits small bedrooms where a bulky headboard would crowd the floor. Choose a color two shades deeper than your bedding so the shape reads clearly from the doorway.
Faux Brick Texture

| Real Brick | Faux Brick Panels | |
|---|---|---|
| Cost | High | Low to medium |
| Install | Mason needed | Glue and nails |
| Weight | Very heavy | Light |
| Removal | Permanent | Possible |
Faux panels give you the weathered loft look without opening up a wall. Most are made of lightweight foam or PU, so one person can hang them alone. Paint them white, then rub a little gray over the top while still wet for an aged finish.
Color Block Geometry

Do
- Limit the palette to three colors.
- Use painters tape and press the edges down with a card.
- Sketch the layout on paper first.
- Pick colors that share the same undertone.
Don’t
- Skip a base coat of the lightest color.
- Leave tape on for days after painting.
- Mix more than two shapes.
- Forget to test colors in morning and evening light.
Color blocking turns a plain wall into wall art and mistakes are easy to fix with a small brush. Start with a large simple shape near the headboard, then add smaller blocks around it. Keep bedding neutral so the paint stays the star of the room.
Limewash Finish

Cost: Medium | Time: One weekend | Skill Level: Beginner
Best For: Plain or lightly textured walls
Result: Soft cloudy depth that shifts with the light
Limewash moves with the light, which flat paint never does. Apply it with a wide brush in crisscross strokes and let the patches show on purpose. Prime first so the color stays even. That’s why many experts recommend two thin coats over one thick one, so patience pays off here.
Botanical Mural

Waking up beside a wall of leaves changes how a morning feels. Large scale foliage in soft greens and pinks makes a small bedroom feel like a garden room. You do not need artist skills, because projector tracing works well for first timers and keeps costs low.
Trace a printed leaf outline with a pencil, then fill each shape with acrylic wall paint in two tones. Work from the background to the front so layers overlap naturally. Choose a pale base color, which keeps the mural bright and stops the room from feeling crowded.
Gallery Wall Display
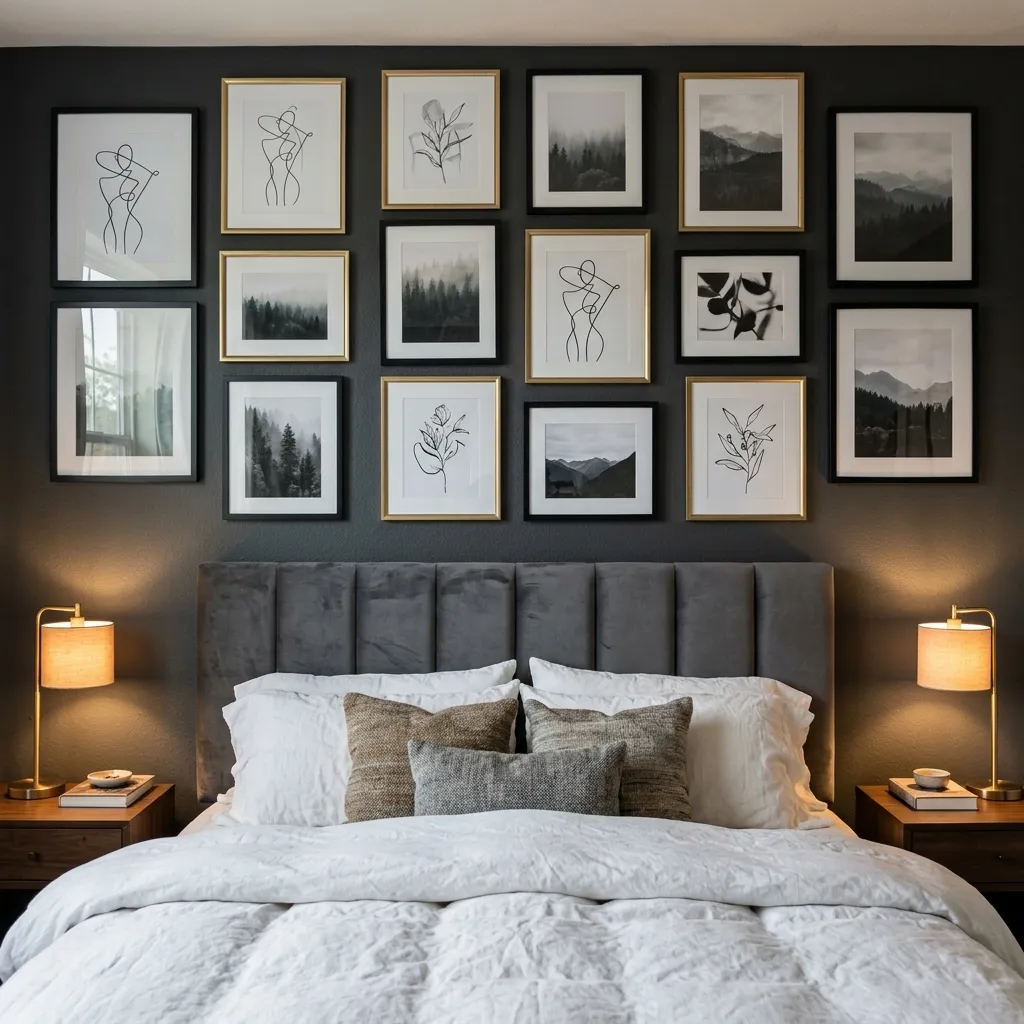
- Lay every frame on the floor first and shuffle the layout before touching a nail.
- Keep gaps between frames at two inches so the group reads as one shape.
- Cut paper templates, tape them to the wall and adjust until it feels balanced.
- Stick to two frame colors so mixed art still looks planned.
- Hang the center of the group about 57 inches from the floor, roughly eye level.
A gallery wall tells your story without a single can of paint. Mix family photos with prints you love and anchor the group over the bed so it feels like a headboard. Printed pages from free art sites work well too. Use removable strips if your landlord frowns on holes.
Sage Green Wall

Quick Tip:
Hold three paint swatches against the wall at morning, noon and evening before buying. Sage can turn gray in cool light and yellow in warm light. Pick the one that stays green in both.
Sage sits in the sweet spot between bold and calm. It pairs with wood, linen and brass without any fuss, which makes styling easy. Soft green settles restless rooms, especially bedrooms that get harsh afternoon sun. Warm woods and cream bedding finish the look nicely without extra decor.
Shiplap Planks

BEFORE
The bedroom wall is smooth and lifeless, so the room looks like a rental. Nothing draws the eye when you walk through the door.
AFTER
Horizontal planks stretch the wall wider and add a soft coastal charm. The painted lines catch daylight and make the bed area feel intentional.
Plywood strips cost far less than real shiplap and look nearly identical once painted. Cut them to eight inch widths, leave a small gap with a nickel as a spacer and paint the seams dark first. A nickel spacer keeps every line even. Finish with a coat of semi gloss for easy wiping.
Stacked Floating Shelves

- Find wall studs with a stud finder and mark them with tape.
- Paint the wall a deep color first, since shelves look sharper against it.
- Mount brackets into studs and level each shelf before tightening.
- Style each shelf with one tall item, one small item and one flat item.
Shelves add layers that a plain wall lacks and they give your favorite things a stage. Leave at least twelve inches between shelves for breathing room. Keep heavy objects low and light ones high. Skip the area directly over your pillow, because a falling frame at night is no fun.
Textured Plaster

| Real Plaster | Plaster Paint Kit | |
|---|---|---|
| Skill Needed | Advanced | Beginner |
| Drying Time | Several days | A few hours |
| Cost | High | Low |
| Finish | Polished depth | Soft texture |
Texture catches light in ways paint cannot. Roll on the textured product, then drag a wide trowel over it in short curved strokes while it is still wet. Work in small sections and practice on a spare board first to find your pressure and pattern. Corners go last.
Oversized Mirror Wall
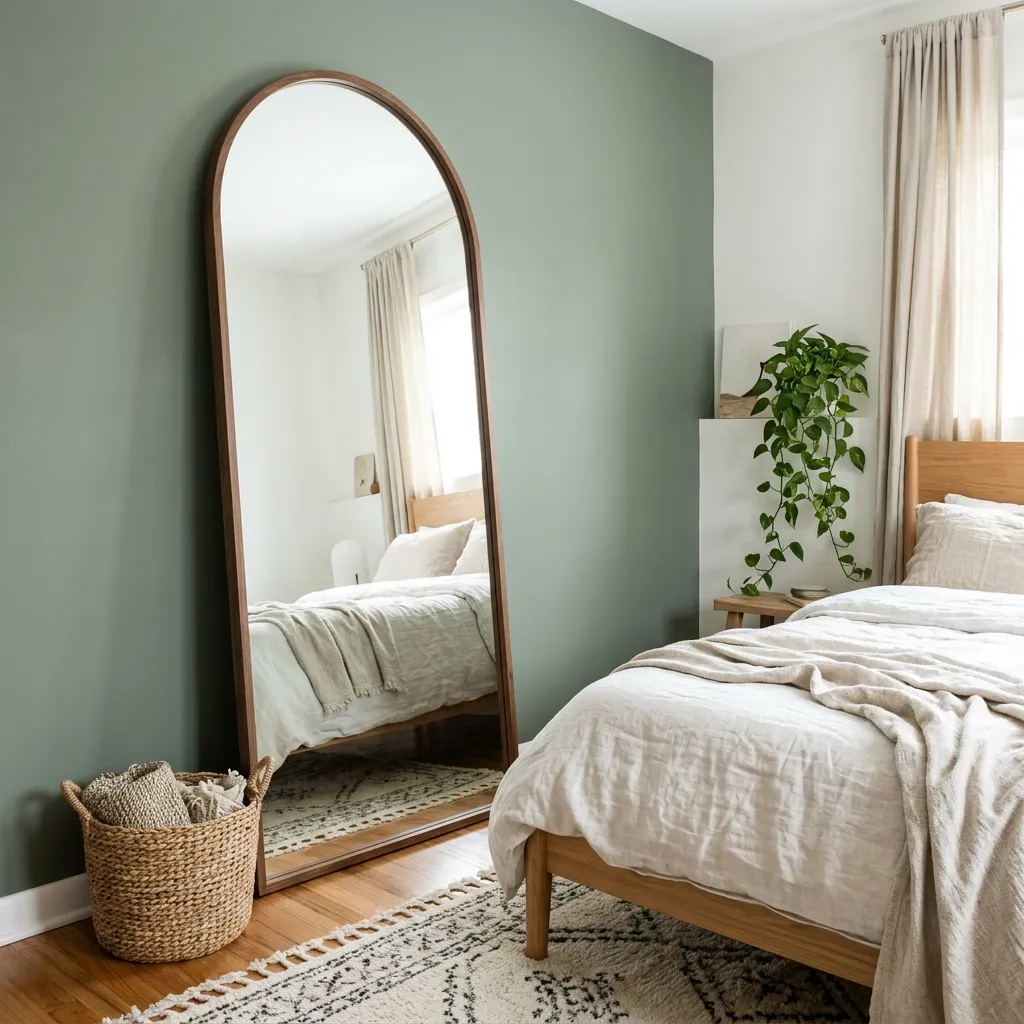
Do
- Place the mirror across from a window to bounce daylight.
- Anchor tall mirrors to the wall with a safety strap.
- Choose a frame finish that matches your lamp or hardware.
- Leave breathing space around the edges.
Don’t
- Hang a mirror directly facing the bed if it bothers you at night.
- Choose a mirror that looks tiny against the wall.
- Let clutter pile up in the reflection.
Among the smartest bedroom accent wall ideas for tight rooms is a single huge mirror. It doubles the light and makes the floor space look twice as deep. Pair it with warm bulbs for a soft evening glow. Keep the rest of the wall plain so the reflection can take center stage.
Terracotta Paint

Cost: Low | Time: Half a day | Skill Level: Beginner
Best For: Rooms with morning or afternoon sun
Pairs With: Cream, olive and natural wood
Terracotta wraps a room in warmth the moment you flip on a lamp. Pick a shade with a bit of brown in it, since pure orange can feel loud. Add two coats of eggshell paint and finish with textured bedding in oatmeal tones to keep the look soft.
Upholstered Wall Panels
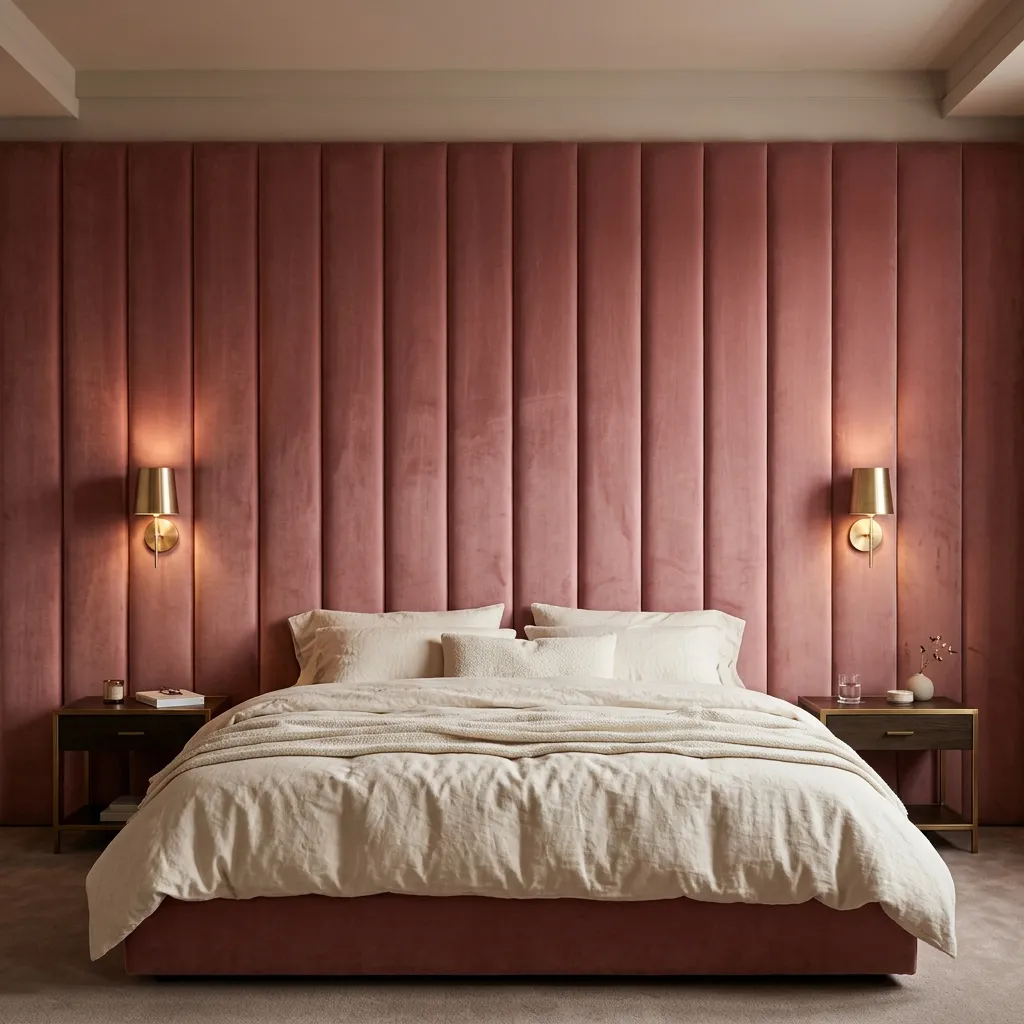
Soft walls feel like a hug at bedtime. Padded panels wrap the wall in fabric, so they soften echo and add a boutique hotel feel at once. Foam backed kits come ready to mount and most take under an hour to hang once you have marked the studs.
Velvet and bouclé hold color well, but check that the fabric is rated for easy cleaning. Pale shades show dust, while mid tones hide it. Choose panels wide enough to span the headboard area and let them run slightly past the bed edges.
Two Tone Horizontal Split

- Place the split line at about one third of the wall height for a grounded look.
- Use a laser level or chalk line to keep the edge perfectly straight.
- Seal the tape edge with a thin layer of the base color before painting the second shade.
- Cover the join with a slim wood rail for a finished look.
- Pick a darker shade for the lower half so the room feels sturdy.
Two tone walls feel tailored without being fussy. The dark lower band hides scuffs from headboards and bags, which is a real bonus in kids or guest rooms. I’ve seen this save repainting time in busy homes. Keep the upper color light so the ceiling stays bright and airy.
Woven Wall Hangings

Quick Tip:
Size matters here. Aim for a hanging that spans about two thirds of your headboard width or it will look lost. Hang it on a wooden dowel with a sturdy anchor and leave a few inches of breathing space above the bed.
Fiber art adds soft texture without any paint or power tools. Tan, cream and rust threads blend into almost any palette. Layer a smaller piece beside the main one for a relaxed, collected look and dust it gently every month so the fibers stay fluffy. Thrift shops often carry good ones.
Matte Black Wall

BEFORE
Pale walls make the bedroom feel washed out at night. The bed blends into the background and lamps look dull.
AFTER
A matte black wall makes white bedding pop and gives lamps a dramatic backdrop. The room feels cozy and sharp at the same time.
Black sounds risky, but it adds instant depth and makes the other three walls feel brighter by contrast. Use a flat or matte finish to avoid glare and add warm light bulbs. Keep bedding light and mix in natural wood so the room never turns cave like.
Oversized Canvas Art
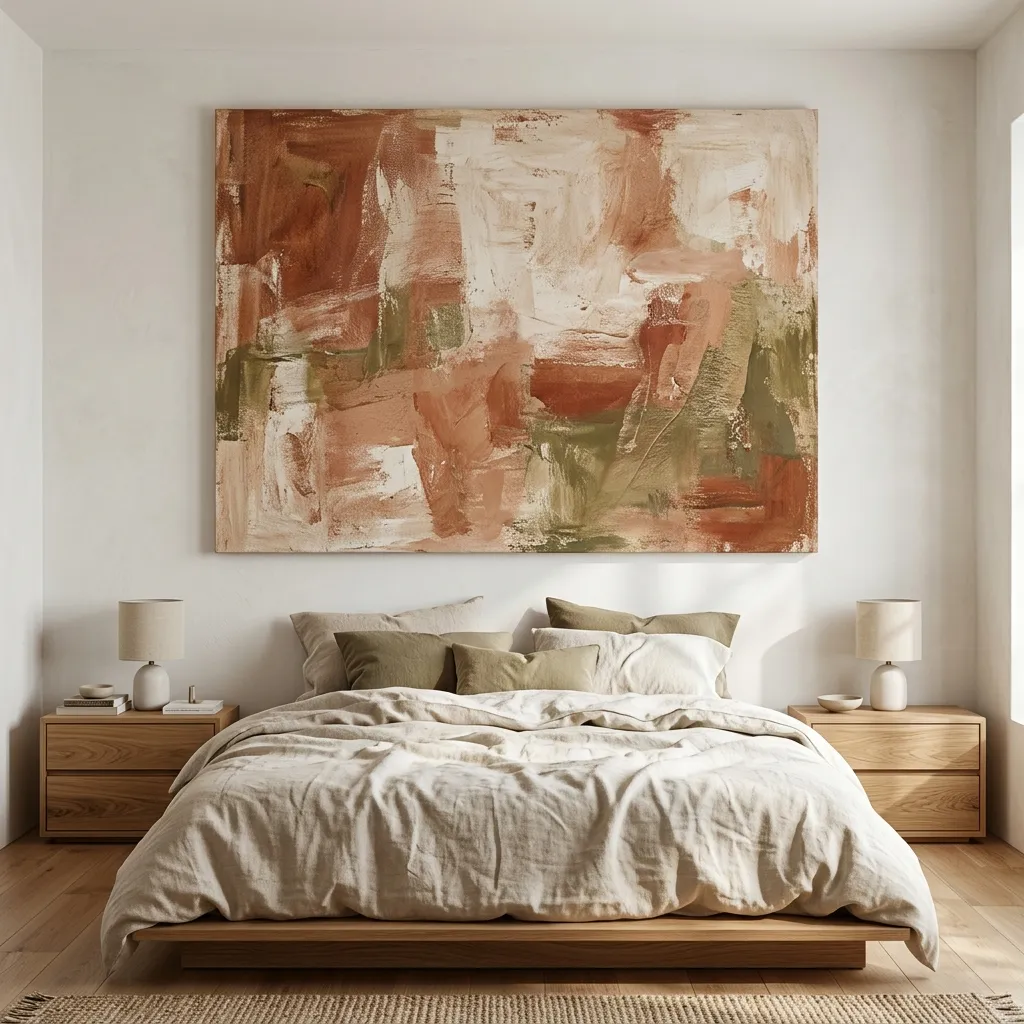
- Measure your headboard width and choose art about two thirds of that size.
- Cut a paper template of the canvas and tape it to the wall to test the position.
- Hang the piece with two hooks, not one, so it stays straight.
- Add picture lights or a nearby lamp to make colors glow at night.
One big piece beats five tiny ones every time. It gives your eyes a place to rest and it saves you from the busy look of scattered frames. You can paint an abstract canvas yourself with a cheap blank frame and a few tubes of acrylic.
Grasscloth Wallpaper

| Real Grasscloth | Vinyl Look Alike | |
|---|---|---|
| Cost | High | Medium |
| Durability | Delicate | Wipeable |
| Seams | Visible | Less visible |
| Install | Pro advised | DIY friendly |
Woven wallpaper adds the kind of quiet texture that photographs beautifully. Real grasscloth stains from water, so keep it away from bedside drinks and humid corners. For easier care, choose a vinyl version with the same woven pattern and simple wipe clean upkeep. Always order a sample first.
Hand Painted Stripes

Do
- Measure and mark stripe widths with light pencil ticks.
- Use a level for the first stripe, then measure from it.
- Paint the lighter color across the whole wall first.
- Press tape edges down firmly before each coat.
Don’t
- Trust the corners to be perfectly straight.
- Pull tape too late, since dried paint can lift.
- Choose stripe widths that vary wildly.
Stripes bring order and energy at the same time. Wide stripes look bold and modern, while narrow ones feel classic and calm. Vertical lines make the ceiling feel taller, which suits low bedrooms best. Eight inch stripes are a safe starting point and a slightly uneven hand drawn edge only adds charm.
Plum Painted Wall
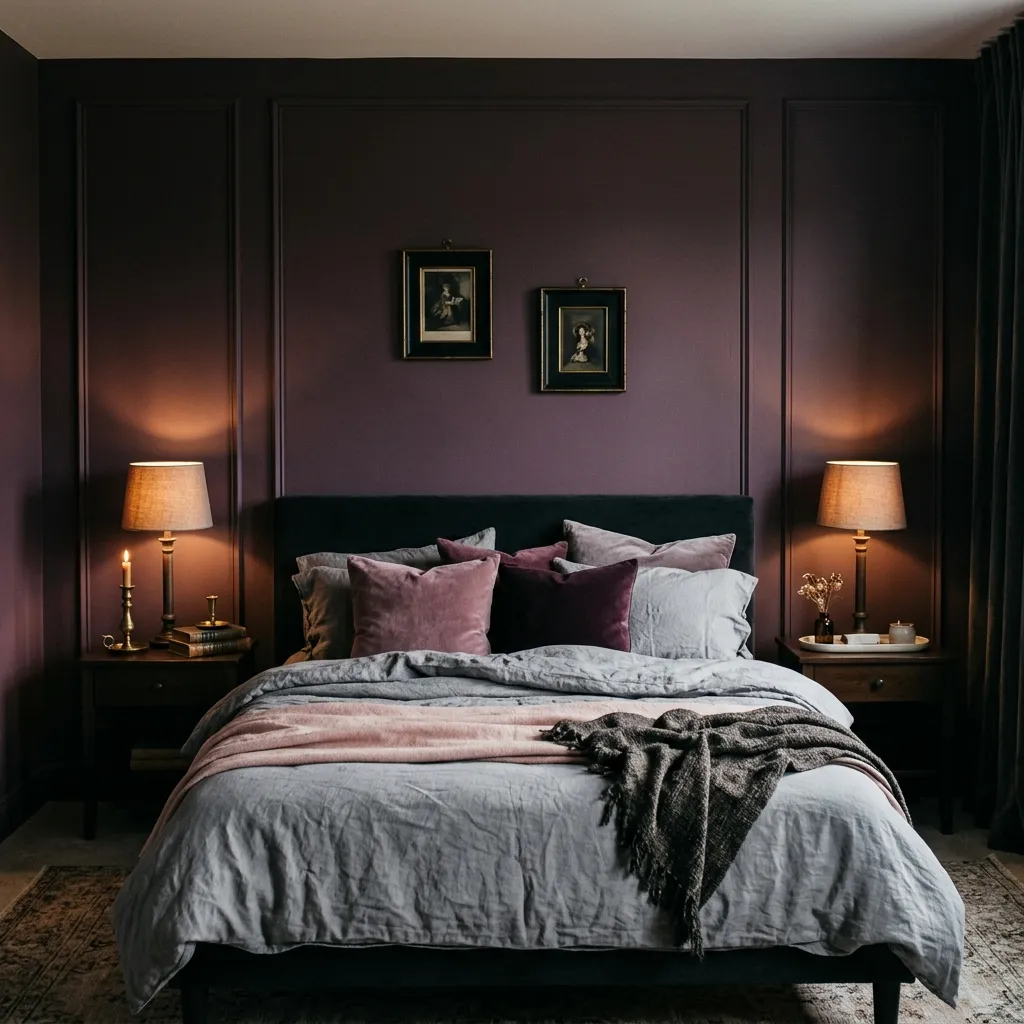
Cost: Low | Time: One afternoon | Skill Level: Beginner
Best For: Rooms with warm lighting
Pairs With: Gray, blush and brass
Plum feels rich without shouting. Under warm bulbs it glows like velvet and under daylight it relaxes into a soft berry tone. Test a swatch near your bed first, since purple can lean pink or blue depending on your light. Brass hardware and gray linens finish it well.
Sconce Lighting Glow
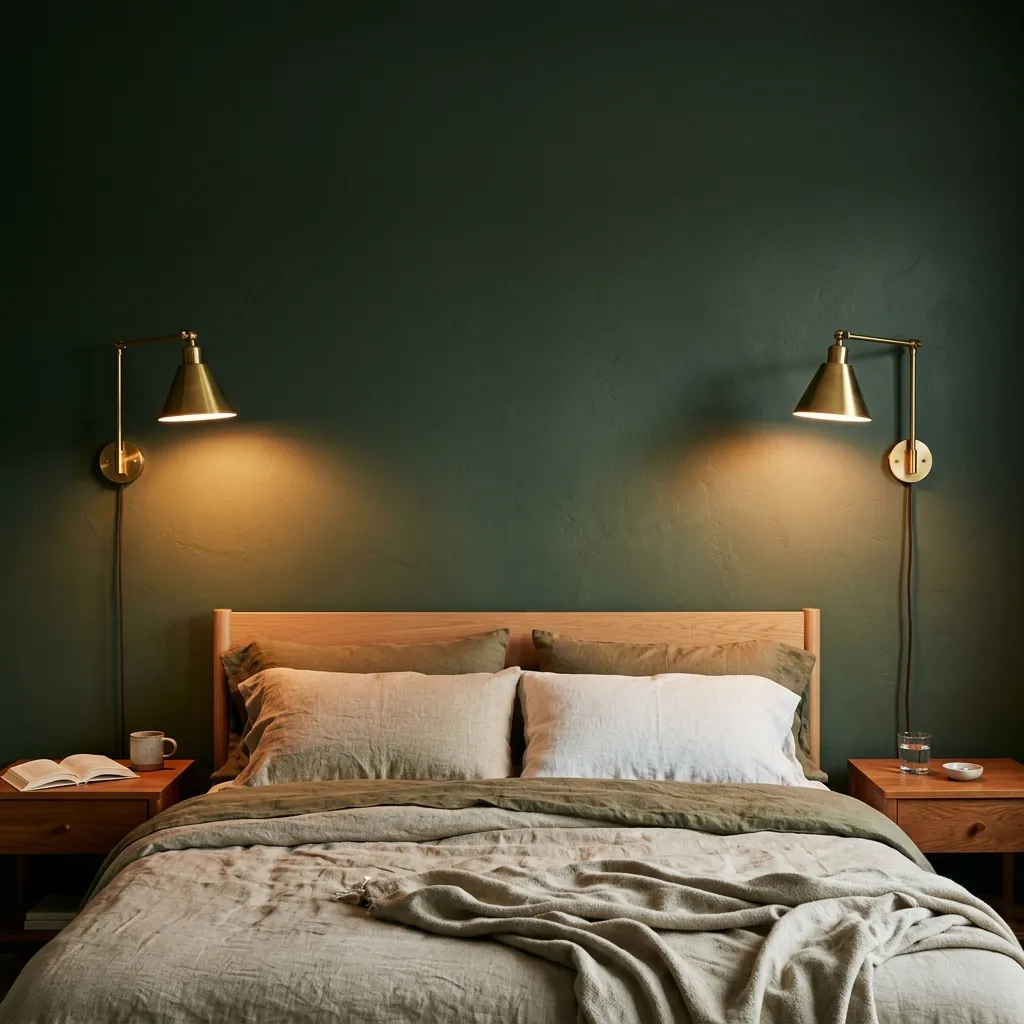
Lighting can turn any wall into the star. Plug in sconces on either side of the bed and the wall behind them gains soft depth after sunset. No electrician is needed, because plug in models run on a cord you can hide with a cord cover painted to match.
Choose warm white bulbs around 2700 Kelvin, which flatter paint and skin alike. Mount fixtures about 60 inches from the floor so light falls at reading height. I’ve tried cool white bulbs here and regretted it quickly, because they flatten color and feel clinical.
Art Deco Pattern
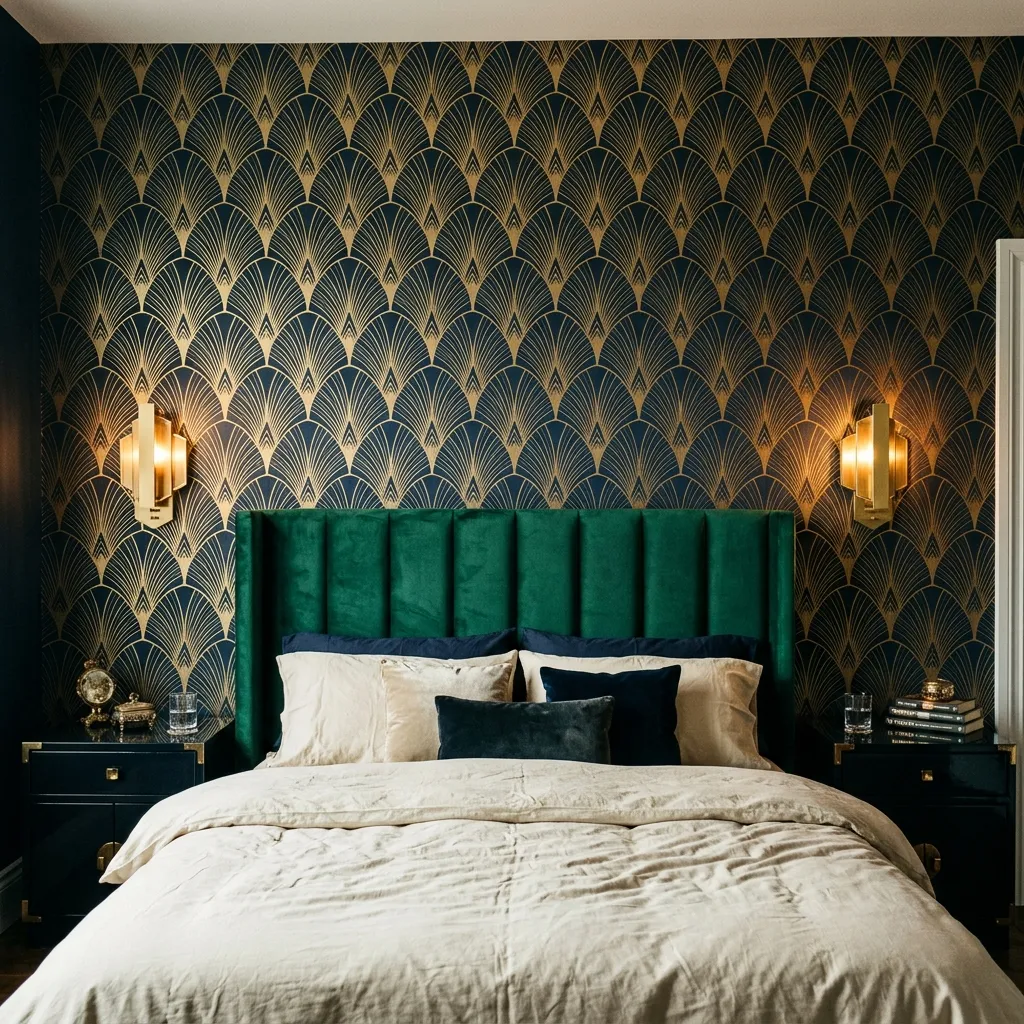
- Choose a pattern with a repeat under 12 inches so small walls do not feel crowded.
- Pair the print with one solid color pulled from the design, such as the gold or navy.
- Keep the headboard shape simple so the wallpaper pattern leads.
- Add metallic accents in lamps and frames to echo the foil in the print.
- Limit the rest of the room to three colors or fewer.
Geometric glamour works best on a single wall, since a whole room of gold fans can overwhelm. Line up the pattern at eye level first, because that is where people notice it most. Ask for a pre trimmed roll and hire a pro if the paper is hand printed.
Picture Frame Molding
Quick Tip:
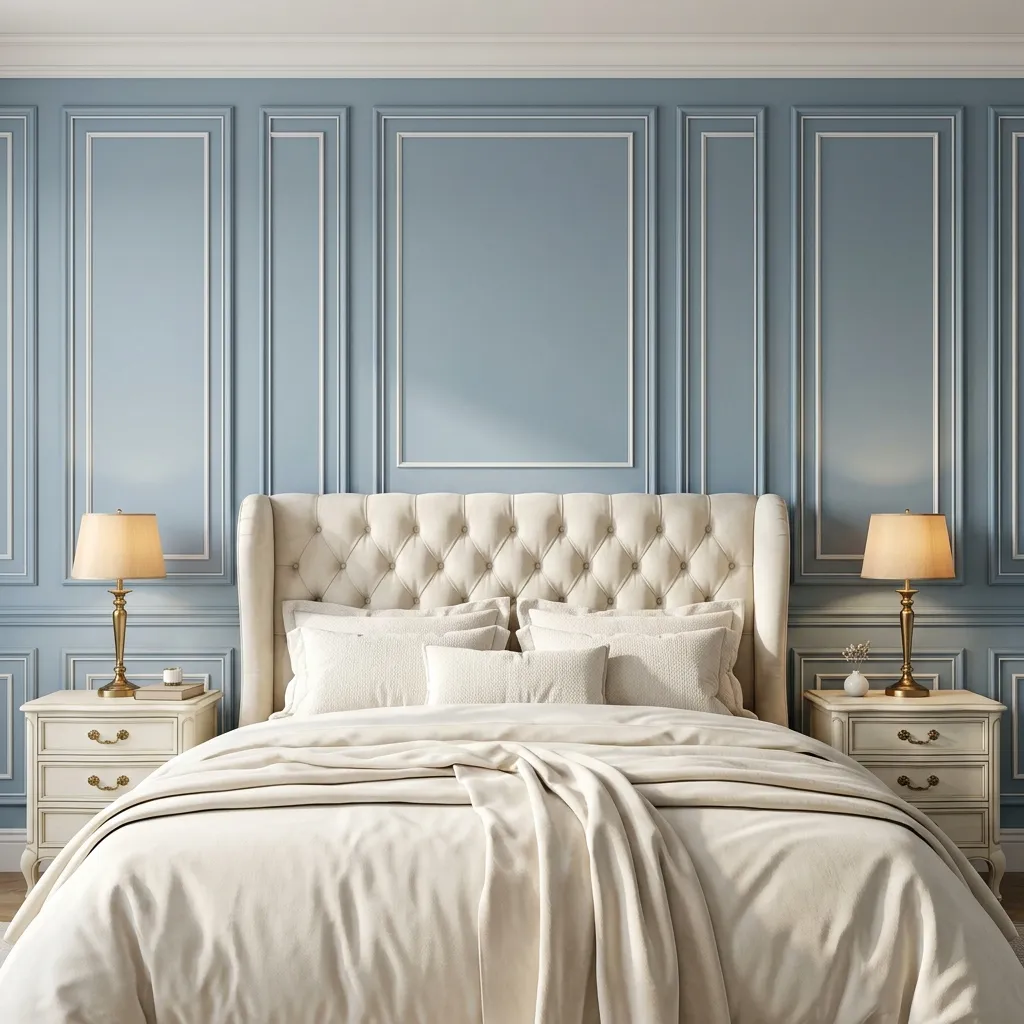
Cut a cardboard spacer exactly as wide as you want the gap between boxes. Use it to keep every rectangle even, since your eyes catch tiny differences. Paint the molding and the wall inside the boxes the same color for a rich tone on tone finish.
Molding adds old world charm for the cost of a few lengths of trim. Measure the wall, divide it into balanced rectangles and glue the trim in place with construction adhesive. Caulk the seams and paint with a satin finish that wipes clean. Pick a calm color so the shadow lines stay the focus.
Ombre Gradient Wall

BEFORE
A single flat color makes the wall look like every other wall. The room has no focal point, so the bed gets lost.
AFTER
A gradient from deep blue at the floor to pale blue at the ceiling pulls your eyes upward. The room feels taller and dreamier.
Blending sounds hard, but it is only paint and patience. Divide the wall into three horizontal bands, paint each in a different shade and blend the seams while wet with a dry brush. A damp sponge also works. Work fast, so the paint does not set before you finish.
Reclaimed Wood Wall
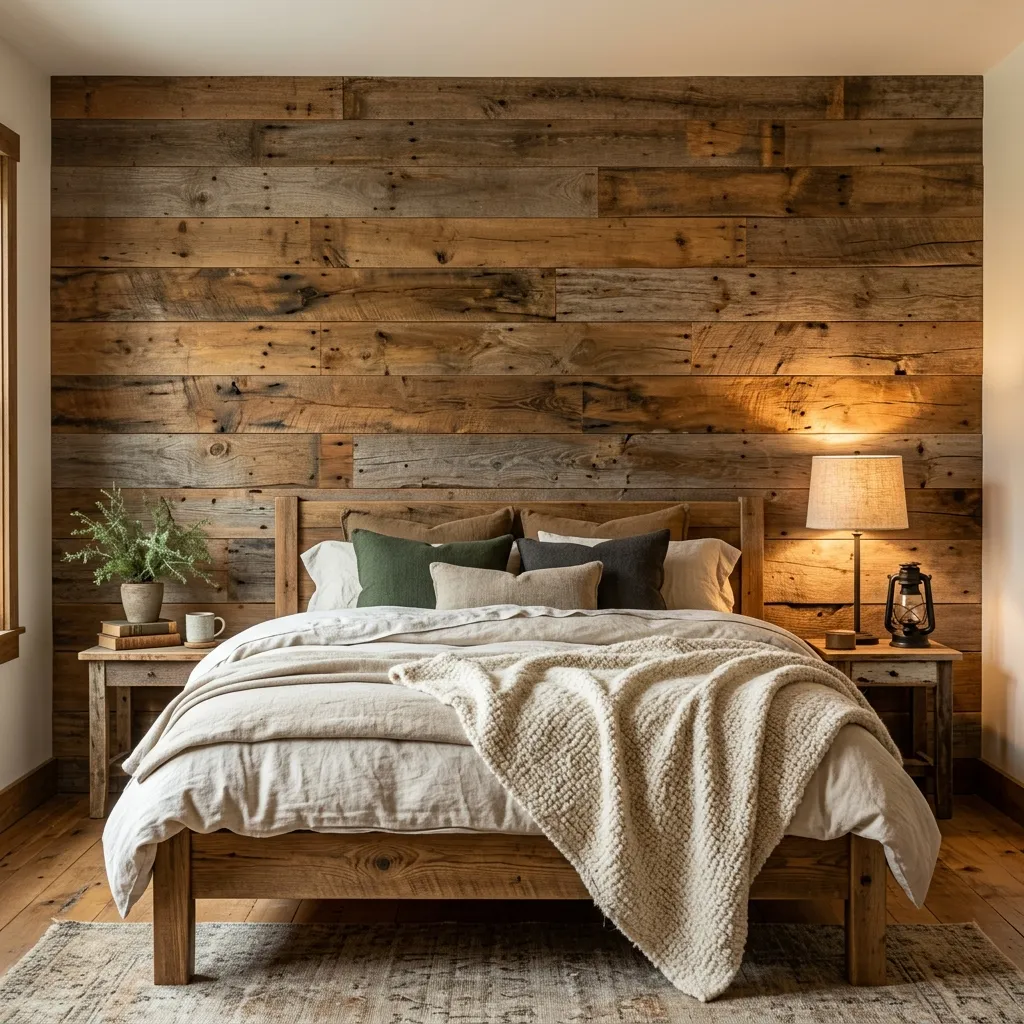
- Source reclaimed boards from salvage yards or free local listings and check for nails and pests.
- Sand rough edges and seal the wood with a clear matte finish.
- Sort boards by tone and length, then lay out a pattern on the floor.
- Nail each board to studs, starting at the bottom and staggering joints.
Old wood carries a history no store bought panel can match. It is a lovely finish for the last of these bedroom accent wall ideas, because it works in cabins, city flats and everything between. Wipe it with a damp cloth and it will age gracefully for years.
CONCLUSION
You do not need a full makeover to love your bedroom again. One wall, one weekend and a little courage can change how the whole room feels. I’ve seen how small changes like these can completely shift the way a space feels and the best part is how proud you feel afterward. Use these bedroom accent wall ideas as a starting point, then make them your own. Save this post on Pinterest so you can find it later, try one idea this month and share the article with a friend who is tired of plain walls. Your bold bedroom starts now.




One Comment