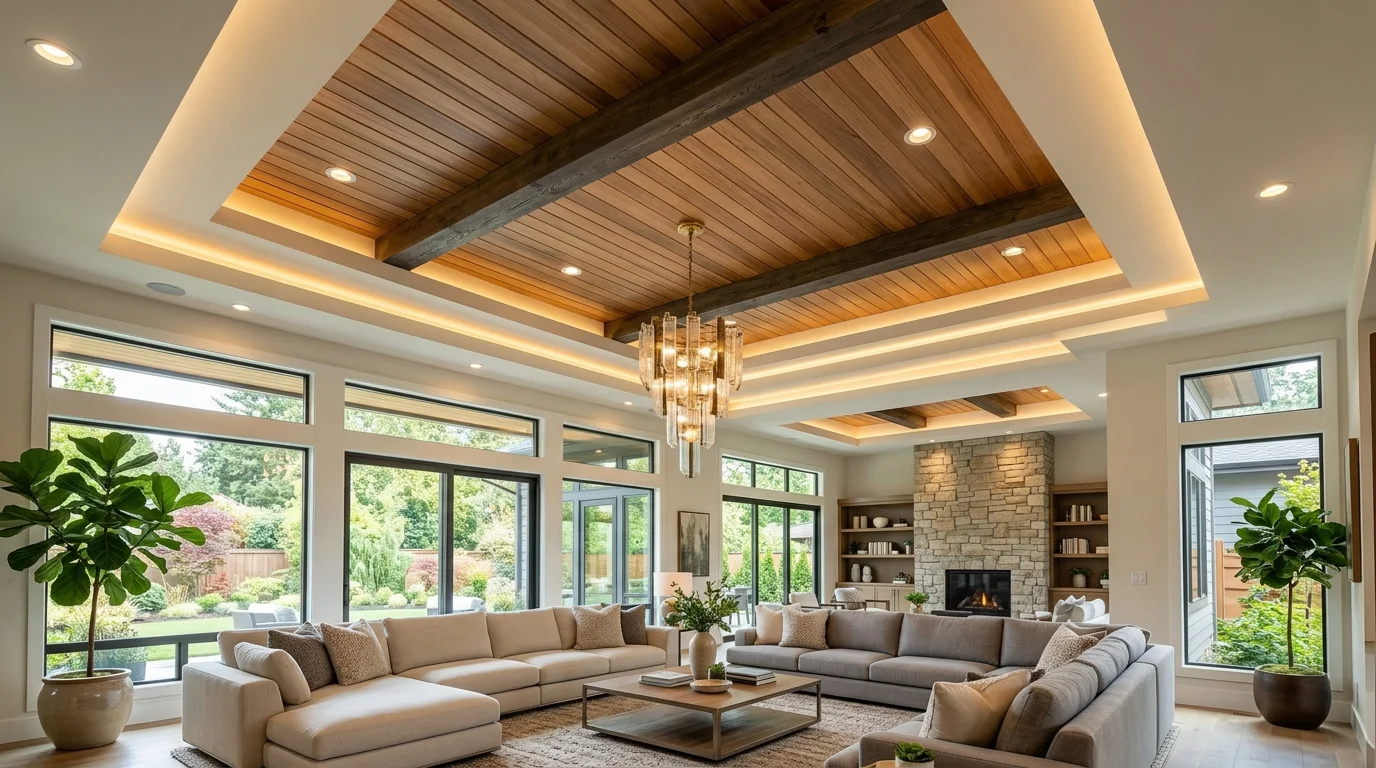
Living Room Ceiling Ideas: 25 Dramatic Upgrades to Try
A beautiful ceiling can change the entire feeling of your living room, yet it is often the last part of the space people think about decorating. The right Living Room Ceiling Ideas can turn an ordinary room into a stylish, welcoming space with personality and visual interest.
Whether your living room feels plain, lacks character or needs a fresh update, there are plenty of ways to make the ceiling stand out. From elegant coffered panels and natural wood beams to soft cove lighting and decorative medallions, small architectural details can create a noticeable difference.
The best part is that you do not need an elaborate renovation to get started. A fresh coat of paint, carefully chosen lighting or a simple ceiling treatment can help your room feel more complete. I’ve noticed that the most inviting interiors often balance one eye catching feature with comfortable furniture and calming colors.
In this collection, you will find inspiring designs, practical decorating tips and ideas for different styles and budgets. Explore the options, discover what suits your home and find a ceiling design that brings your entire living room together.
Coffered Ceiling Beams
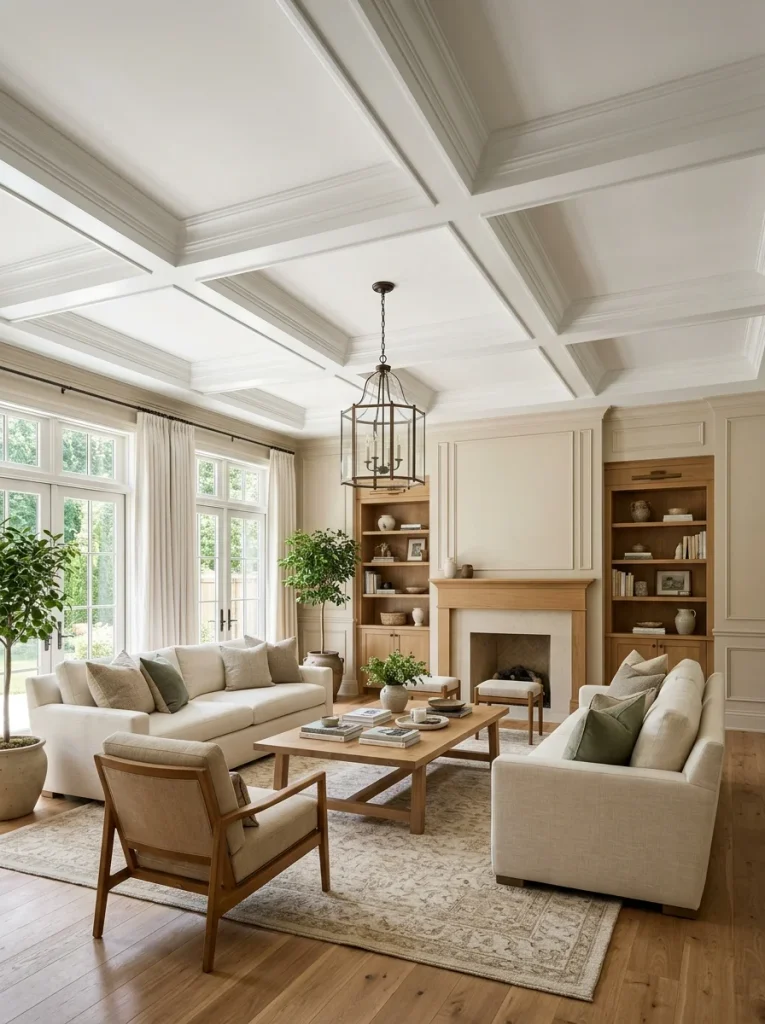
Coffered ceilings bring architectural depth to a living room without requiring bold colors or busy decorations. Their recessed panels create a structured pattern that draws the eye upward, making the entire space feel more thoughtfully designed. White panels work beautifully with neutral furniture, while natural wood trim adds warmth.
For a balanced finish, keep the panel shapes proportional to your room. Larger living rooms can handle broad, dramatic sections, while smaller spaces often benefit from simpler grids. Pair the ceiling with understated lighting so its geometry remains the main attraction.
Natural Wood Ceiling Beams

- Choose the right wood tone. Light oak creates an airy Scandinavian feel, while walnut adds richness and contrast.
- Plan the beam direction. Running beams along the room’s length can emphasize its dimensions.
- Match existing finishes. Coordinate the wood with flooring, furniture legs, or a fireplace mantel.
- Consider lightweight alternatives. Hollow faux beams can provide a similar appearance without the weight of solid timber.
- Check ceiling structure first. Confirm suitable fixing points before installing any overhead feature.
Exposed beams introduce texture and character, especially in living rooms with plain ceilings. They work with farmhouse, rustic and contemporary interiors when the finish feels intentional. Keep the remaining ceiling simple and avoid using too many competing wood tones. For heavy beams, consult a qualified professional about secure installation.
Soft Cove Ceiling Lighting

Quick Tip:
Choose warm white LED lighting around 2700K to 3000K for a cozy living room atmosphere. Hide the light source inside a properly designed ceiling recess so the room receives a soft glow rather than harsh, visible points of light.
Cove lighting creates a gentle border around the ceiling, making the upper part of the room feel layered and inviting. It is particularly useful in living rooms where a central chandelier feels too formal or direct. Add dimmable controls to adjust the brightness for movie nights, entertaining guests, or everyday relaxation. Have electrical connections and ceiling modifications handled safely by qualified professionals.
Read More: 28 Living Room Curtain Ideas That Bring Serious Drama
Painted Ceiling Contrast

A contrasting ceiling color can make an ordinary living room feel thoughtfully designed. Deep green, muted navy or warm charcoal creates visual depth, especially when the walls and furnishings remain relatively light. The ceiling becomes a defining feature without requiring expensive architectural construction.
Before painting, test a sample directly on the ceiling and observe it throughout the day. Overhead surfaces often appear darker than expected because of changing light conditions. Use a flat or matte finish to reduce glare and disguise minor surface imperfections. Repeat the ceiling color in a cushion, artwork or decorative accessory for a connected look.
Layered Tray Ceiling

- Create a clear central recess. Keep the main recessed area proportional to the seating arrangement.
- Choose complementary finishes. White on white layers create subtle depth, while contrasting trim makes the structure more noticeable.
- Add recessed lighting. Position fixtures carefully to illuminate the room without creating excessive glare.
- Highlight the perimeter. Concealed lighting can emphasize the stepped edges during the evening.
- Keep decorations restrained. A simple chandelier works better than several competing focal points.
A tray ceiling adds dimension without overwhelming the room when its proportions suit the available height. It can help define the main seating area in an open plan home. Before building the recess, confirm the ceiling’s structural layout and available clearance with a qualified contractor. In rooms with limited headroom, a shallow design usually feels more comfortable than several deep layers.
Wood Plank Ceiling

| Design choice | Option A | Option B |
|---|---|---|
| Wood color | Pale oak for an airy feel | Dark walnut for richer contrast |
| Plank direction | Lengthwise to emphasize room length | Crosswise to emphasize room width |
| Overall style | Smooth, modern finish | Rustic, visibly grained finish |
| Visual effect | Light and understated | Warm and dramatic |
Wood planks bring natural texture to a plain ceiling and make neutral furnishings feel warmer. For a cohesive result, coordinate the ceiling with one or two existing wood finishes rather than matching every surface exactly. Check the material’s suitability for overhead installation and allow for the manufacturer’s recommended expansion gaps and secure fixing method.
Matte Black Ceiling
DO:
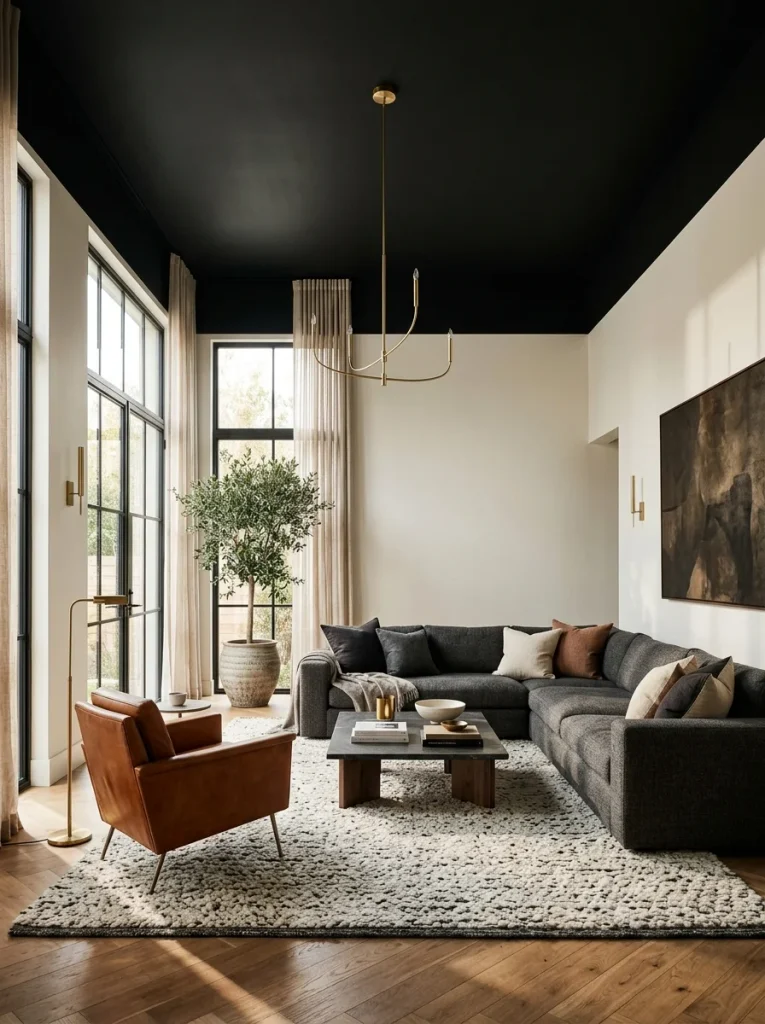
- Pair the dark ceiling with lighter walls to maintain contrast.
- Use warm lighting to soften the overall appearance.
- Select a flat or matte ceiling paint for a restrained finish.
- Repeat black details in frames, lamps or furniture legs.
DON’T:
- Use too many dark finishes in a room with limited daylight.
- Choose an oversized pendant that competes with the ceiling.
- Ignore the existing ceiling height when planning the color.
- Apply paint over damaged or poorly prepared surfaces.
A black ceiling can make exposed pipes, beams, or lighting fixtures feel intentional in contemporary interiors. It is particularly effective in rooms with generous daylight, high ceilings, or carefully layered lighting. In a smaller living room, consider painting only a defined ceiling section instead of covering the entire surface.
Decorative Ceiling Medallion
Cost: Low to moderate, depending on material and size.
Time: Several hours for a straightforward installation, excluding repairs.
Skill Level: Beginner to intermediate for lightweight products with suitable mounting methods.
Best For: Traditional, transitional and classic living rooms.
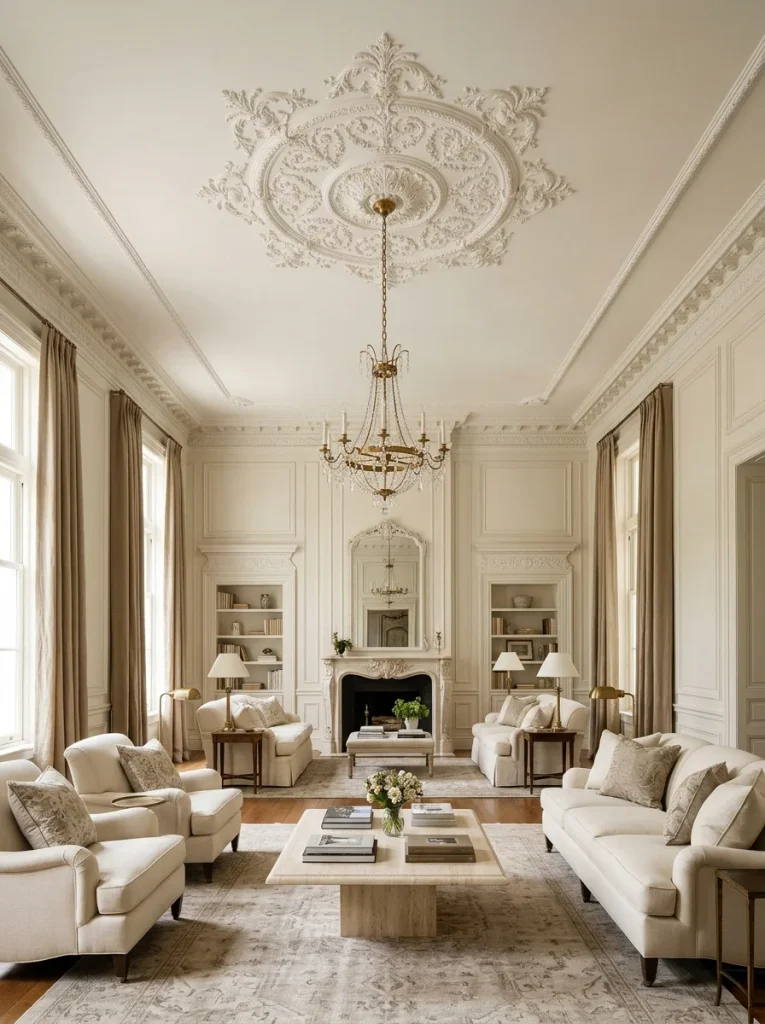
Result: A defined focal point around the central ceiling light.
A ceiling medallion gives a chandelier or pendant a more finished appearance. Choose a diameter that relates to the light fixture and surrounding ceiling rather than selecting the most ornate design available. Lightweight polyurethane options are easier to handle than heavy plaster, but every medallion must be attached using a method appropriate for its weight and ceiling construction.
Geometric Ceiling Panels
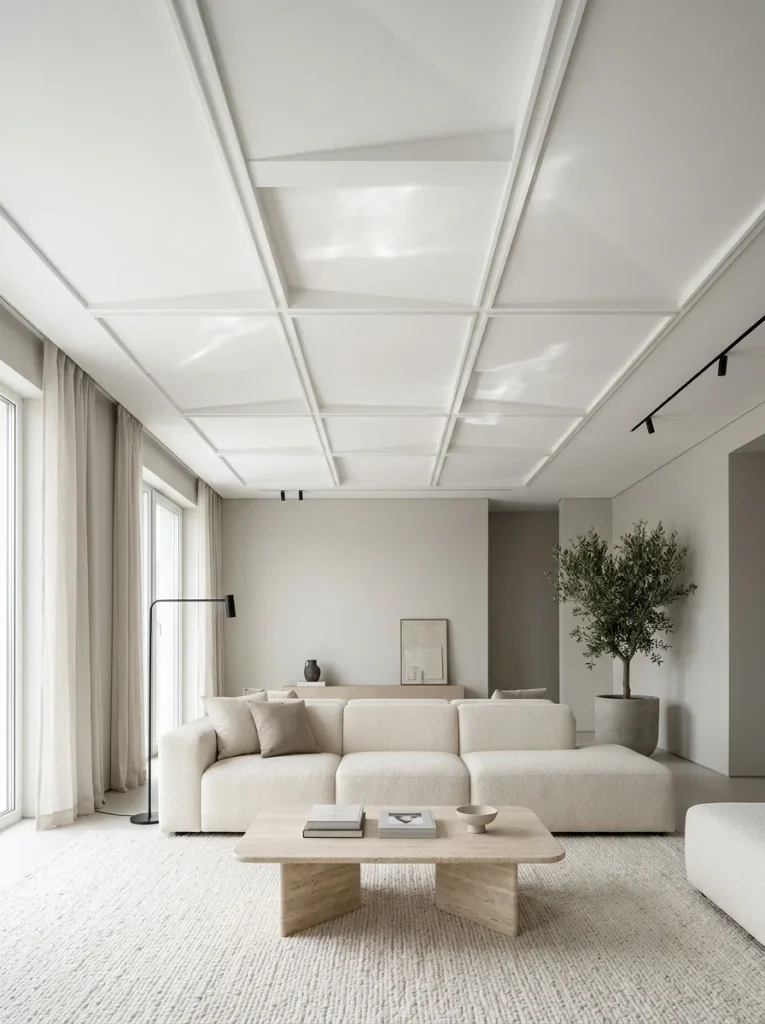
Geometric panels give a flat ceiling a more architectural appearance through repeated shapes, raised borders or recessed sections. The key is to choose a pattern that complements the room’s dimensions rather than making the ceiling unnecessarily busy.
For a subtle effect, use white panels against a white background and let the shadows define the shapes. For a stronger statement, introduce a small amount of contrast through paint or wood trim. Keep the furniture and wall decorations relatively simple so the ceiling remains the dominant pattern.
Statement Pendant Cluster
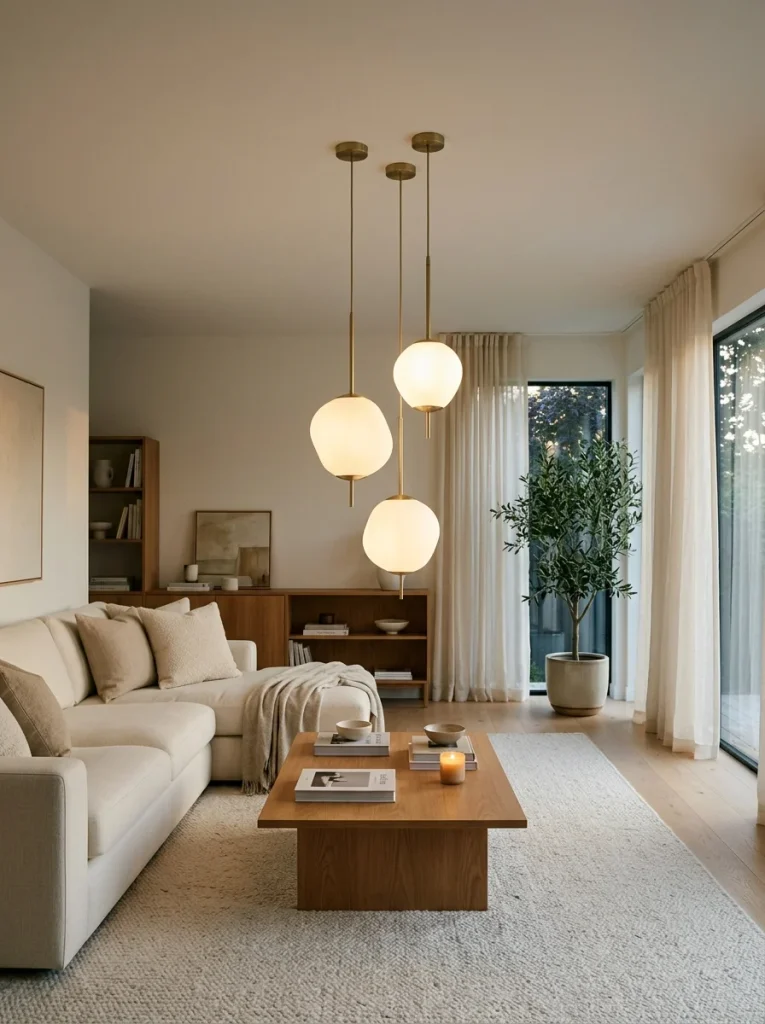
- Select a unified family of lights. Choose pendants that share a finish, shape or material.
- Vary the heights carefully. Create visual rhythm without obstructing views across the seating area.
- Center the arrangement. Align the cluster with the main conversation zone or coffee table.
- Check ceiling capacity. Ensure the mounting points and electrical installation can support the selected fixtures.
- Install compatible dimmers. Adjustable brightness helps the cluster work for both everyday use and entertaining.
A pendant cluster creates a dramatic focal point without changing the entire ceiling structure. Glass globes feel lighter visually, while metal shades create a stronger silhouette. In an open-plan room, the grouping can also distinguish the living area from the dining space. Check fixture dimensions and hanging clearances before installation, particularly when the ceiling is low or people regularly walk beneath the lights.
Subtle Ceiling Wallpaper

Cost: Low to moderate, depending on wallpaper quality and ceiling size.
Time: Several hours to a full day for a manageable room, depending on preparation.
Skill Level: Intermediate, because overhead alignment can be difficult.
Best For: Living rooms with smooth, sound ceiling surfaces.
Result: Decorative pattern without adding bulky architectural elements.
Ceiling wallpaper introduces detail where people often expect a plain white surface. Small botanical prints, fine stripes and understated textures can add interest without overwhelming the furniture below. Before purchasing, confirm that the wallpaper and adhesive are suitable for ceiling application. Repair loose paint, smooth uneven areas and test a sample to see how the pattern looks under your room’s lighting.
Exposed Industrial Ceiling

An exposed ceiling can give a living room an industrial character through visible concrete, pipes, ducts and structural elements. It works especially well in loft-style homes where the architecture already supports an unfinished aesthetic.
Before: A low, heavily boxed-in ceiling may feel visually crowded, particularly when bulky coverings hide the room’s original structure.
After: Carefully exposed and finished elements create a more open industrial appearance, with the ceiling contributing texture and character.
Before removing any ceiling covering, have a qualified professional identify structural components, wiring, plumbing and any potentially hazardous materials. Not every ceiling is suitable for exposure and some services must remain enclosed or accessible according to local requirements.
Recessed Ceiling Spotlights
| Lighting approach | Option A: Basic grid | Option B: Layered plan |
|---|---|---|
| Placement | Evenly spaced fixtures | Fixtures positioned for specific tasks |
| Atmosphere | Uniform general lighting | More flexible and dimensional lighting |
| Wall lighting | Limited emphasis | Selected walls and artwork highlighted |
| Control | One switching group | Separate switching or dimming zones |
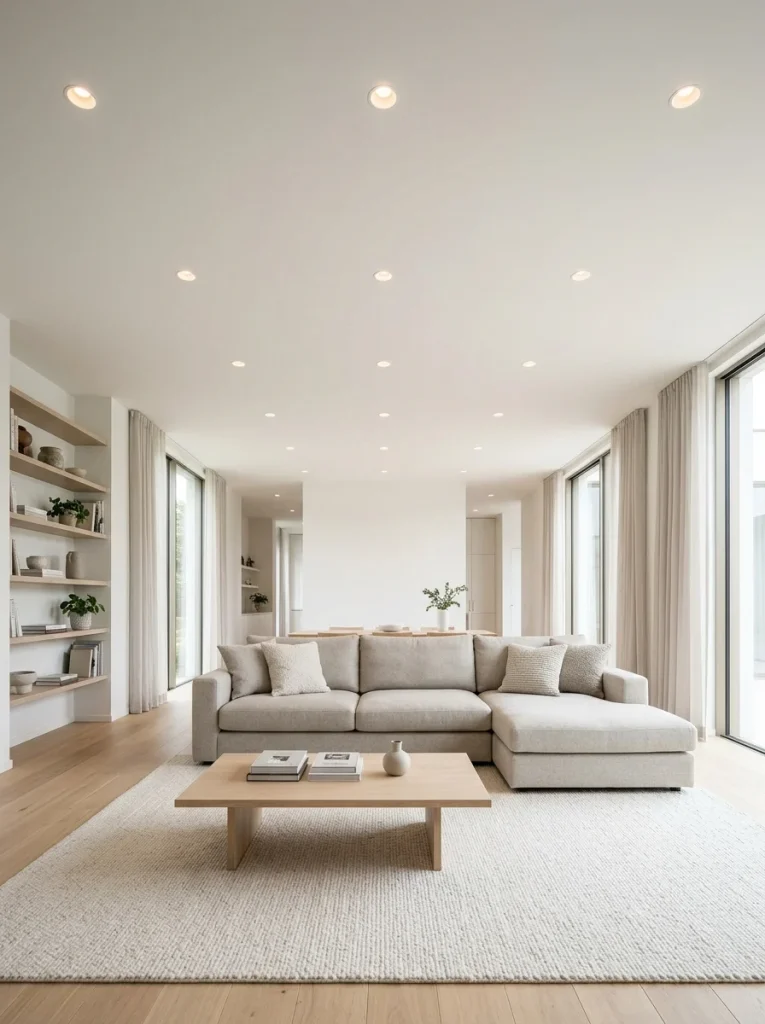
Recessed spotlights provide useful general lighting without adding bulky fixtures to the ceiling. A layered plan often works better than placing every light in a rigid grid because different parts of the room serve different purposes. Combine ceiling lights with floor lamps or table lamps and choose suitable beam angles and color temperatures. Have a qualified electrician plan the layout and confirm the ceiling’s insulation and fire-safety requirements.
Ceiling With Crown Molding

DO: Match the molding profile to the room’s architectural character.
DO: Measure every wall carefully before cutting the corners.
DO: Use paintable caulk and suitable filler for a clean finish.
DON’T: Choose oversized molding that overwhelms a small room.
DON’T: Assume every corner is perfectly square.
DON’T: Cover damp patches or damaged plaster without repairing the cause.
Crown molding creates a defined transition between the walls and ceiling, making a living room look more finished. Simple profiles suit contemporary interiors, while layered designs complement traditional rooms. Paint the molding the same color as the ceiling for a quiet effect or match it to the trim for a more pronounced outline. Accurate measuring and careful corner joints matter more than elaborate detailing.
Curved Ceiling Details

Cost: Moderate to high, depending on the complexity of the construction.
Time: Several days or longer for custom framing, plastering, and finishing.
Skill Level: Professional installation recommended for substantial curved structures.
Best For: Contemporary interiors, architectural renovations and selected ceiling transitions.
Result: Softer lines and a distinctive architectural focal point.
Curved ceiling details replace sharp transitions with flowing shapes that soften a room’s appearance. A shallow curve around a seating area can add interest without requiring an elaborate ceiling design. Keep nearby furniture and lighting consistent with the curved geometry, using rounded tables or simple globe pendants where appropriate. Because custom curves require accurate framing and finishing, discuss the design with an experienced contractor before work begins.
Metallic Ceiling Finish
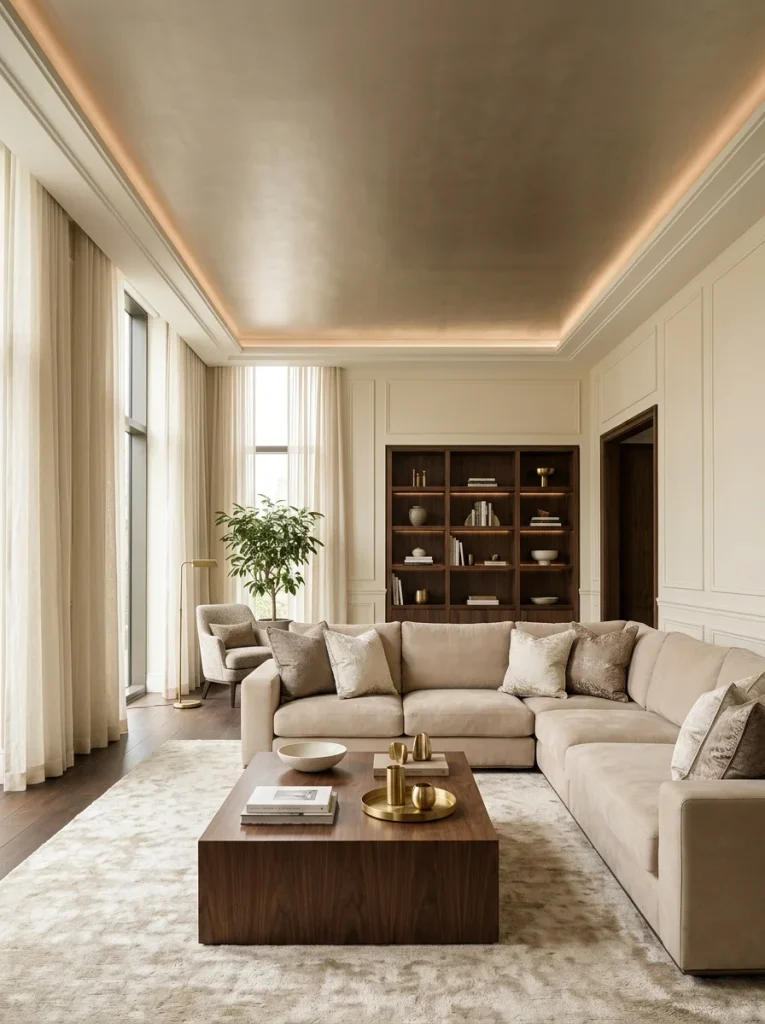
Metallic finishes add a reflective quality that changes as daylight and artificial lighting move across the room. Champagne, soft bronze and muted pewter usually feel more restrained than highly reflective gold or silver.
For the best result, test the finish on a large sample before applying it overhead. Metallic paints can reveal surface imperfections and produce uneven patches if the preparation is inconsistent. Repair the ceiling first, follow the product manufacturer’s application instructions, and use controlled lighting to prevent glare from becoming distracting.
Fabric Ceiling Panels
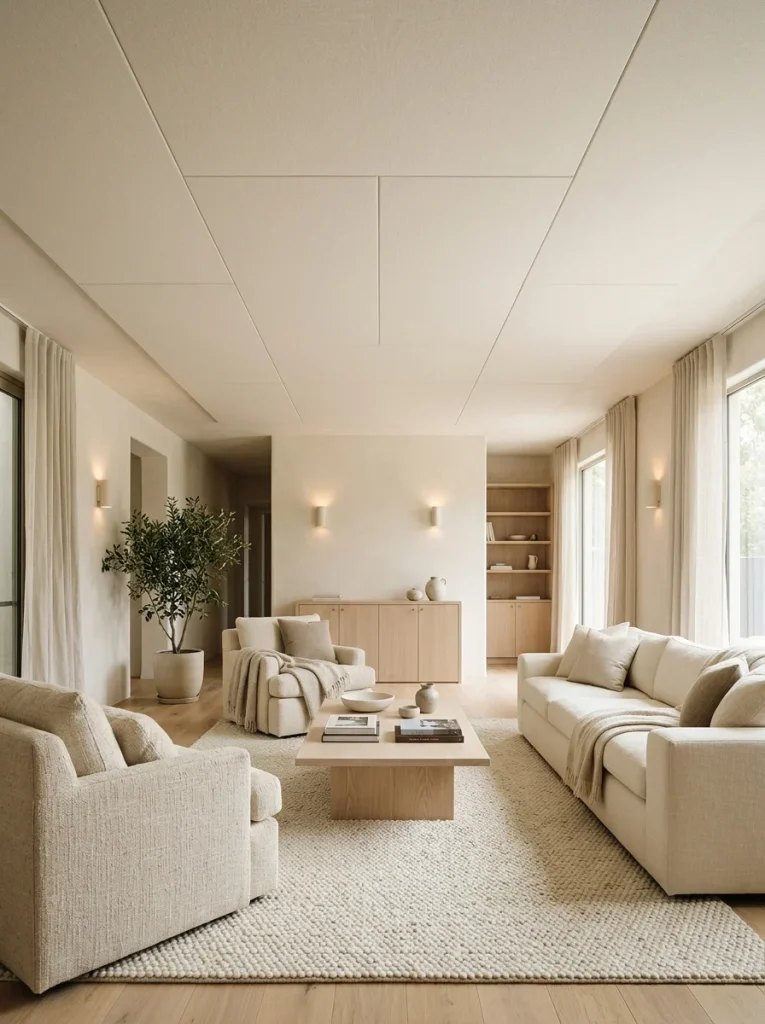
- Choose the right fabric. Look for a material designed for the intended ceiling system and suitable for the room’s fire-safety requirements.
- Keep the panel layout simple. Large, clean sections usually feel calmer than many small squares.
- Coordinate the color. Ivory, sand, and pale gray blend naturally with neutral furniture.
- Plan for maintenance. Select panels that can be cleaned or replaced according to the manufacturer’s guidance.
Fabric panels introduce a softer texture than paint or plaster and can help reduce some sound reflections when the complete system is designed for acoustic performance. They are useful in living rooms that double as television or conversation spaces. However, fabric can collect dust and may be unsuitable in damp environments. Choose certified products and secure mounting systems rather than attaching ordinary fabric overhead.
Skylight Ceiling Feature

Before: A room with limited windows may depend heavily on artificial lighting and feel dim during the day.
After: A properly designed skylight can introduce daylight from above, brightening surfaces and changing how the room feels throughout the day.
Skylights can make a living room feel more connected to the outdoors, especially when the roof allows light to reach the main seating area. Their position, glazing, shading and thermal performance all matter. Before installation, consult a qualified roofing or building professional about structural changes, waterproofing, insulation, condensation control and local building requirements. Consider solar heat gain and glare as well as brightness.
Two-Tone Ceiling Design

- Choose two compatible colors. Pair warm white with sage, dusty blue or muted clay.
- Map the boundary. Decide whether the color division should follow the room’s architecture or define the seating zone.
- Mark the line accurately. Use a level and quality painter’s tape for a crisp edge.
- Test the colors overhead. Check the samples in morning and evening light.
A two-tone ceiling creates a graphic feature without requiring additional construction. It works especially well when the room already contains two related accent colors. Keep the division simple, such as a border around the perimeter or a single colored section above the seating area. Allow the first coat to dry fully and remove painter’s tape according to the paint manufacturer’s instructions for the cleanest edge.
Decorative Ceiling Tiles
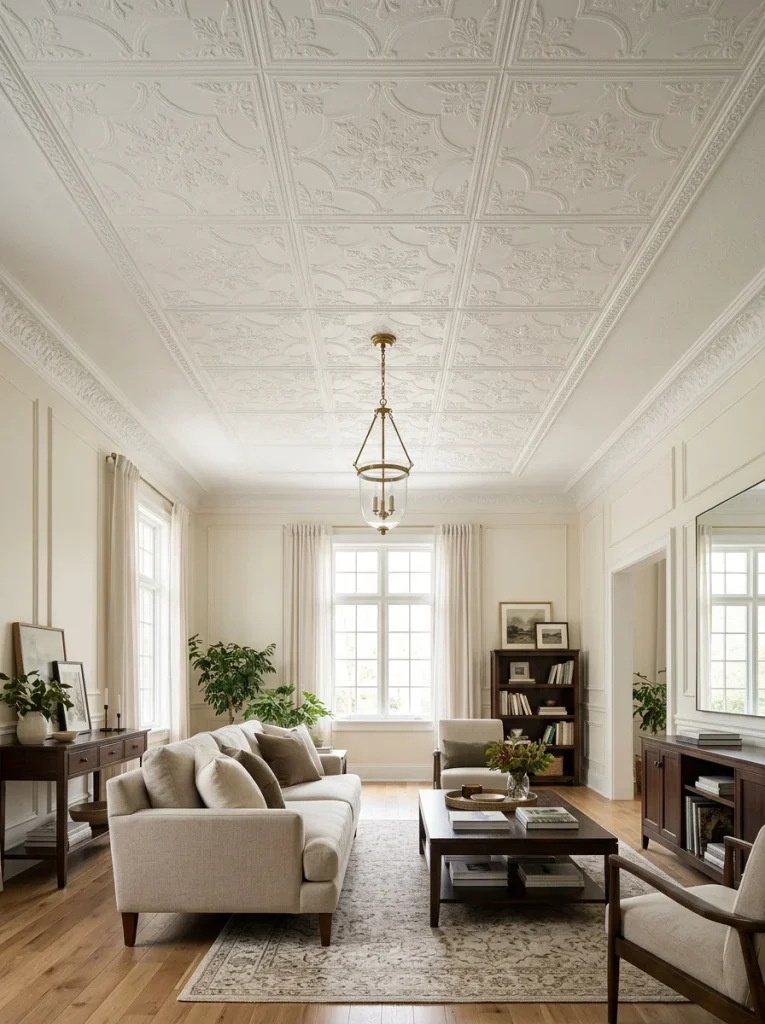
| Design approach | Option A: Plain panels | Option B: Decorative tiles |
|---|---|---|
| Surface | Smooth and understated | Patterned and textured |
| Visual character | Contemporary and minimal | Traditional or vintage inspired |
| Installation | Often simpler | Depends on tile system and ceiling condition |
| Maintenance | Usually straightforward | Depends on the tile material and finish |
Decorative ceiling tiles can introduce a patterned surface without the complexity of custom plasterwork. They come in a range of materials and styles, from lightweight contemporary panels to traditional embossed designs. Check the manufacturer’s specifications for overhead use, fire performance, adhesive compatibility, and cleaning requirements. Measure the room before ordering so the tile pattern aligns neatly and narrow leftover strips are minimized at the edges.
Floating Ceiling Panels

Floating panels create the appearance of a ceiling element suspended below the main ceiling, often with a glowing perimeter. They can define a seating zone in an open plan living room while providing space for selected lighting features.
The installation needs careful planning because the panels require a secure support system and adequate clearance. Confirm that the ceiling height can accommodate the drop without making the room feel cramped. Concealed lighting should remain accessible for maintenance, and any electrical work should be completed by a qualified professional. A single broad panel often looks more cohesive than several unrelated shapes.
High-Gloss Ceiling Finish
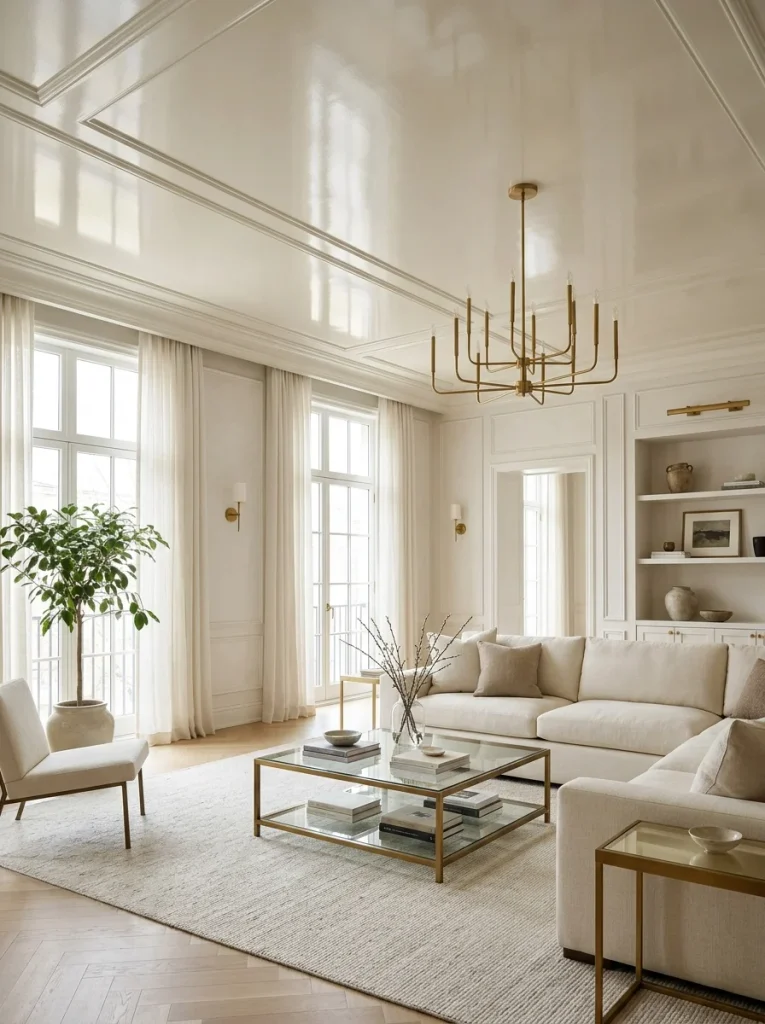
Cost: Low to moderate for paint and preparation, depending on ceiling condition.
Time: One to several days, including surface preparation and drying.
Skill Level: Intermediate, because glossy finishes reveal flaws.
Best For: Smooth ceilings in rooms where controlled reflection is desirable.
Result: A brighter-looking surface with a subtle reflective effect.
A high-gloss ceiling reflects more light than a typical flat finish, creating a distinctive polished appearance. However, it also highlights dents, uneven joints, roller marks and other imperfections. Have the ceiling repaired and sanded thoroughly before painting, and test the sheen under both daylight and evening lighting. In rooms with strong direct light, a satin or low sheen alternative may provide a more forgiving result.
Minimalist Flush Ceiling
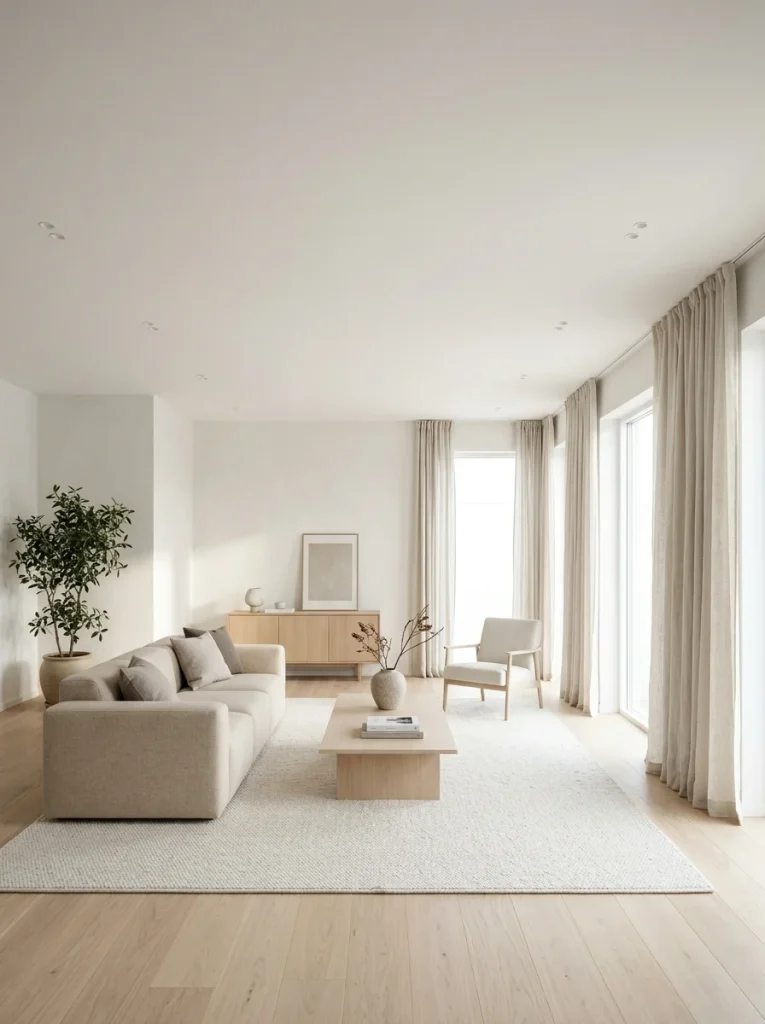
- Repair visible imperfections. Fill cracks and uneven joints before applying the final finish.
- Choose a consistent white. Test warm and cool undertones against the wall paint.
- Keep lighting discreet. Use a considered arrangement of recessed fixtures or a simple flush mounted light.
- Avoid unnecessary details. Skip decorative borders if the goal is a continuous, clean surface.
A minimalist ceiling allows furniture, artwork and natural light to take the lead. It is especially useful in compact living rooms where complex patterns or deep ceiling features may feel visually heavy. A smooth finish requires good preparation, so address cracks, stains and loose paint before decorating. If stains return or cracks continue to spread, investigate the underlying cause rather than simply painting over it.
Rustic Reclaimed Wood Ceiling
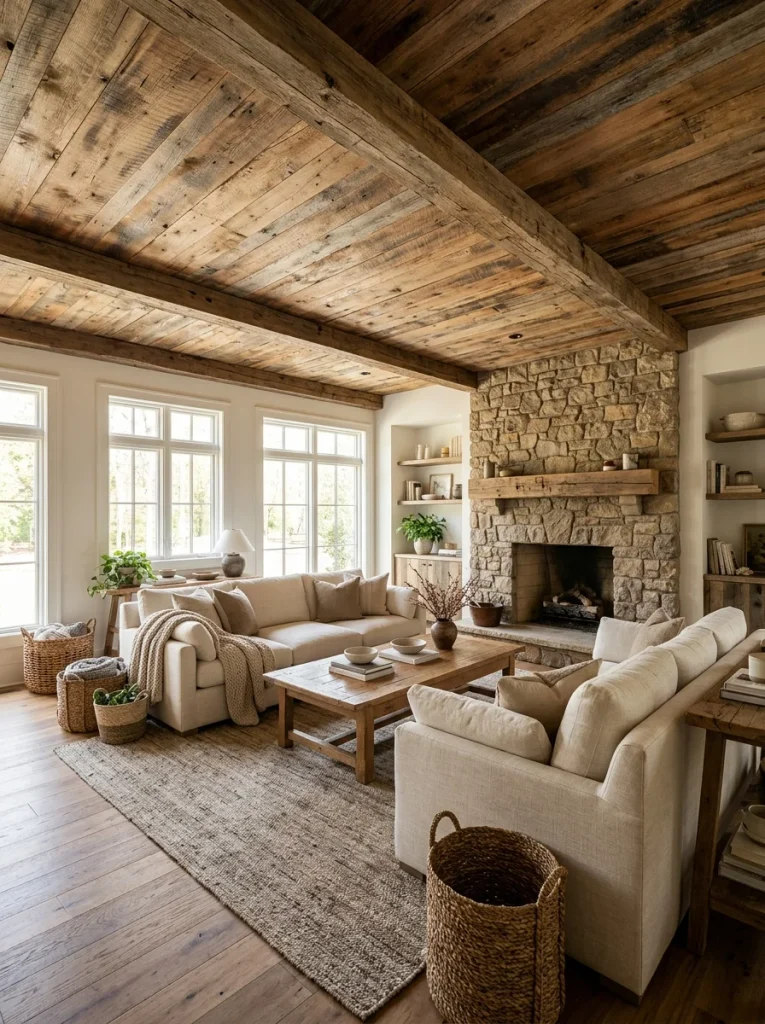
Reclaimed timber gives a living room a weathered, character rich ceiling with visible grain and natural variation. The material pairs well with simple upholstery, stone surfaces and restrained metal lighting, allowing the wood to provide most of the decorative detail.
Before installation, inspect reclaimed boards for moisture damage, pests, loose finishes, and other defects. Confirm that the wood is suitable for interior use and that the support system can carry its weight. Use an appropriate protective finish when needed and avoid combining too many competing wood patterns across the floor, furniture and ceiling.
Sculptural Ceiling Lighting
DO:
- Choose a fixture with a clear silhouette that suits the room’s scale.
- Coordinate its metal finish with selected furniture or hardware details.
- Check the overall width and hanging height before purchasing.
- Use dimmable bulbs or compatible controls when supported.
DON’T:
- Choose a fixture so large that it dominates every other element.
- Hang it too low above walking routes or sightlines.
- Mix too many competing finishes without a clear palette.
- Ignore the fixture’s weight or ceiling support requirements.
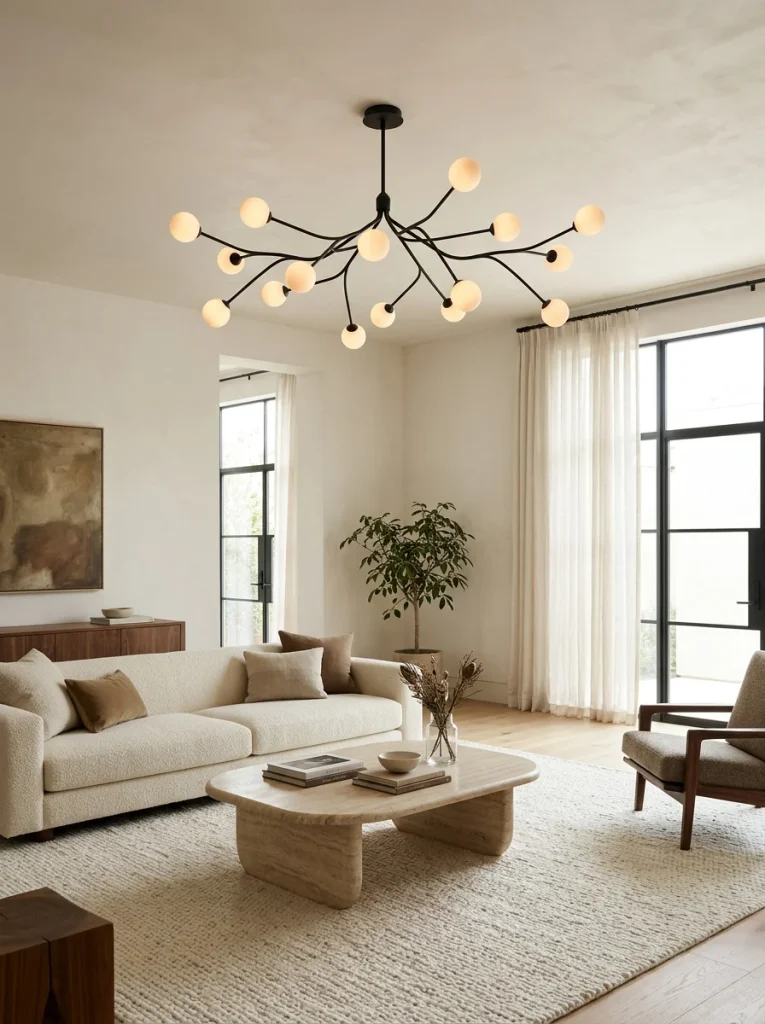
Sculptural lighting turns the ceiling into a focal point while providing practical illumination. Branching forms add movement, globe designs feel softer and linear fixtures suit long seating arrangements. Choose a fixture that complements the ceiling height and furniture layout, then layer it with lamps for a more flexible lighting plan. A striking light works best when the surrounding ceiling remains relatively uncluttered.
CONCLUSION
Your ceiling has more potential than you might think. From warm wooden beams and elegant coffered panels to colorful finishes and subtle lighting, the right Living Room Ceiling Ideas can add depth, character, and a polished finishing touch to your home.
Start with one feature that suits your budget, ceiling height, and decorating style. You might choose a simple paint update or plan a more detailed architectural design. Small, thoughtful changes can make your living room feel more personal and inviting.
Save this article on Pinterest for inspiration, try your favorite idea, and share it with someone planning a home refresh. Your next beautiful living room detail could be right above you!




One Comment